
Are you tired of using the same old fonts on your website and want to make it look different? If you’re not a coding expert, don’t worry! We have a simple guide that will show you an easy way to add your favorite fonts to your WordPress themes. This documentation will take you through the process of uploading custom fonts, one step at a time, making it simple to give your website a unique style.
Table of Contents
PLUGIN INSTALLATION
To begin customizing and uploading your font, you’ll need to install a Plug-in called Hash Custom Font Uploader.
*Note: This plugin is only compatible with themes by HashThemes*
Hash Custom Font Uploader Installation
To install the Hash font uploader follow the instructions:
- Go to Plugins > Add New Plugins> Upload Plugins.
- Click on Upload Plugin and choose the .zip file from your PC.
- After you have uploaded the .zip file click on Install Now.
- Then Activate the Plugin.
- You can see the Plugin appear as Hash Custom Font Uploader.
Once you’ve installed the plugin, you can then use your custom fonts to kickstart the font uploading process.
Let us guide you through the process one step at a time.
FONT SELECTION
Themes powered by HashThemes provides a wide selection of Google Fonts that you can choose from. There are more than 800+ Google fonts.
However, if you’re seeking something distinctive, you can always explore numerous font websites that offer an even greater variety of choices crafted by multiple font designers and are available for free or paid across different websites.
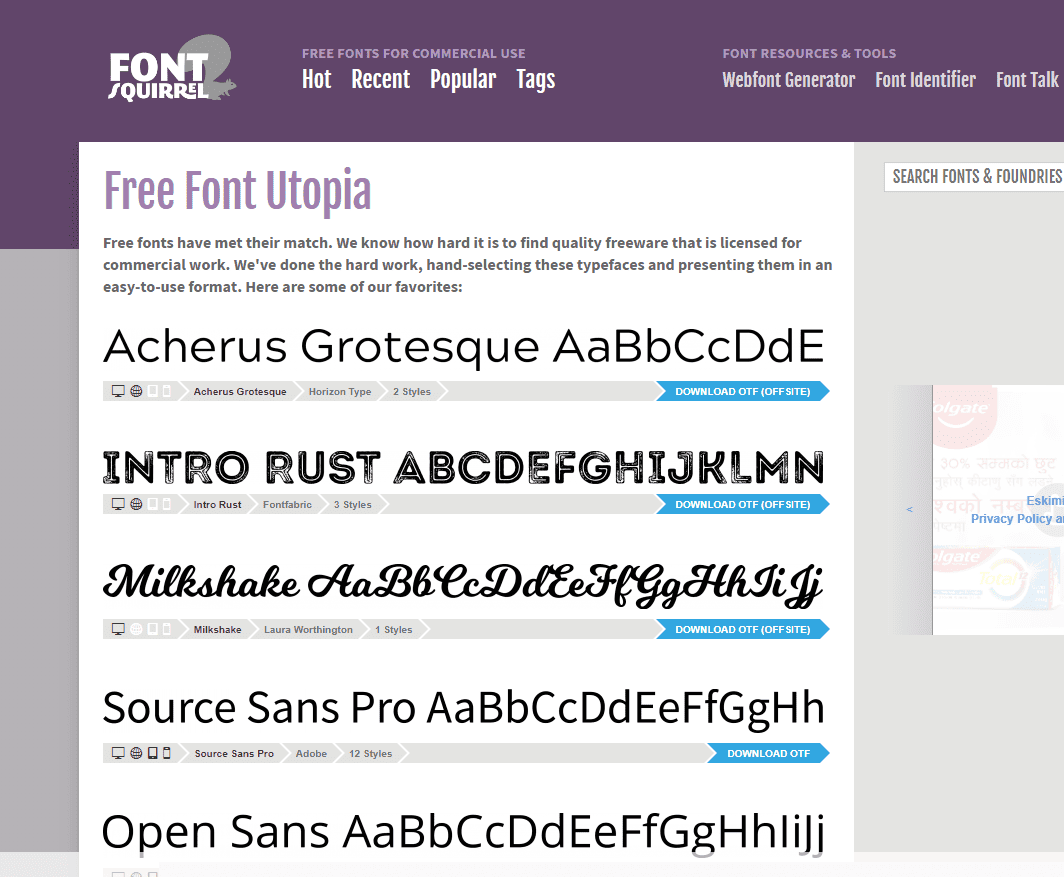
Font Squirrel is a prime example of such website. This platform not only grants you the freedom to download fonts at no cost but also streamlines the process of converting your files into the necessary formats for font uploading.
Additionally, it’s worth mentioning that there are numerous high-quality fonts available for purchase, requiring only a minimal fee, and they are ready for immediate use.
In this tutorial, we’ll demonstrate how to simplify the font upload process using Font Squirrel.
We need 2 font file formats (WOFF and WOFF2) to be used in Hash Custom Font Uploader. If you want to know more about the variations of the font and why files are converted to WOFF and WOFF2 format read along. If you want to start right away with uploading a custom font tutorial Click Here.
UNDERSTANDING DIFFERENT FILE FORMATS
Before we jump into the tutorial, let’s familiarize ourselves with some typical file formats that fonts can come in.
TrueType Font (.ttf): A .ttf font format is a widely used font format for desktop and web typography. This file type is compatible with both Windows and macOS systems.
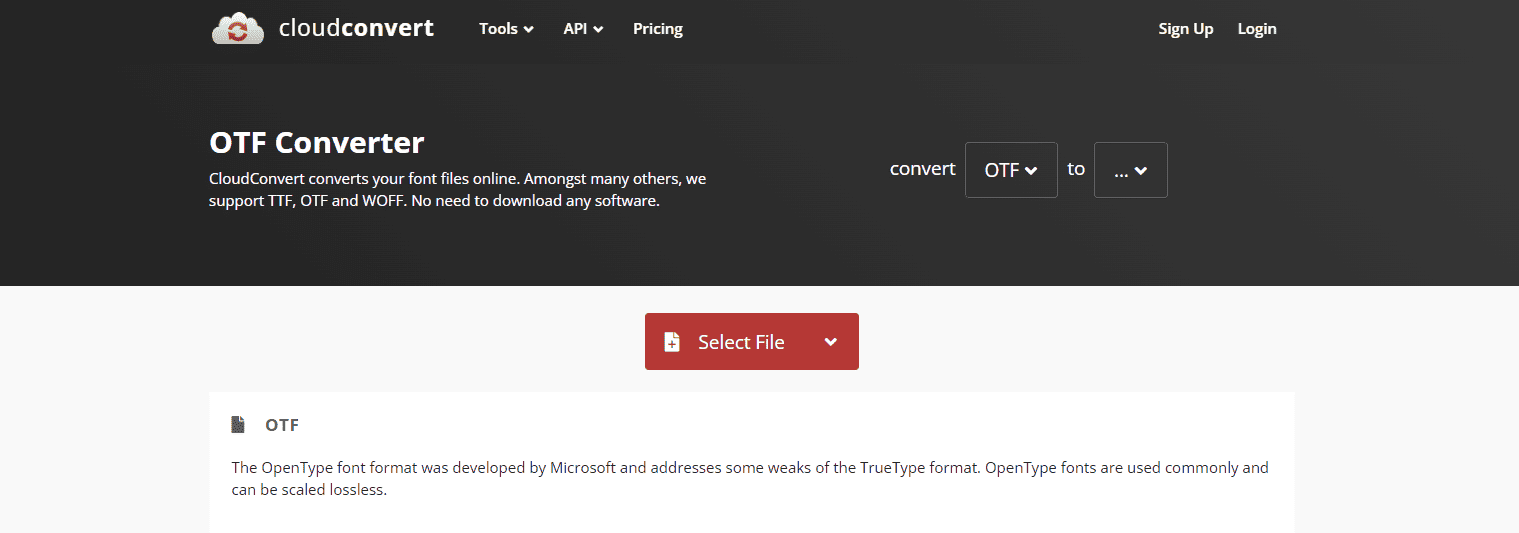
OpenType Font (.otf): An Open Type format is an extension of the True Type format. This format allows additional typographic features and is compatible with both Windows and macOS.
Web Open Font Format (.woff): This type of format is specifically designed for web usage. It offers good compression and browser compatibility.
Web Open Font Format 2 (.woff2): This file format is an improved version of the Web Open Font format, providing superior compression and performance for web fonts.
PostScript Type 1 Font (.pfb): PostScript type of font format is an older version of font format which is primarily used in the PostScript printing industry.
SVG Font (.svg): Based on the XML SVG fonts are often used for web icons and special designs.
Bitmap Font (.fon): Fonts represented as a grid of pixels, suitable for low-resolution displays.
These are some of the font formats that are used for various purposes. The reason for familiarizing with these formats is that some files need to be converted for an added advantage.
The most commonly used file formats are TTF(True Type Font) and OTF (Open Type Font) for desktop and web typography.
However, as of 2021, the most commonly used font formats for web usage were Web Open Font Format (WOFF) and WOFF2 (Web Open Font Format 2).
*Note: It is important to know that the popularity of the fonts may evolve over time and new technologies may override the old ones.*
Why is it necessary to change files into .woff and .woff2 formats?
While the TTF and OTF files can be directly uploaded on the web, converting them into .woff and .woff2 file format have several advantages:
1. Compression:
The prime reason to convert TTF and OTF files to WOFF and WOFF2 formats is that they compress in size. When the file size is smaller it leads to faster web page loading times. This is crucial for improving the user experience and SEO rankings as well.
2. Web Optimization:
WOFF and WOFF2 formats are well-suited for the web and widely accepted, including the feature for font subsetting allowing users to include only the characters and glyphs needed for a particular web page, further reducing the file size.
3. Browser Compatibility:
Modern web browsers widely support WOFF and WOFF2 formats, ensuring reliable font rendering across different platforms and devices. TTF and OTF files may have varying levels of compatibility and support.
4. Licensing:
Many font licenses tend to permit the use of WOFF and WOFF2 formats on the web, while they may have more restrictions on TTF and OTF files. By converting fonts to WOFF/WOFF2 format, you can ensure that you comply with font licensing requirements.
5. Performance:
WOFF and WOFF2 font formats are generally optimized. Hence, they perform better in web environments, resulting in smoother and faster text rendering.
These are the basic necessities to convert the TTF and OTF files to WOFF/WOFF2 files. Next, we will guide you through the font uploader process.
SELECTION OF FONTS IN THE “FONT SQUIRREL” WEBSITE
Now, let’s get started with the font selection process and explore further.
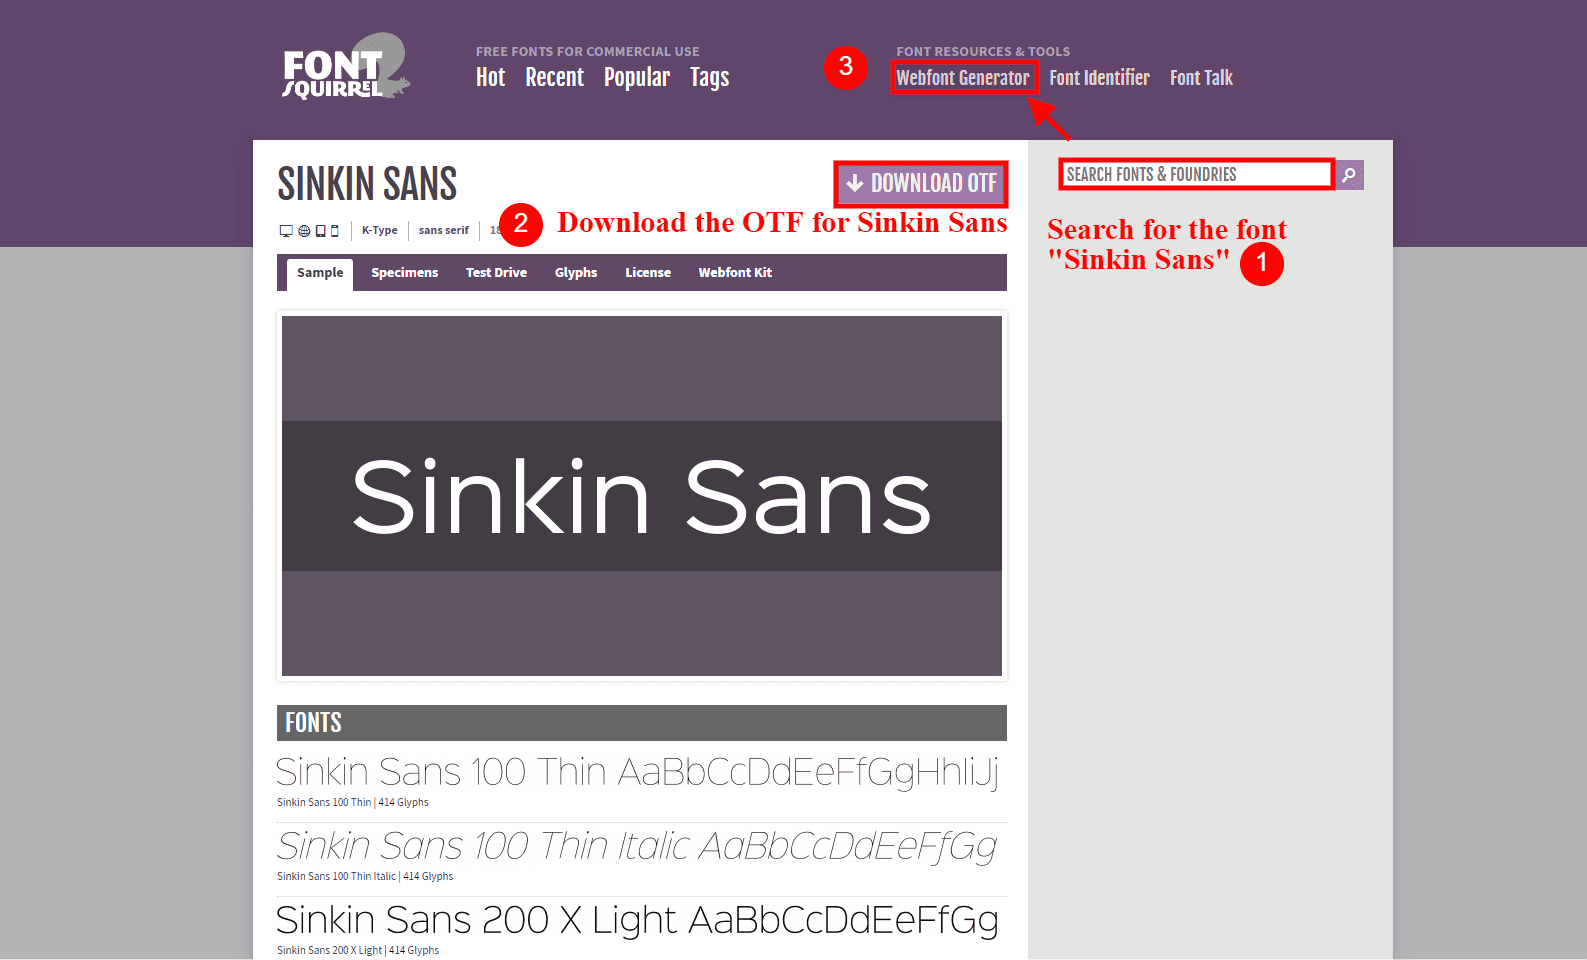
- Enter “Sinkin Sans” into the search bar, and you’ll see a font preview along with its different variations.
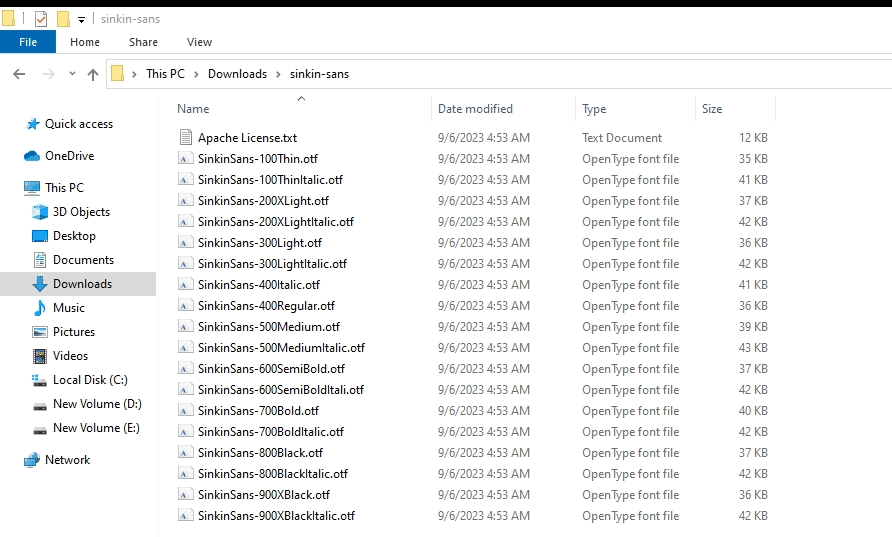
- Next, download the OTF file for Sinkin Sans font.
As for this tutorial we have chosen “Sinkin Sans” font. You can choose and use any font of your liking. Also, as we have mentioned earlier, the font can be in various formats. Here the Sinkin Sans font file is in OTF format.
- Extract the .zip file to your designated folder.
WEBFONT GENERATOR
The fonts to be used in the Hash Custom Font Uploader should be in WOFF and WOFF2 file formats. So if the downloaded font is in WOFF and WOFF2 file formats then you can skip the below step and directly proceed to Hash Custom Font Uploader. But if the downloaded font is not in WOFF and WOFF2 formats then you will need to use Font Generator/Converter to generate WOFF and WOFF2 font files.
- We will use the Webfont Generator online application of the Font Squirrel Website.
- Click on the Webfont Generator as pointed by No. 3 in the below screenshot.
- To obtain your kit, click on the Upload Fonts button and upload the downloaded/extracted font files
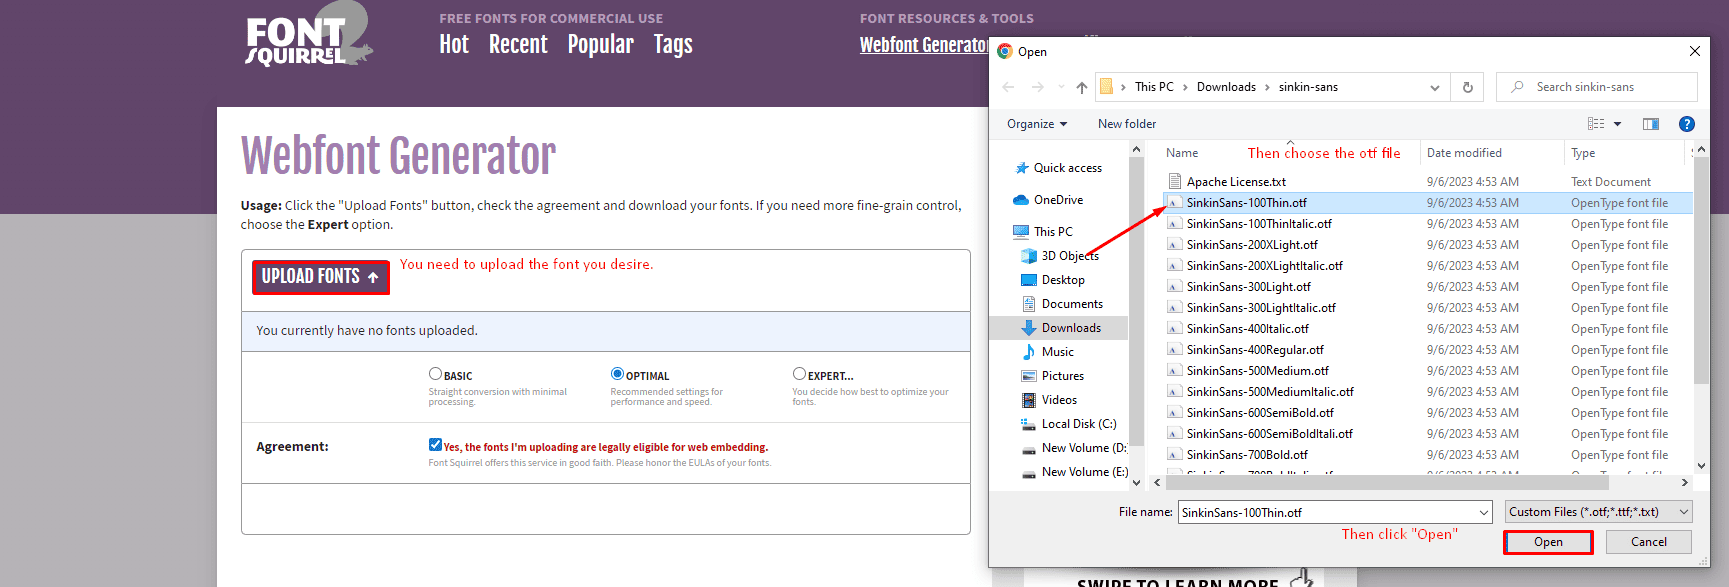
- In this instance, we’re choosing “Sinkin Sans Regular.”
- Once you’ve made your selection, simply click on Open.
- Download the Kit.
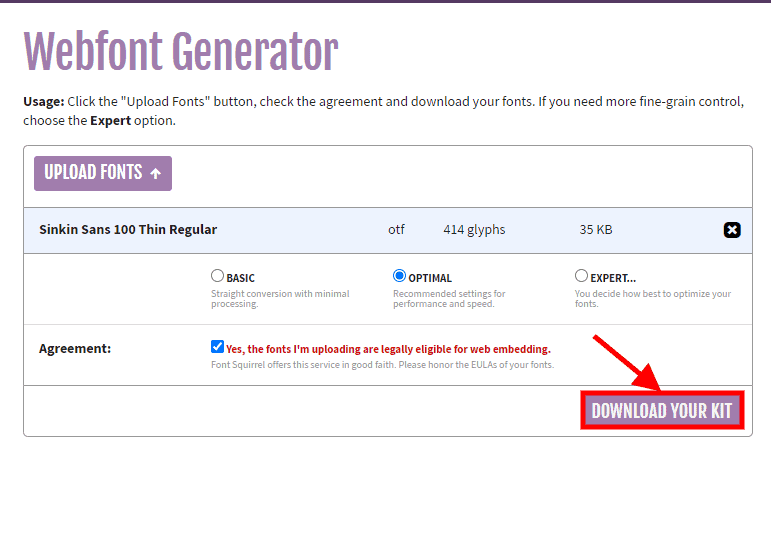
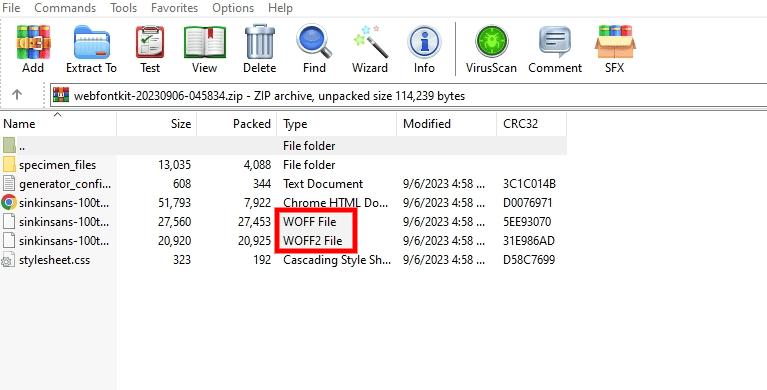
- Extract the downloaded zip. You will see that the Webfont generator has created the .WOFF and .WOFF2 files necessary for our Hash Custom Font Uploader Plugin.
Uploading Custom Fonts on Hash Custom Font Uploader Plugin
The Sinkin Sans font is almost ready to be used on your website, and you’re just a few steps away. Please follow the instructions below:
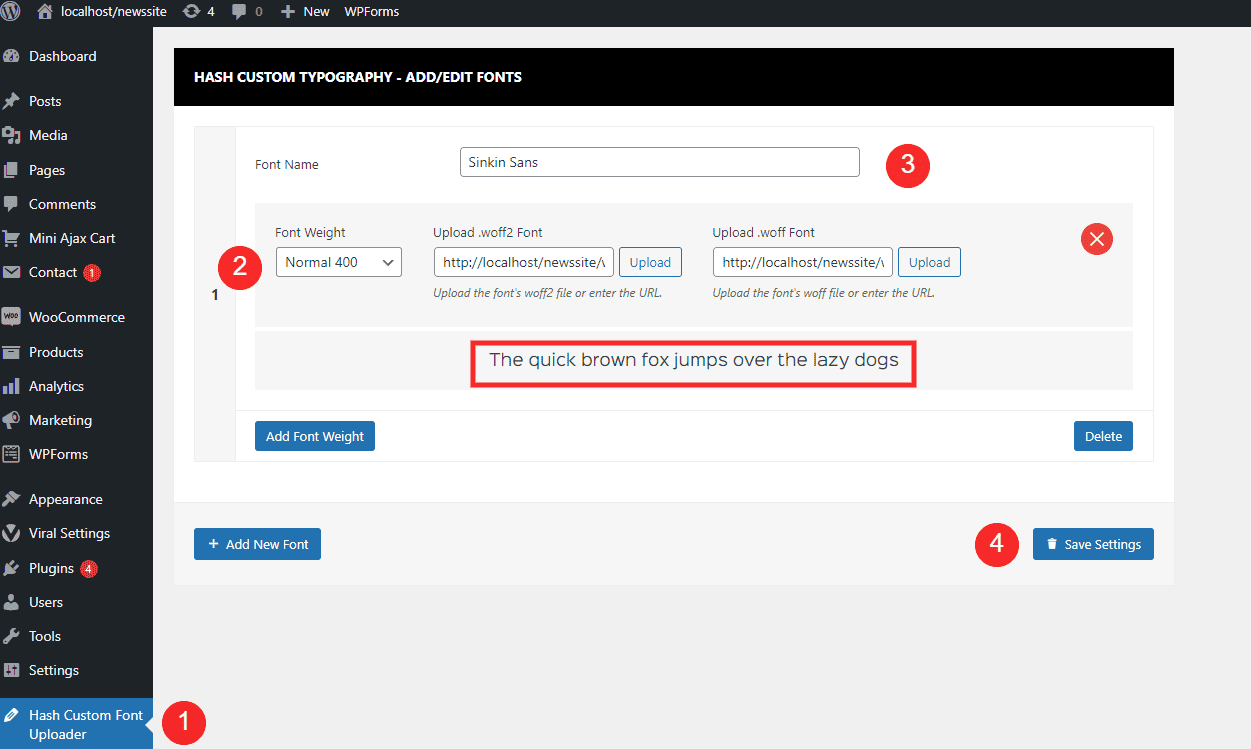
- Go to Hash Custom Font Uploader
- Then, upload the .woff2 and .woff font files as instructed, and make sure to select the font weight as Normal 400.
- In the next step, give your font a name to make it easier to find when you need it. In this case, since the font is Sinkin Sans, we’ve named it accordingly.
- Save it by clicking on “Save Settings”.
- Once saved, you’ll see how the Sinkin Sans font appears at the bottom. This also indicated that the font is working and you can use it now.
Uploading Variations for Custom Fonts
A font can have different styles and appearance. Here we will learn how to add different font styles of the same font.
The font we have selected above (Sinkin Sans) has different variations like thin, light, regular, medium, semi bold, bold, black and its italic.
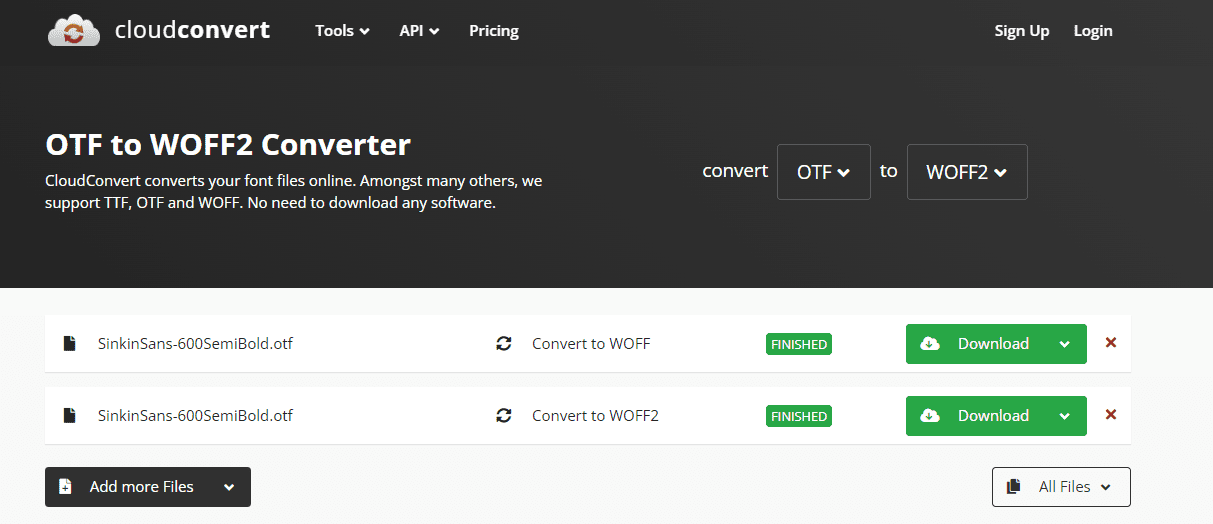
Here we are going to select the Semi Bold style of Sinkin Sans. And we are going to use another font converter website instead of “Font Squirrel”
Note: There are many other converters on the internet. Here, we are using CloudConvert.
- To start with, go to the OTF converter which converts our files to .woff2 and .woff files.
- Here you can see it helps you convert files easily. Choose the files you are going to convert to. Here we are going to convert the file Sinkin Sans semi bold .otf to .woff and .woff2
- After you have chosen which file to convert, “Choose File” from your desktop.
- Convert the files and this will take some time.
- After the conversion is completed save the necessary files to your PC.
- Go to Hash Custom Font Uploader
- And as you are adding the weight to the same font click on “Add Font Weight” instead of clicking on “Add New Font”.
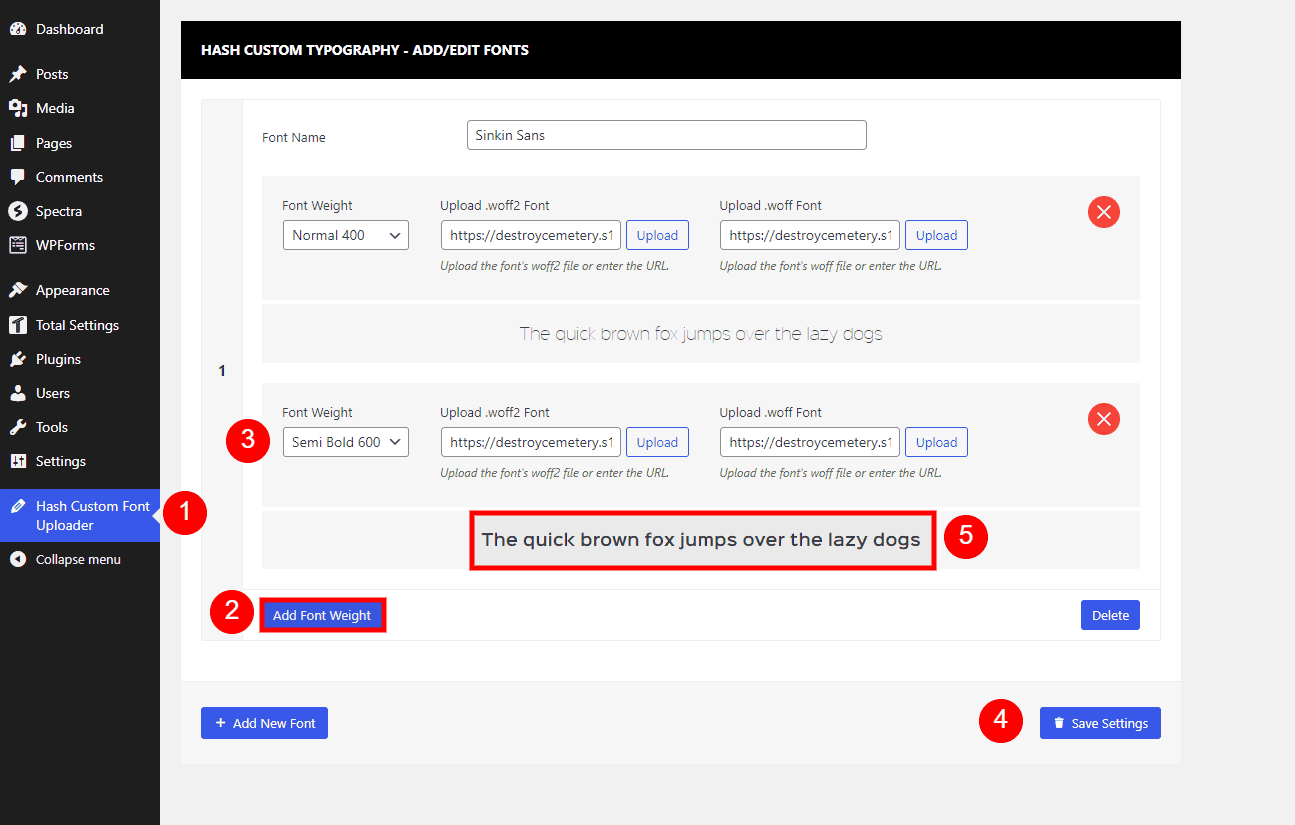
- Then, upload the .woff2 and .woff font files as instructed, and make sure to select the font weight as SemiBold 600.
- Click on the “Save Settings” button to save it.
- You can see how the text appears. The text is bolder than the text above.
- Similarly, you can add more font variations by clicking on “Add Font Weight” and another font by clicking on “Add New Font“.
USING THE FONTS YOUR WEBSITE
Let’s use the uploaded font on the website.
- Go to Appearance> Customize.
- Within the Typography Settings, locate the ‘Body’ option for further customization.”
- In the “Font Family” option, search for ‘Sinkin Sans’ and select it.
- Once the font is selected, the “Font Weight/Style” will show the variation that we had added earlier (Normal 400 and Semi Bold).
- Select the appropriate variation and then see the changes live in the right customizer window.
- You can tweak font size, letter spacing, and line height to your liking.
- When you’re satisfied, click ‘Publish’ to apply the changes, and your website will sport its new look.
It’s all you need to do to upload your custom fonts. If you have any confusion you can always reach out to us.
Purchase
Hash Custom Font Uploader is a premium extension. Purchase it by clicking the below button.