
Viral Mag Documentation
This documentation will guide you through the installation, configuration and customization option of the theme.
If you have any questions or need any assistance related to the theme, feel free to open a support ticket. Our support team will be more than happy to help you out.
Theme Installation
Installation via FTP/cPanel
- Download a copy of Viral Mag zip file.
- Save the downloaded theme zip file in your hard drive.
- Extract the downloaded zip file you will find a folder with style and other theme files inside it.
- Now Connect the FTP server using the FTP details and copy the extracted folder to ‘site-name/wp-content/themes/’ path.
- Now go to the Dashboard > Appearance > Themes.
- You’ll see the Viral Mag theme in the theme dashboard.
- Activate the theme.
Install via WordPress Dashboard
To install the theme via WordPress Dashboard follow these steps:
- Go to Dashboard > Appearance > Themes.
- Click on Add New button then search for the Viral Mag keyword in the search field.
- Hover over the Viral Mag theme from the search result and click on the Install button.
- Once installed activate the theme.
Import Demo Content
Viral Mag theme comes with a one-click demo import feature. It will allow you to install the demo data in a single click and save your time as you won’t have to build your website from scratch.
To install the demo data on the website:
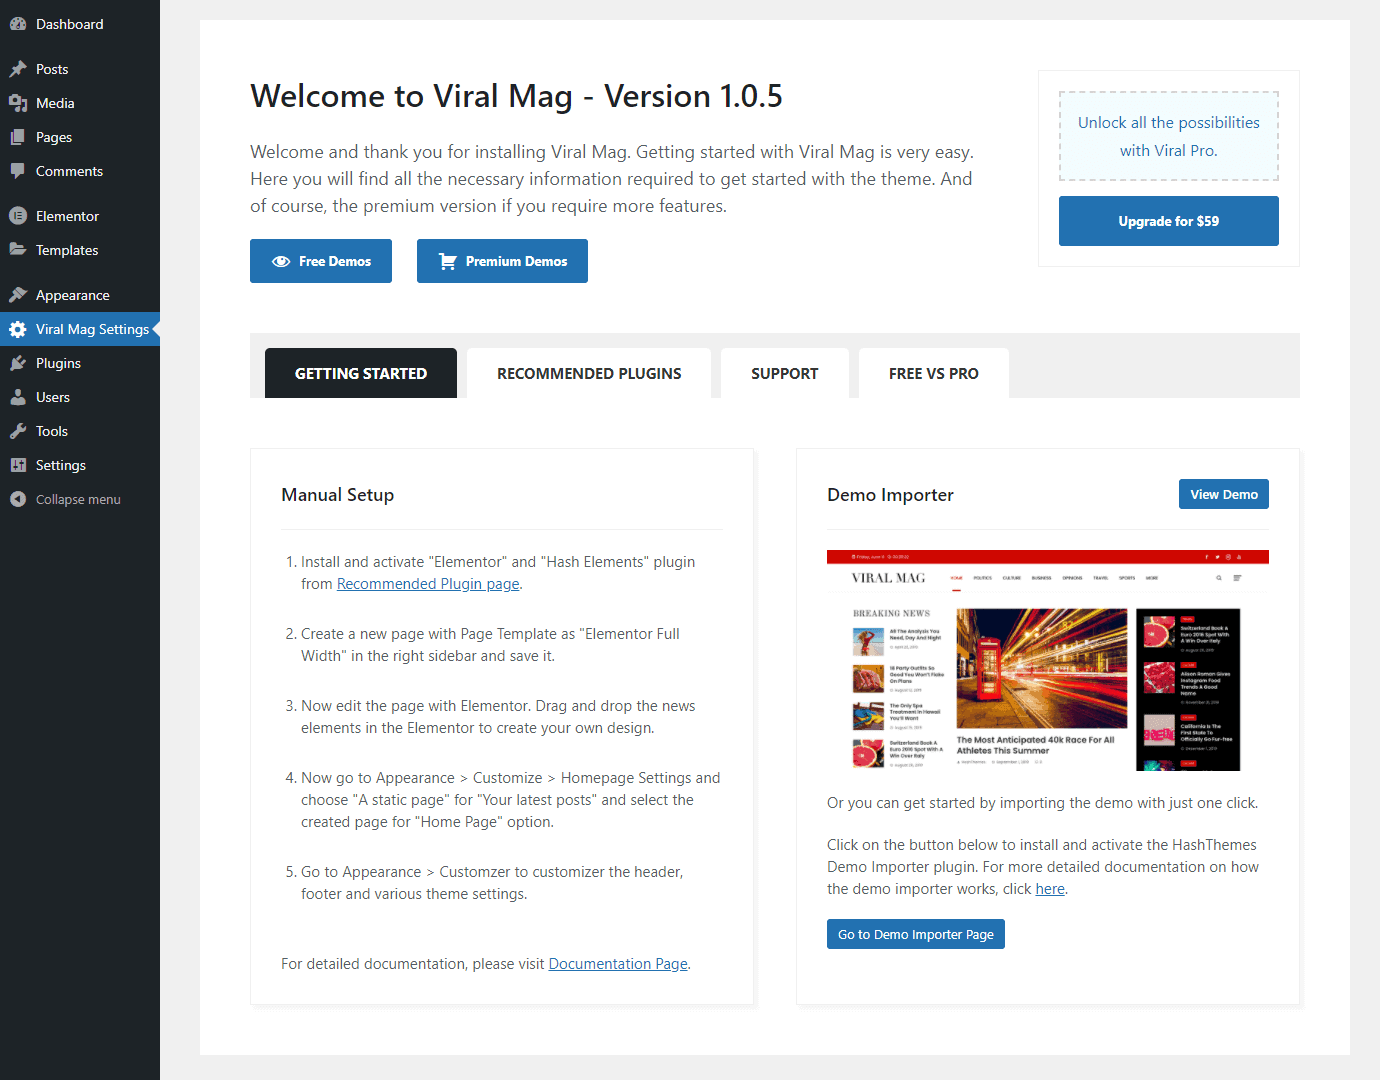
- Go to Appearance > Viral Mag Settings.
- On the right side of the page, you will see a Demo Importer Section. Click on the “Install Demo Importer Plugin” button.
- After the plugin is installed and activated, click on the “Go to Demo Importer Page”
- You will land on the HashThemes OneClick Demo Importer Page where you will see a list of free and premium demos.
- There are 2 types of demos available i.e. Customizer and Elementor. You can easily separate the demo types by clicking on their respective tabs.
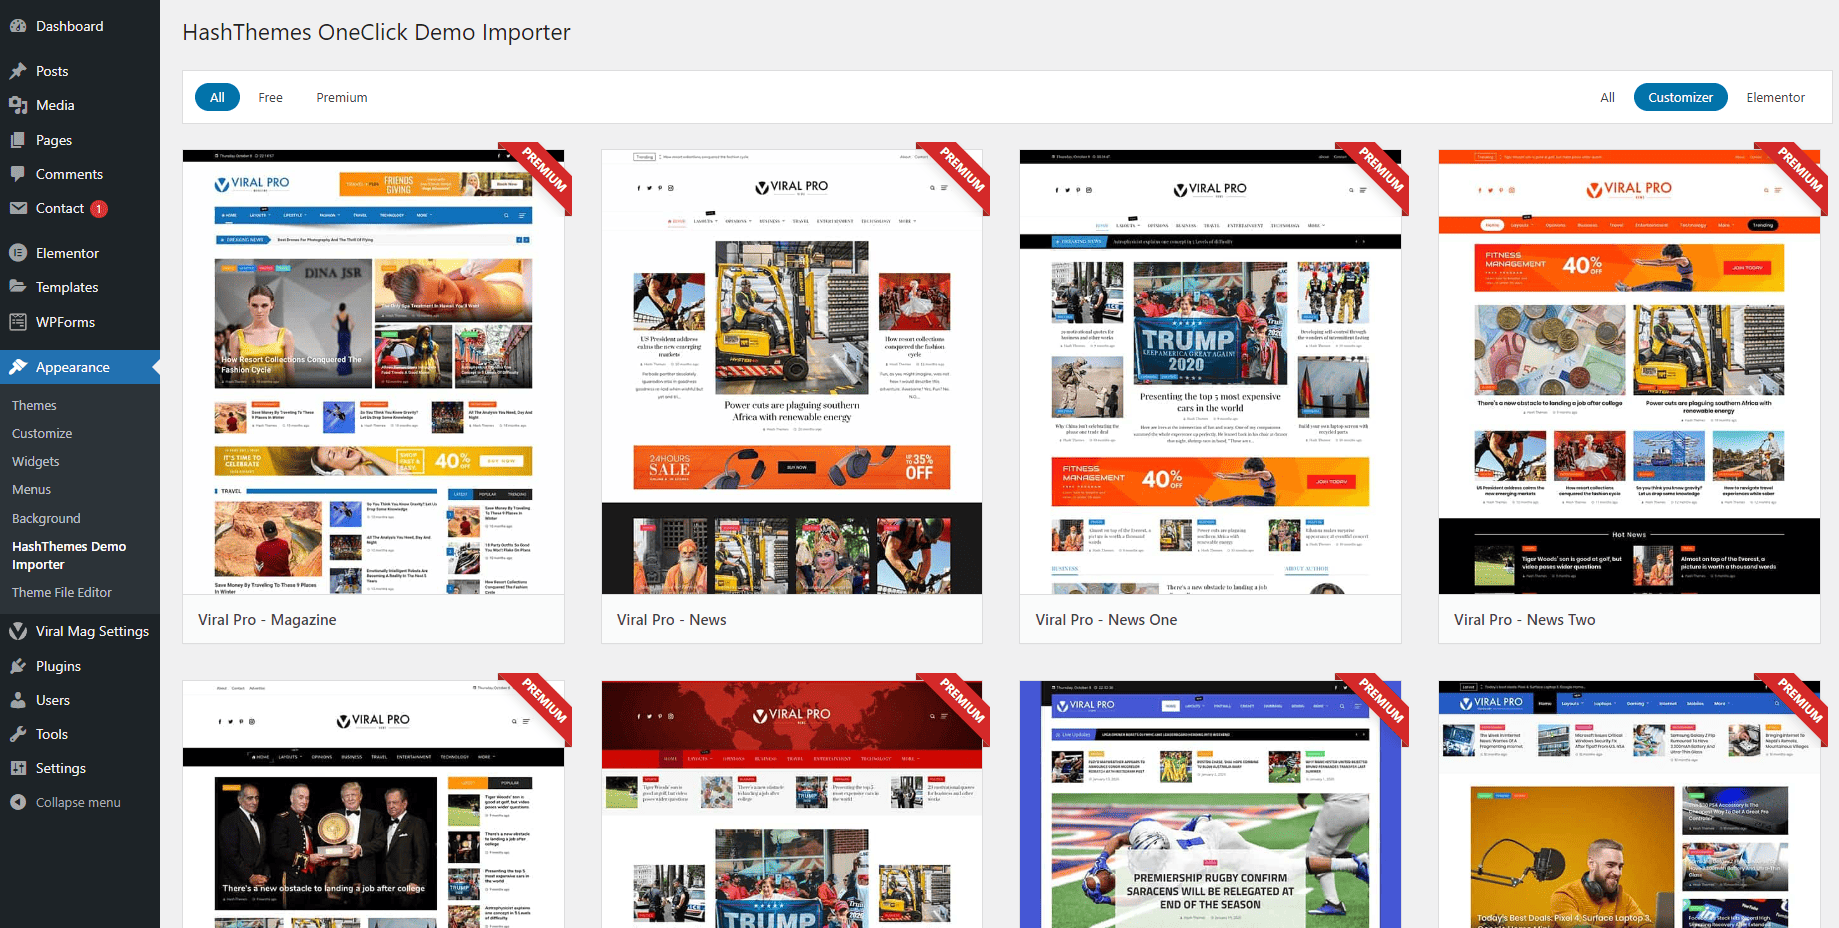
Viral Mag: Customizer Demo
- If you want to make all the configuration and customization of your website from the WordPress customizer, you can import the customizer demo.

Viral Mag: Elementor Demo
- If you want to make all the configuration and customization of your website from the Elementor page builder, you can import the Elementor demo.
- You can directly install the free demos. While for the premium demos, you need to purchase the pro version of the theme – Viral Pro.
- Click on the “Preview” button to get a quick view of the demo and the “Install” button to install the demo.
- On clicking the “Install Button” a popup will appear that will show the list of required plugins for demo import and to reset your website. If you do not have important content then it is recommended to reset the website so that demo import works flawlessly. Resetting websites will delete all your content.
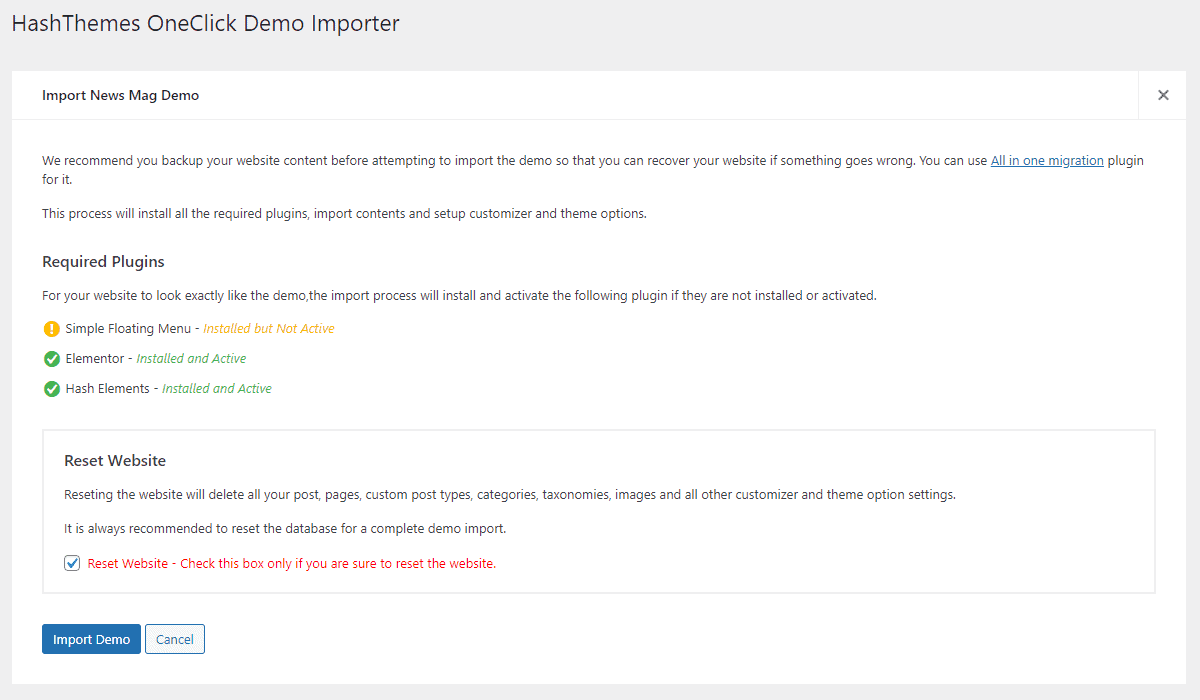
- If you have no problem resetting your website then check the “Reset Website” option and click on the “Import Demo” button.
- The demo installation window will appear that will install all the required contents like XML content, customizer settings, widgets, and other required contents.
- Congratulations, the demo data is successfully installed on your website. Now you can view your imported website.
You can also check out our video tutorial for a better understanding of how to import demo content on your website using the HashThemes Demo Importer Plugin:
Home Page Setup
Setting Home Page with Elementor
Viral Mag is an Elementor based WordPress theme that allows you to create a static homepage from the Elementor page builder.
To set up the homepage using Elementor Page Builder, follow these step:
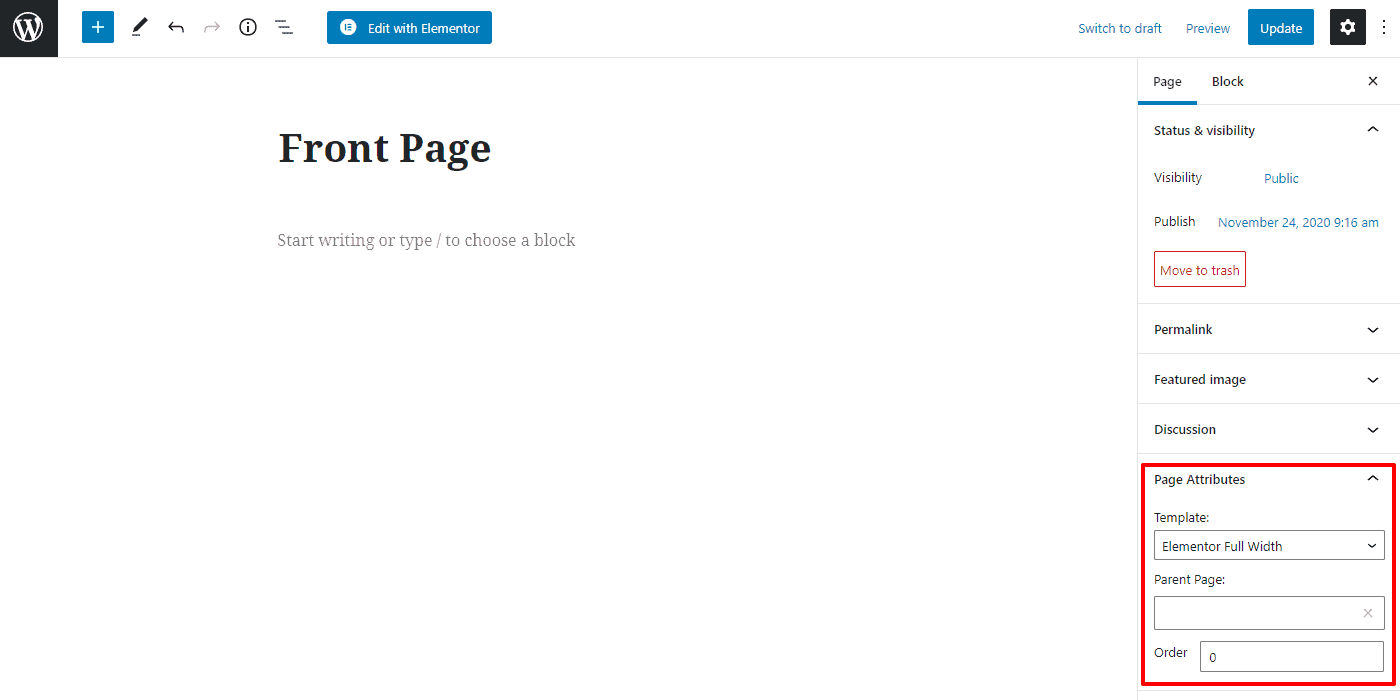
- Go to Page > Add New to create a new page.
- Set Title for your new page and choose the page template Elementor Full Width.
- Once done, click on the Publish button to save changes.
- Now go to Settings > Reading to assign your Elementor homepage.
- Inside the Your homepage displays set the option to A static page and choose the page you have created using the Elementor Full Width page template from the Front Page drop down list.
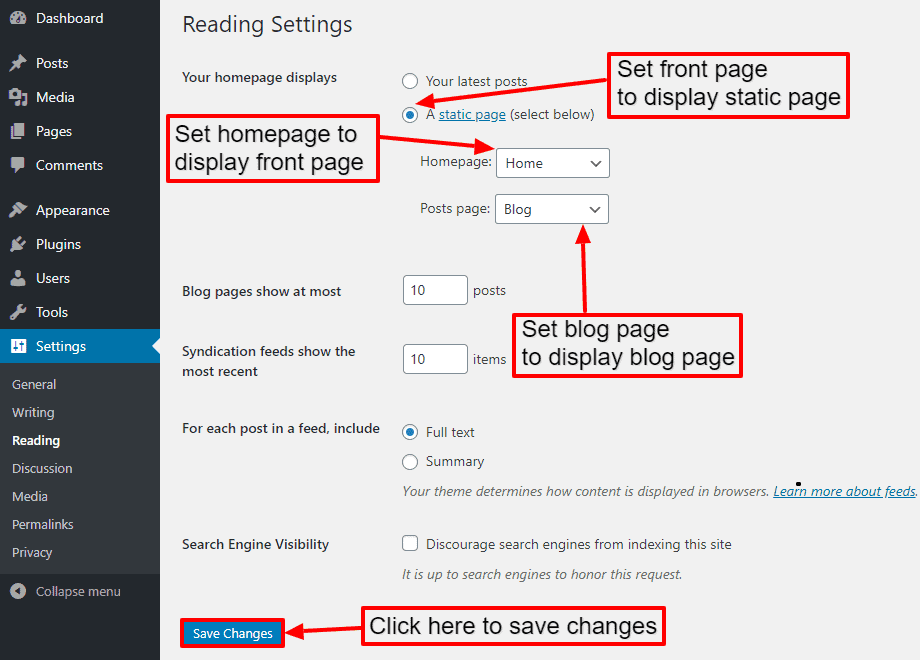
- Once done, click on Save Changes button.
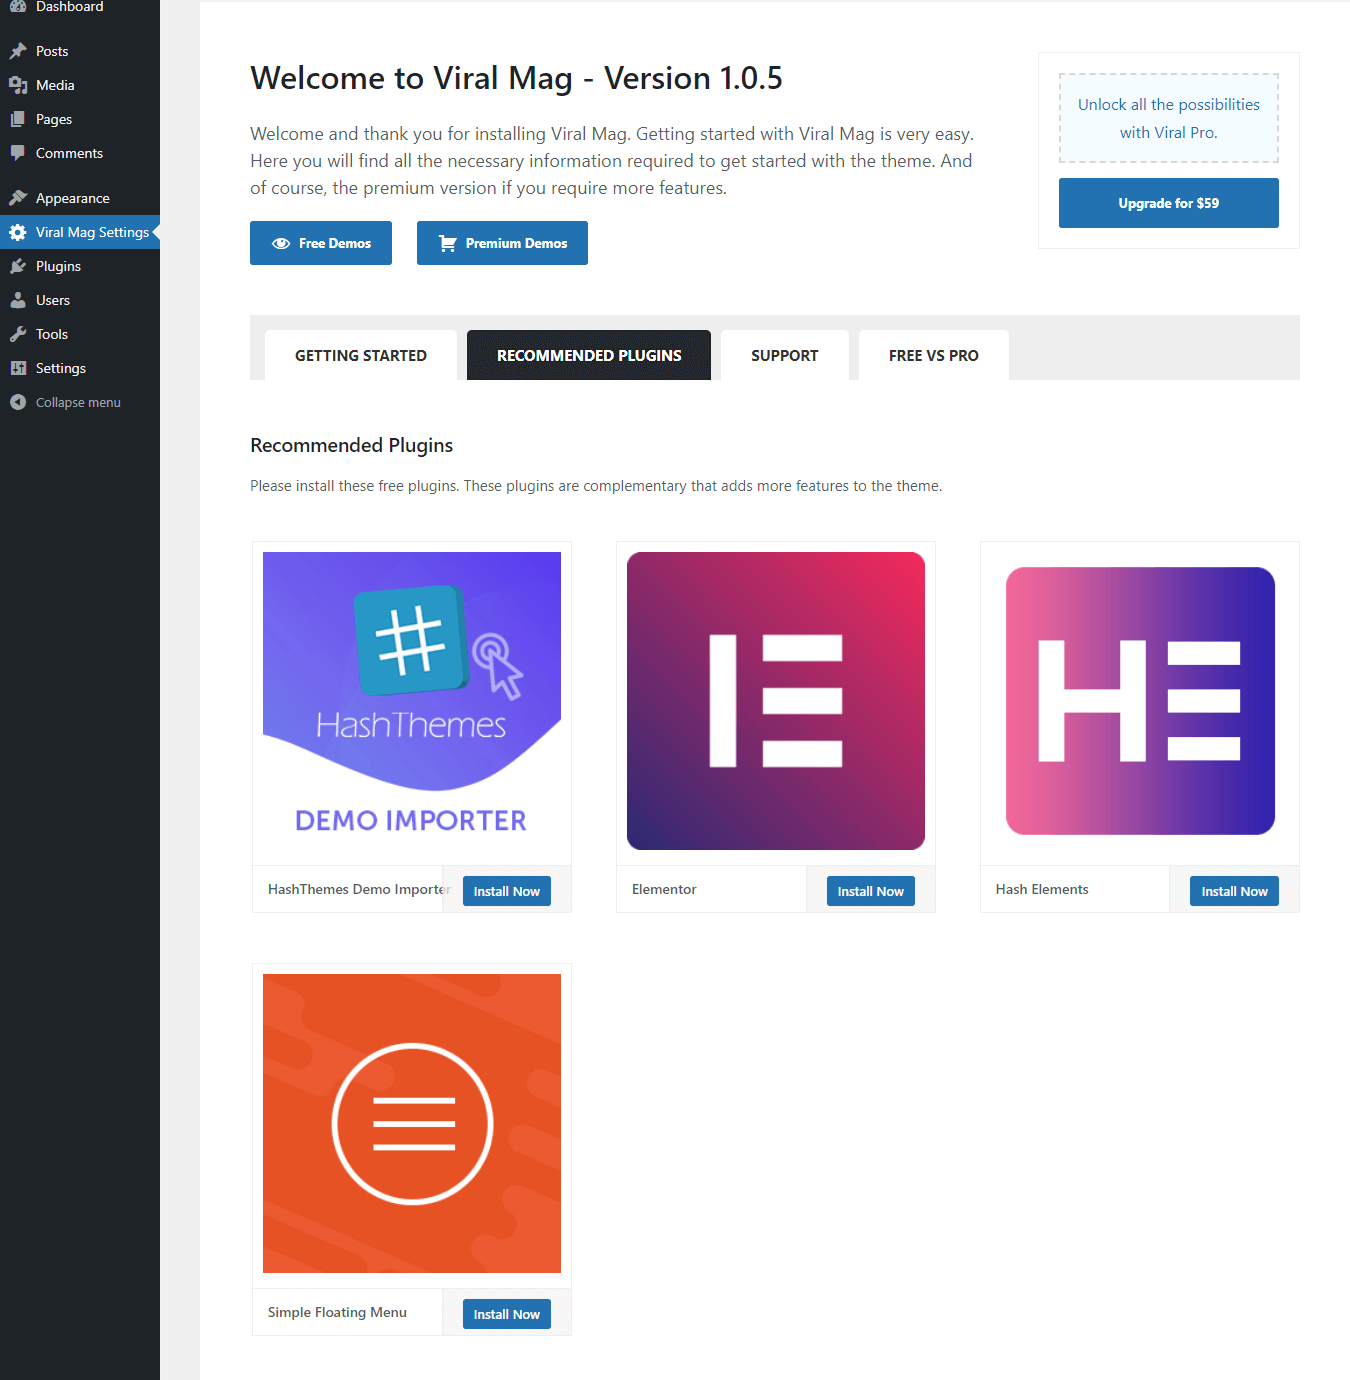
- Now go to Viral Mag Settings > Recommended Plugin to install Elementor and Hash Elements plugin.
- Then, edit your newly created page and click on “Edit with Elementor” to create your homepage from Elementor.
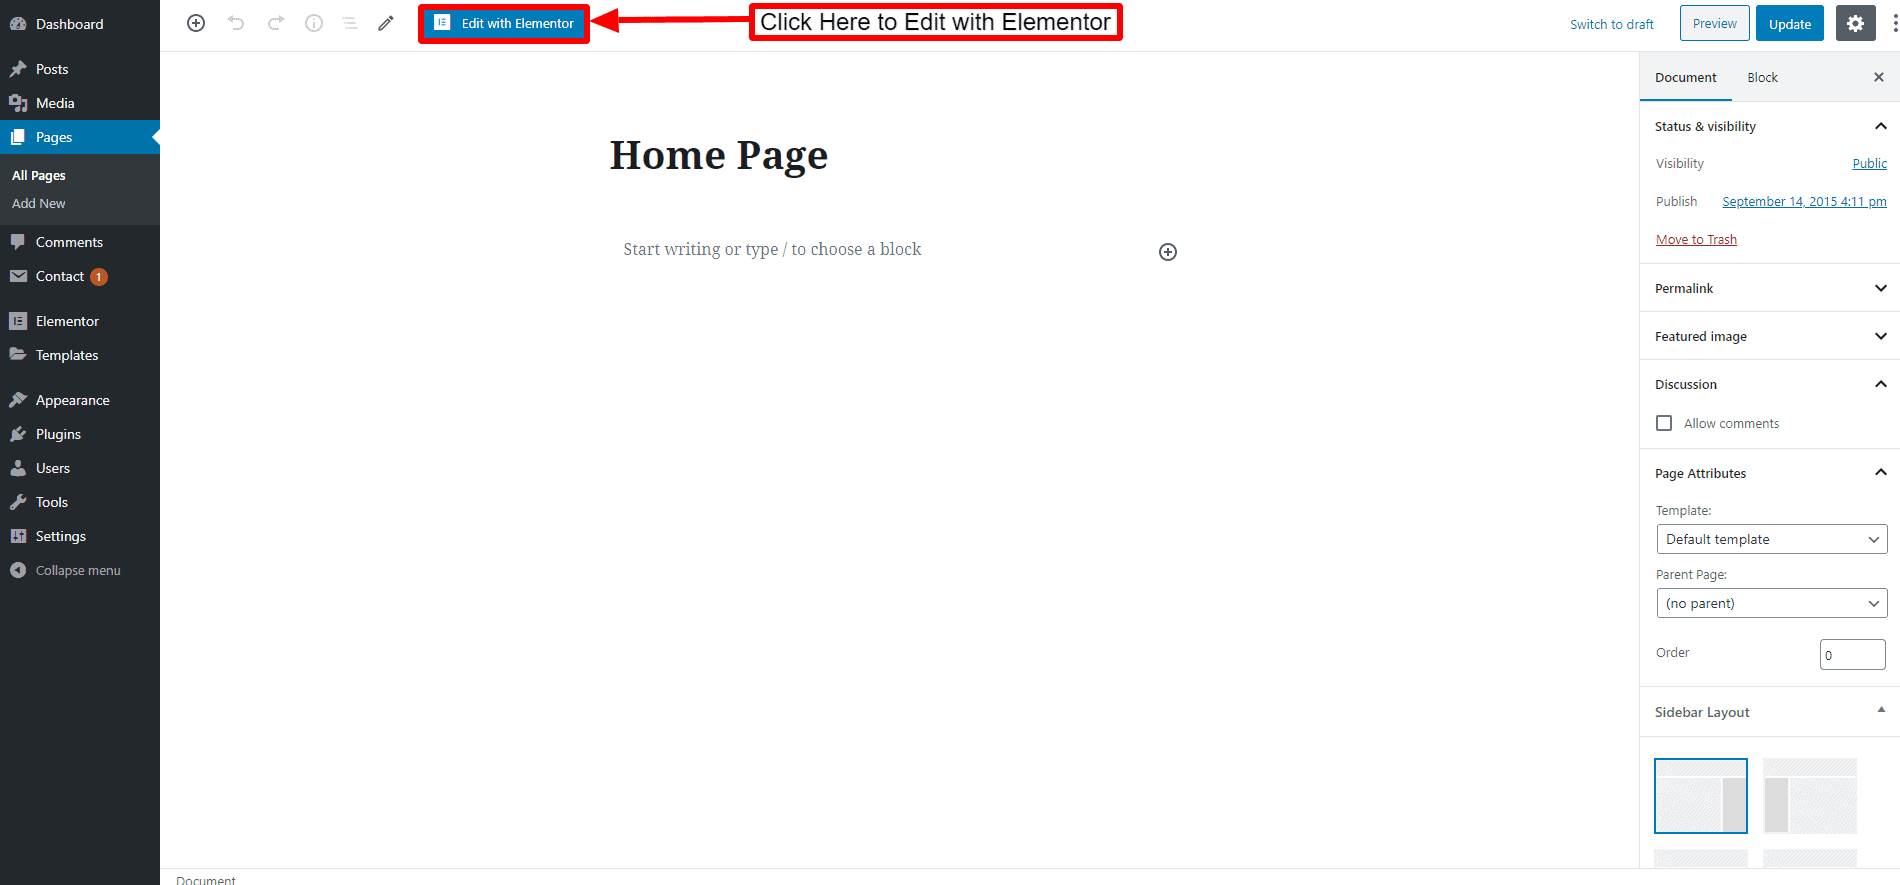
- Drag and Drop different elements that you want to add on your homepage.

- Once done, click on the “Update” button to save changes.
Setting Your Latest Post As Front Page
In the above step, the post page will be entirely overwritten by the featured homepage of the theme. So, if you want to a post page on your featured homepage, follow these steps:
- Go to Settings > Reading.
- Inside the Your homepage displays set the option to Your latest posts.
- Then, set the number of blogs that you want to display on your homepage.
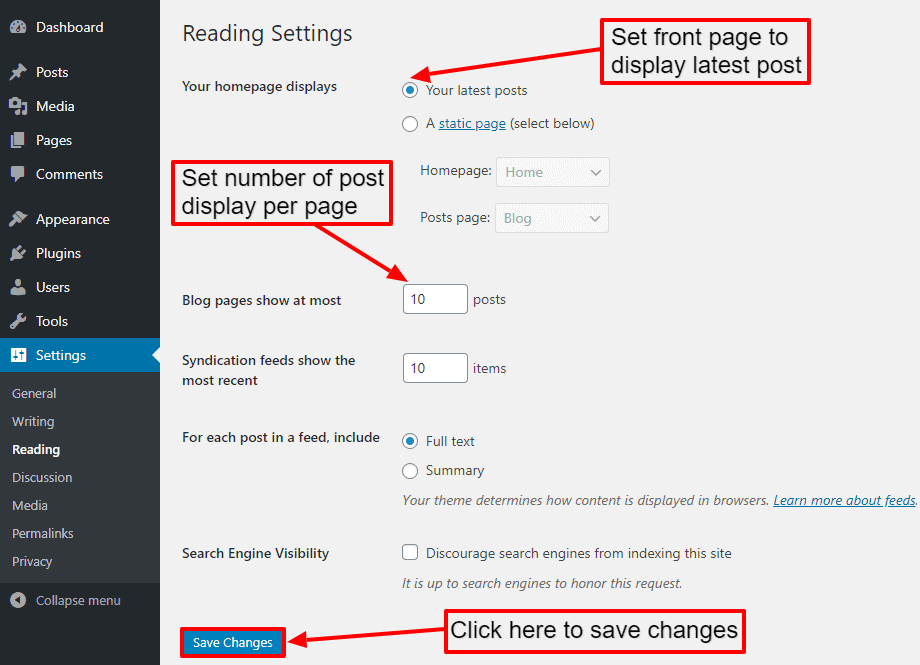
- Click on Save Changes.
Color Setup
Before setting up anything, everyone wants to set the primary color of the theme. Viral Mag allows you to choose from unlimited sets of color for your website through color picker. To set the theme primary color, follow these steps:
- Go to Appearance > Customize > Color Settings.
- Click on Select Color and pick the color of your choice.
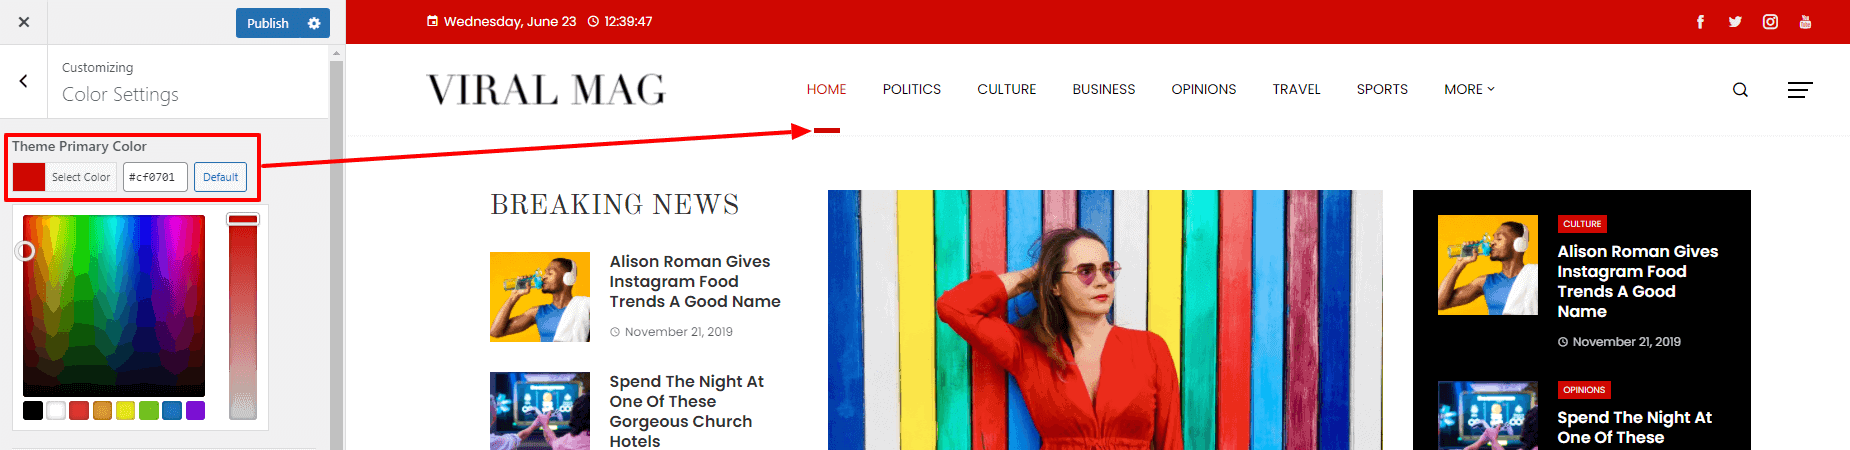
- Click on the “Publish” button to save changes.
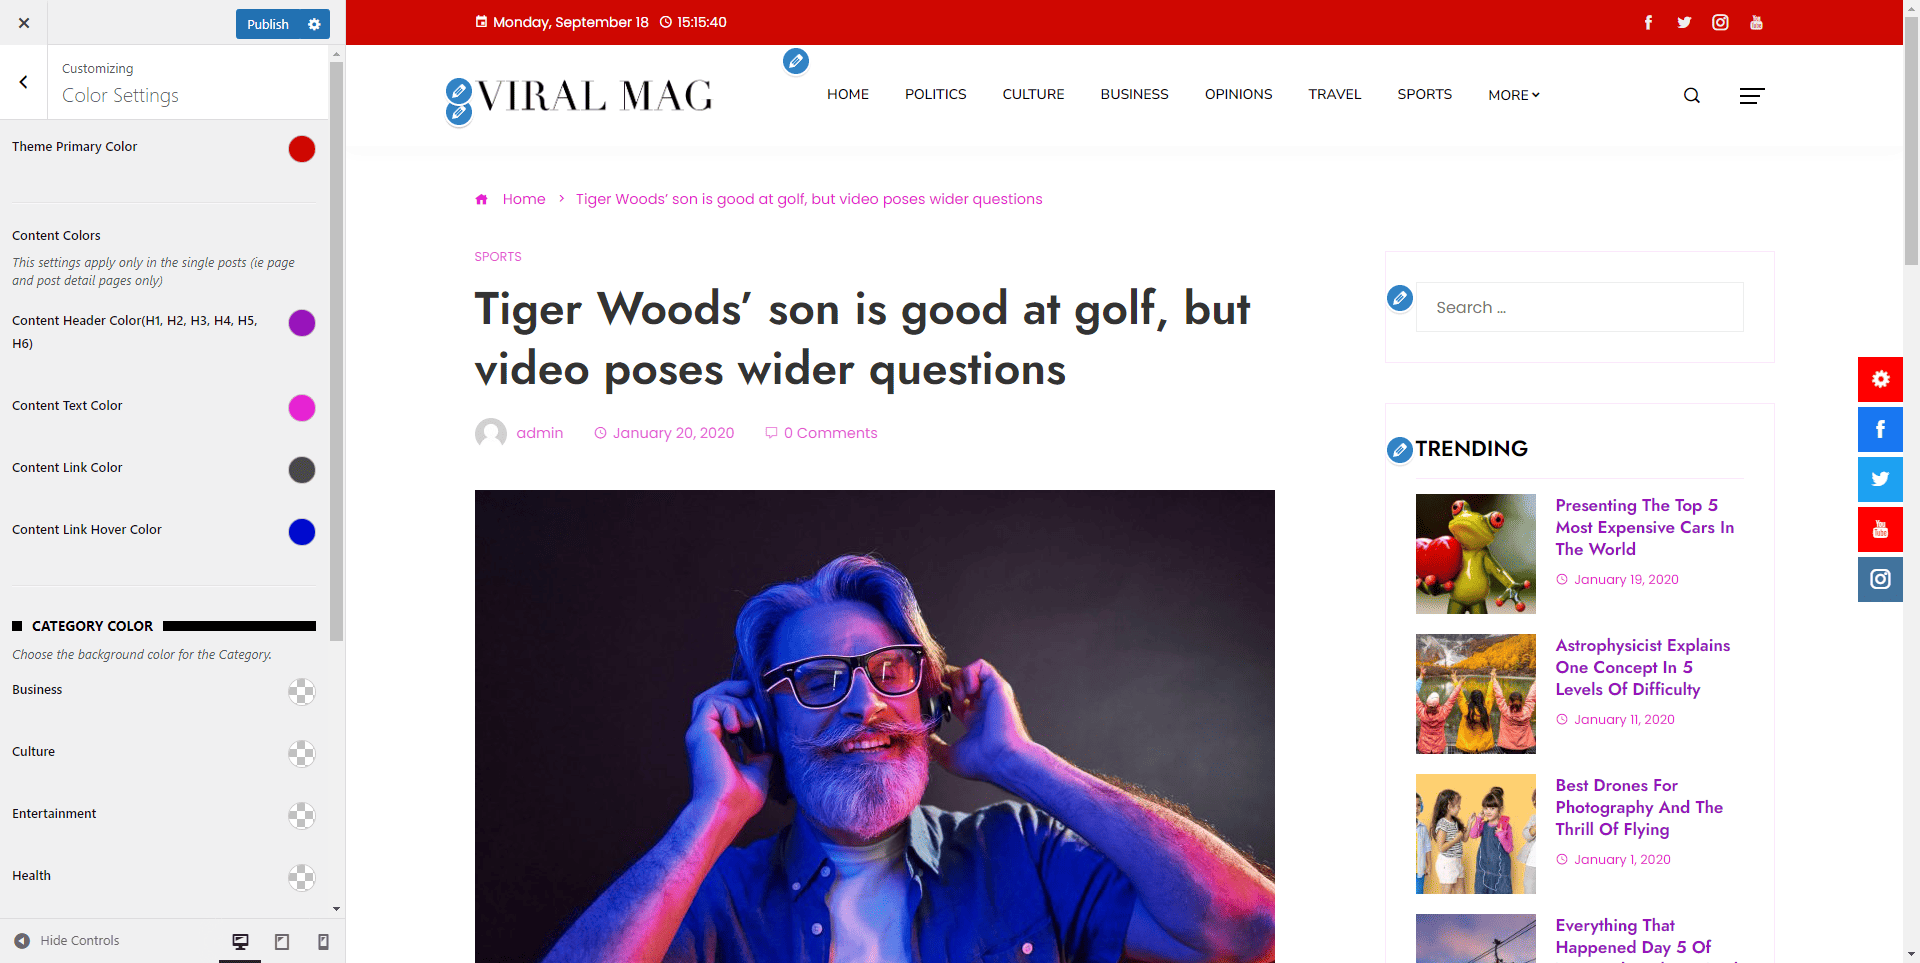
Customizing Content Colors
Customizing the content colors is only applies to a single post or a detailed page.
- You can make changes in each of these: Content Header Color(H1, H2, H3, H4, H5, H6), Content Text Color, Content Link, Color Content, Link Hover Color.
- Select the colors that go well with your website.
- Once you are happy with how it is looking click on the ‘Publish’ button.
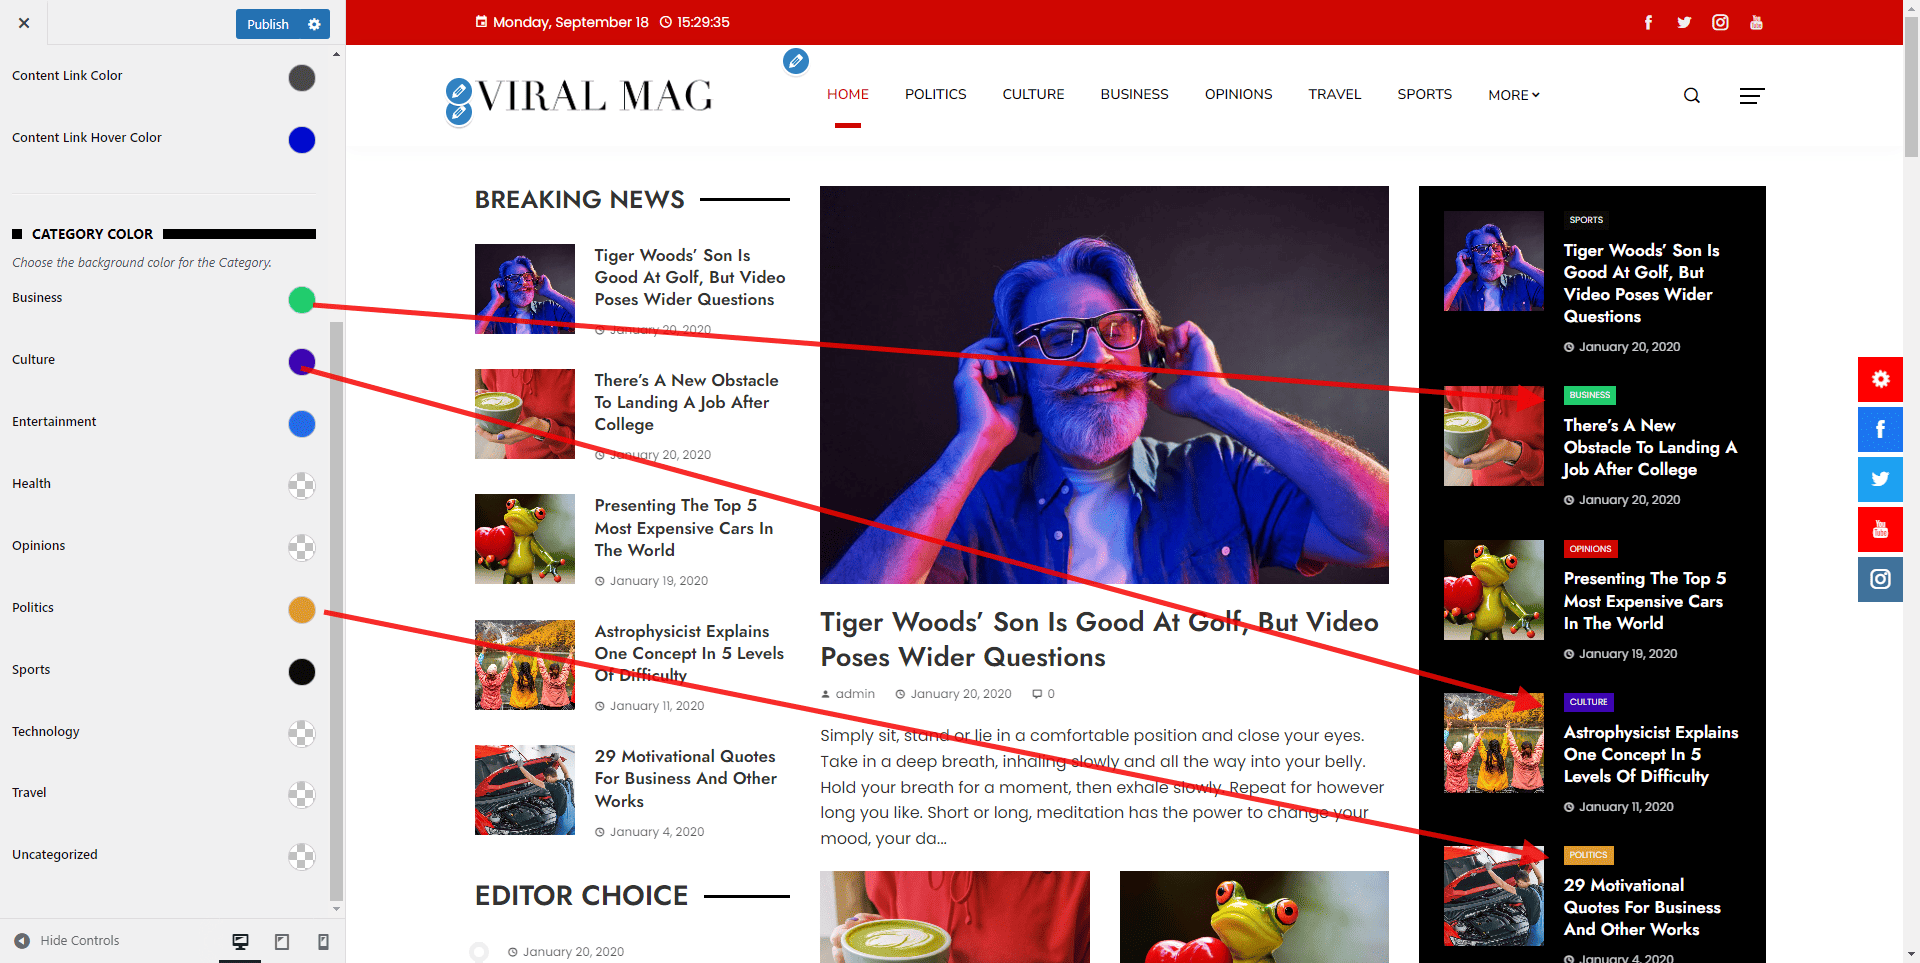
Customizing Category Color
Customizing the category color on the right section of the category section.
- You can make changes in each section you add.
- Select the colors that go well with your website.
- Once you are happy with how it is looking click on ‘Publish’ button.
General Settings
There are always few things that you will want to set up before adding any content to your website. Accordingly, Viral Mag also has a group of general settings under this heading:
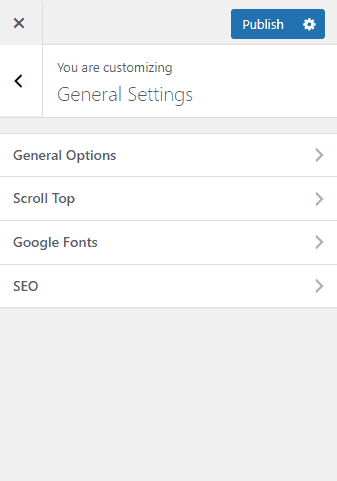
The general settings include
- General Option
- Scroll Top
- Google Fonts
- SEO
General Option
The theme provides you the option to either set full-width layout or boxed layout of your website. To set the layout of your site, you need to follow these steps:
- Go to Dashboard > Appearance > Customize.
- Go to General Settings > General Option.
- Now Choose either a Full-Width Layout or Boxed Layout as per your requirement.
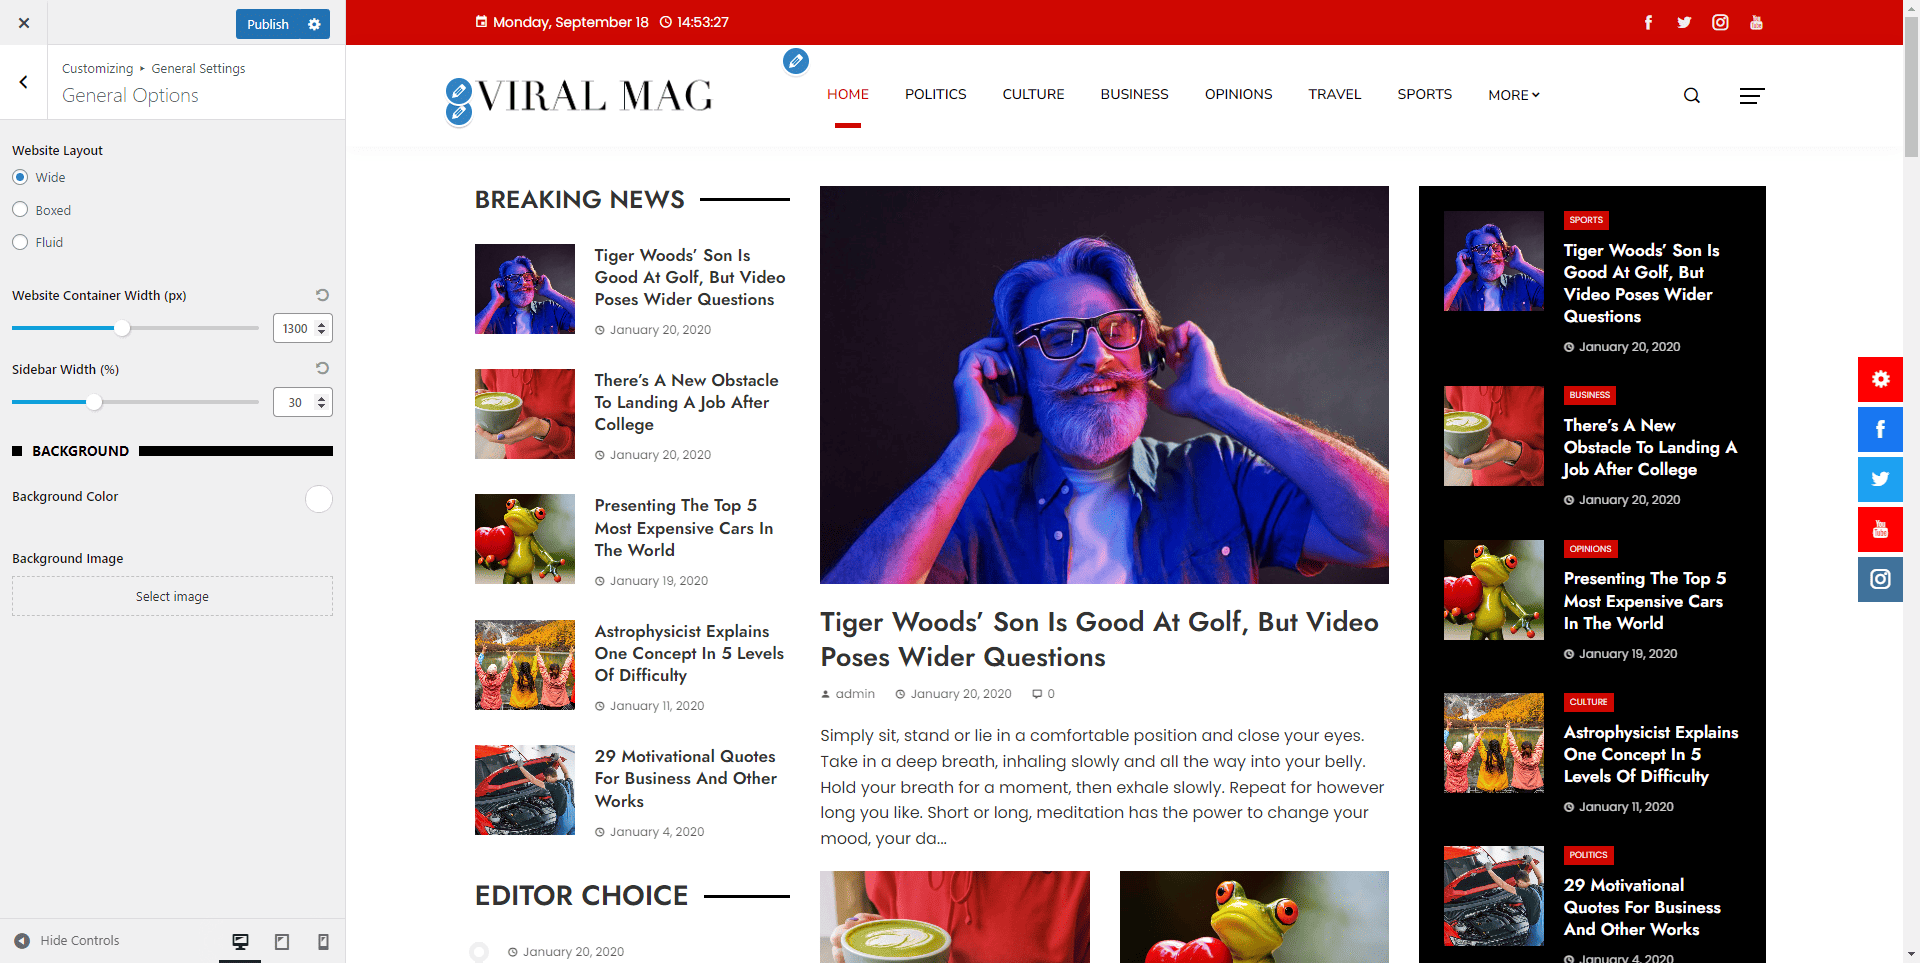
- Also, set the container width and sidebar width of your website.
- Besides, you can also select the background image and colors as well.
- Once done, click on the Publish button.
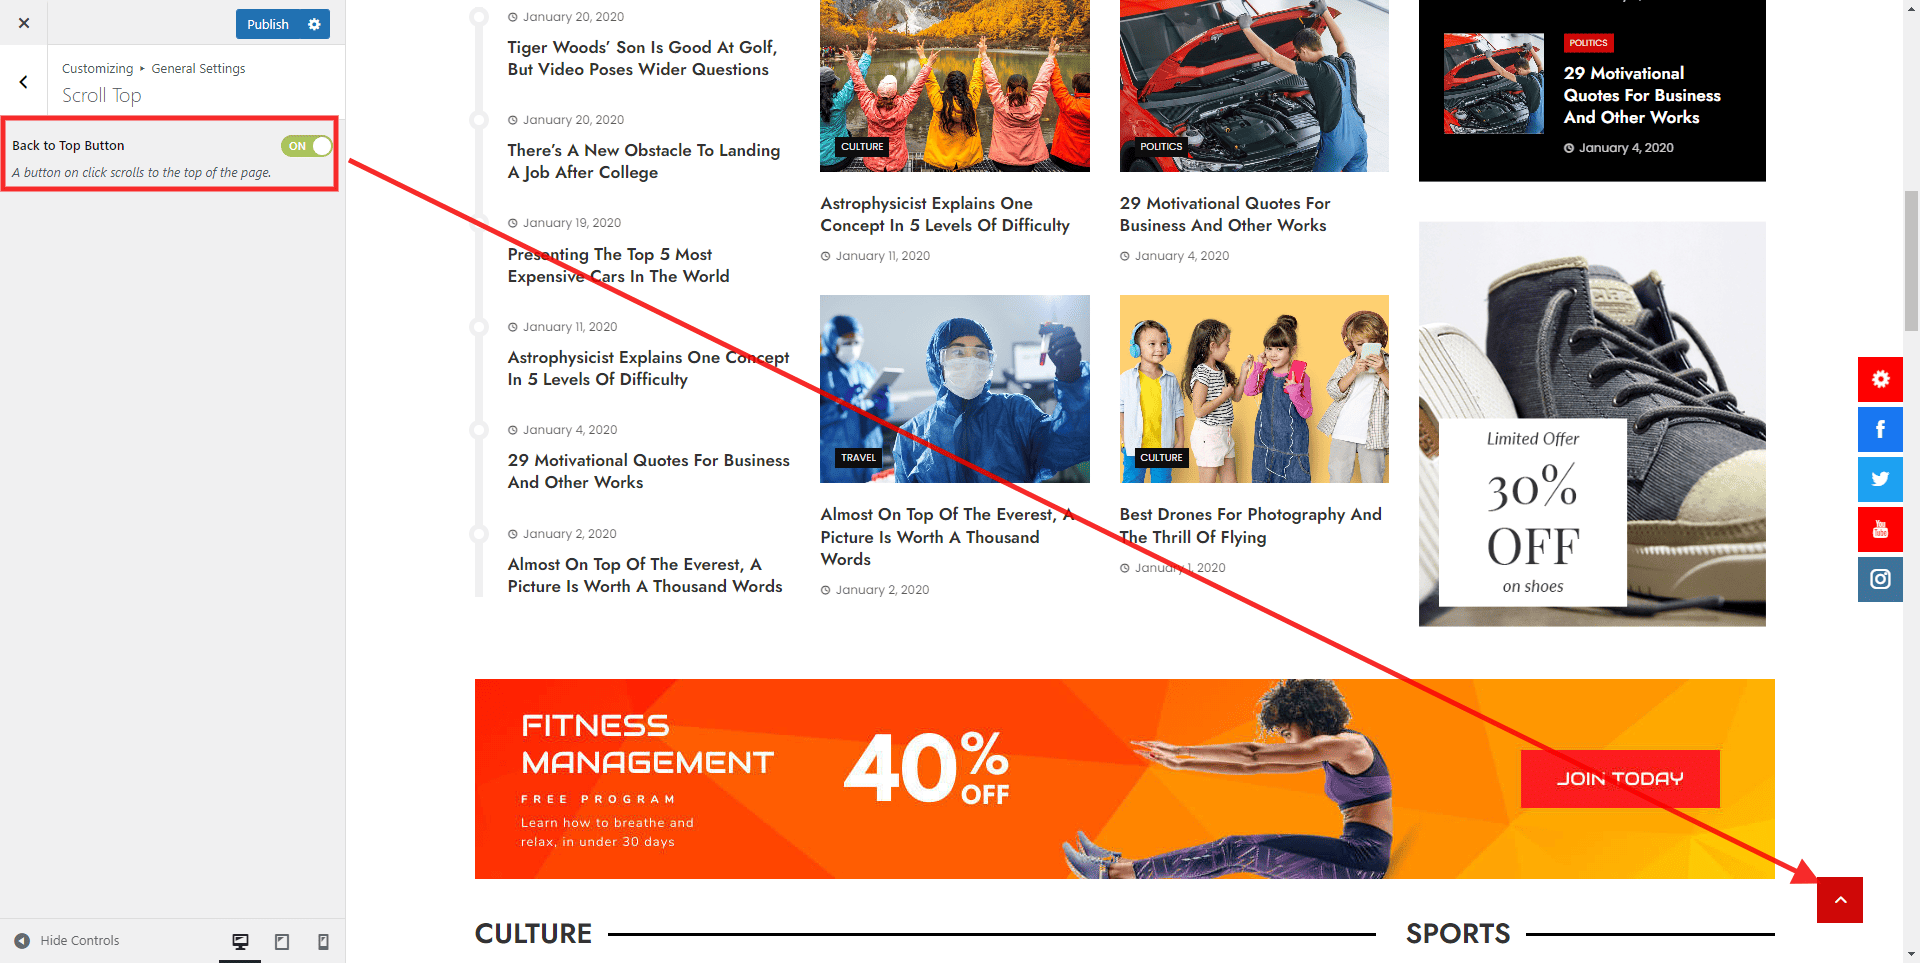
Scroll top
The theme comes with the option to show/hide scroll to top button on your website. The scroll to top button will allow you scroll back your website to its top section by clicking it.
To configure scroll to top button, follow these steps:
- Go to Dashboard > Appearance > Customize.
- Go to General Settings > Scroll to Top.
- Now, set the Scroll to Top option to On if you wish to have a scroll to top button on your website else set the option to No.
- Once done, click on the “Publish” button.
Google Fonts
The theme comes with the option to load Google Fonts locally on your website. This setting will allow you to host the fonts on your own server. However, keep in mind that doing so can slightly slow down your website
To configure this setting, follow these steps:
- Go to Dashboard > Appearance > Customize.
- Go to General Settings > Load Google Fonts Locally.
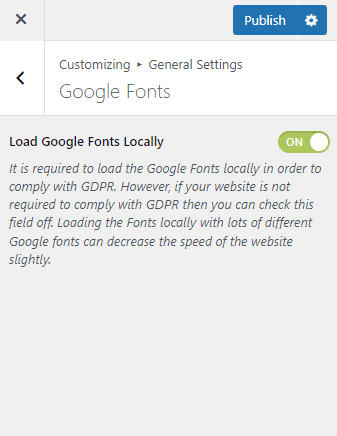
- Now, set the Load Google Fonts Locally option to On if you want to see the fonts load locally. If you don’t require it you can simply turn off the settings.
- Once done, click on the “Publish” button.
SEO
The theme comes with the option to optimize SEO practices on your website. This setting will allow you to host the fonts on your own server. However, keep in mind that doing so can slightly slow down your website
To configure this setting, follow these steps:
- Go to Dashboard > Appearance > Customize.
- Go to General Settings > SEO.
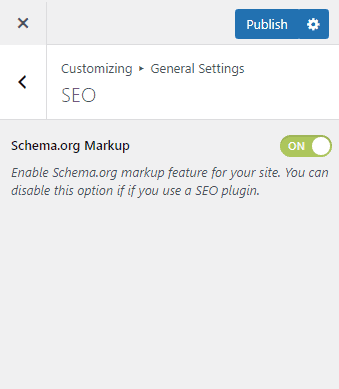
- Now, set the option to ON if you want to make your website SEO friendly.
- Once you have made the necessary changes click the ‘Publish’ button.
Header Settings
Viral Mag theme allows you to configure each and every element of the header from the header layout to header elements and their design.
Logo & Favicon
To upload the site logo, follow these steps.
- Go to Appearance > Customizer > Header Settings > Logo & Favicon.
- Click on the Select Logo button and choose the logo from the media library.
- You can also add the Site Title and Site Tagline and choose its color.
- Click on Select Site Icon to upload the favicon.
![]()
![]()
- Once done, Publish the changes.
Header Layout
Viral Mag comes with 2 different header layouts to choose from. You can choose any of them as per your choice. To choose the header layout:
- Go to Appearance > Customizer > Header Settings.
- Click on the Header Option.
- Now, choose the best matching one for your website.
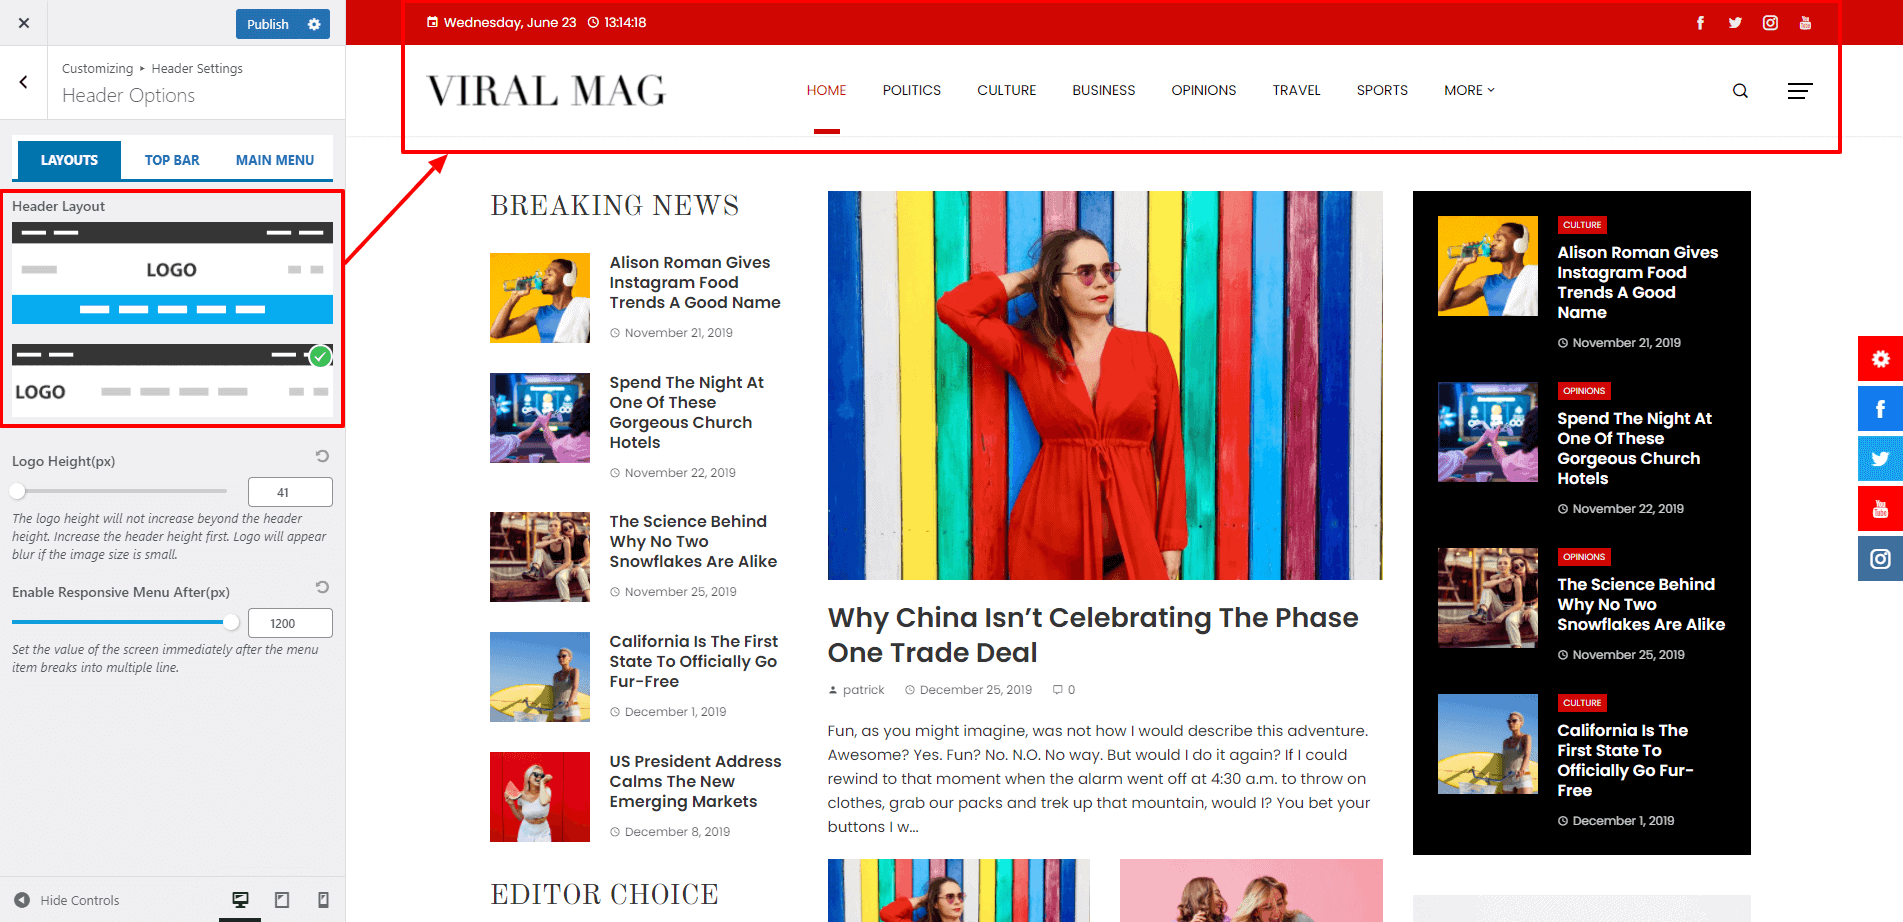
- Also, set the logo height and the menu responsiveness of the website.
- Once done, click on Publish button to save change.
Header Top Bar
In the header top bar settings, you can enable/disable top header, configure the color setting, set the top header height. You can also what content to display in the left and right top header. You can either display social icon, menu, widget, custom HTML text or ticker on the top bar.
- Go to Appearance > Customizer > Header Settings.
- Click on Header Option.
- Click on the Top Bar tab.
- Enable/Disable the Top Header.
- If enabled, choose the top header background color, text color and anchor color for the top header.
- Also, set the header height.
- Set the “Disable in mobile” option either to show or hide it in the mobile device. If disabled, the top header will not show on the screen smaller than 768px.
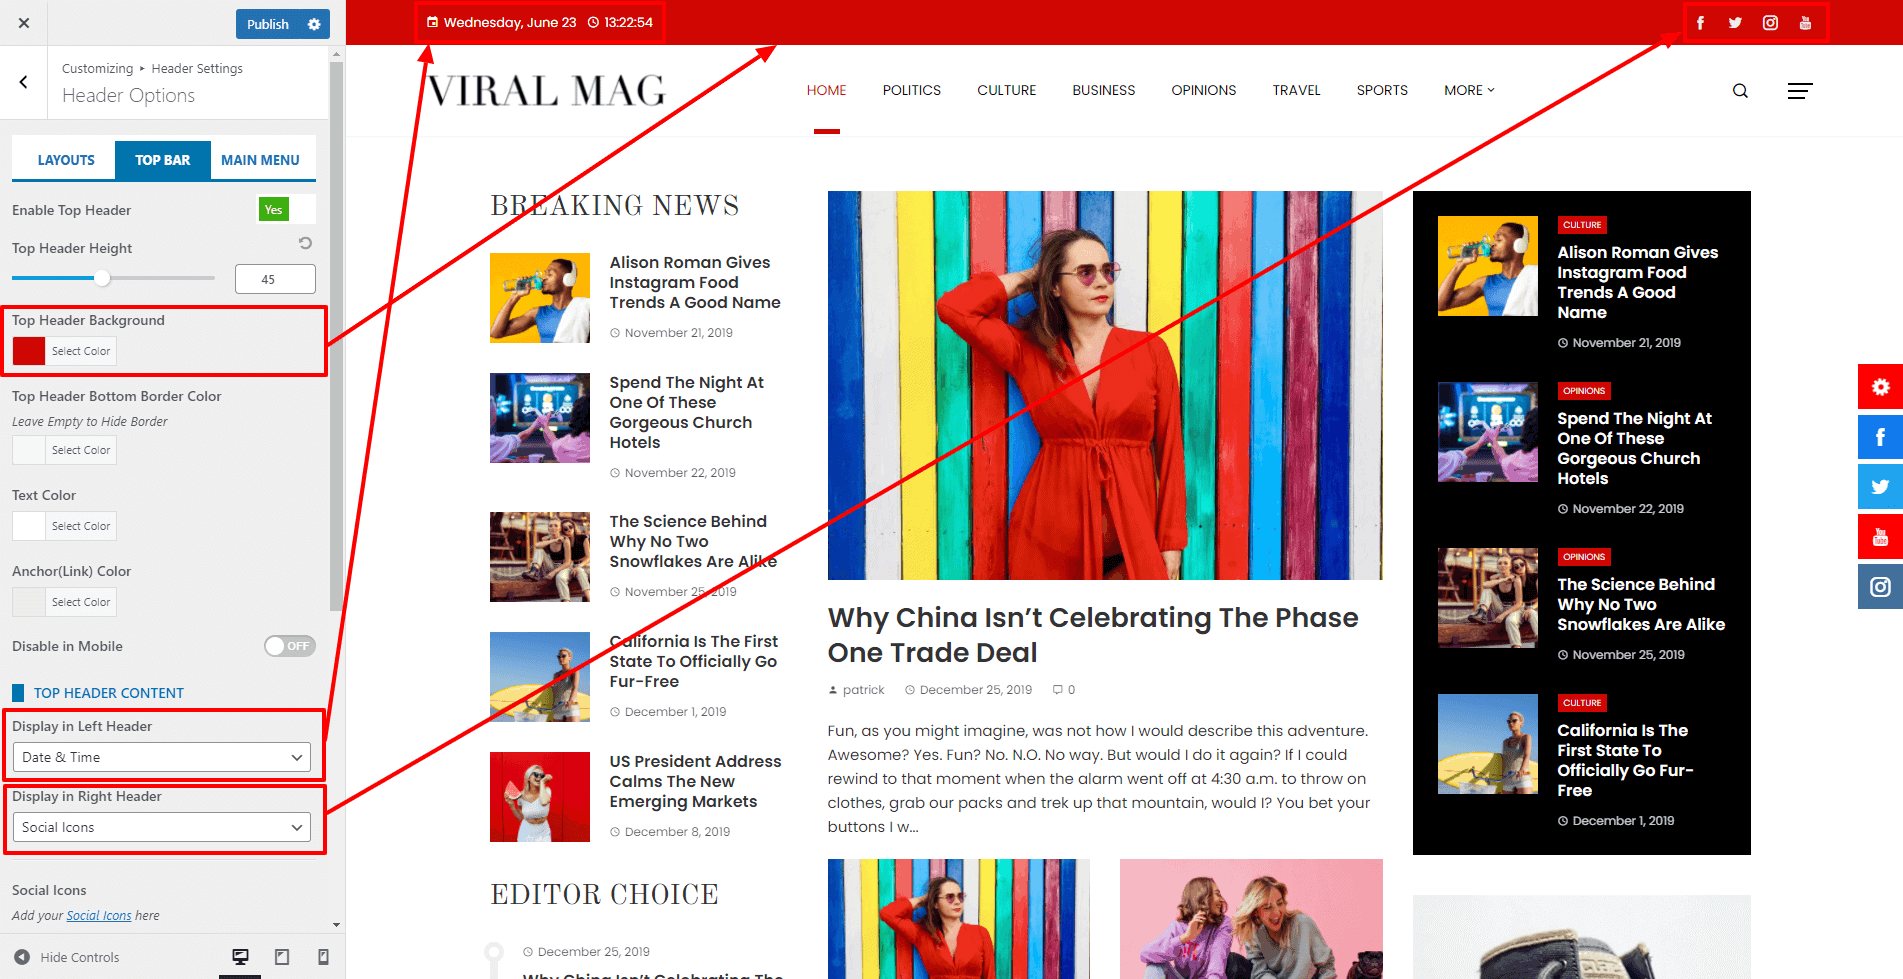
Choose what content to display in the left and right top header. You can choose either to display Social Icon, Menu, Widget, or HTML content.
If you have chosen Social icons, follow the below steps
- Click on the Social Icon in the description text.
- Click on Add New to add social icons
- Choose the icon and add the link
- Follow the steps again to add more social icons
If you have chosen Menu, follow the below steps
- Go to Appearance > Menu.
- Create a new menu
- Enter the Name of the Menu and click on Create Menu button
- Now add the menu items and click on Save Menu.
- Now go back to Appearance > Customizer > Header Settings.
- Click on Top Header Tab
- In the Select Menu option, the newly created menu will appear. select it
If you have chosen Widget, follow the below steps
- Go to Appearance > Widget.
- Select the Widget Area from the drop-down menu.
- Add the widgets to the Widget Area that you had selected for the top header
- In case you need to create a new widget, you can go through the article:
If you have chosen HTML Text, follow the below steps
- Add your text in the HTML Text field. This field also supports HTML so you can add formatting to the text and even HTML elements.
Menu Setup
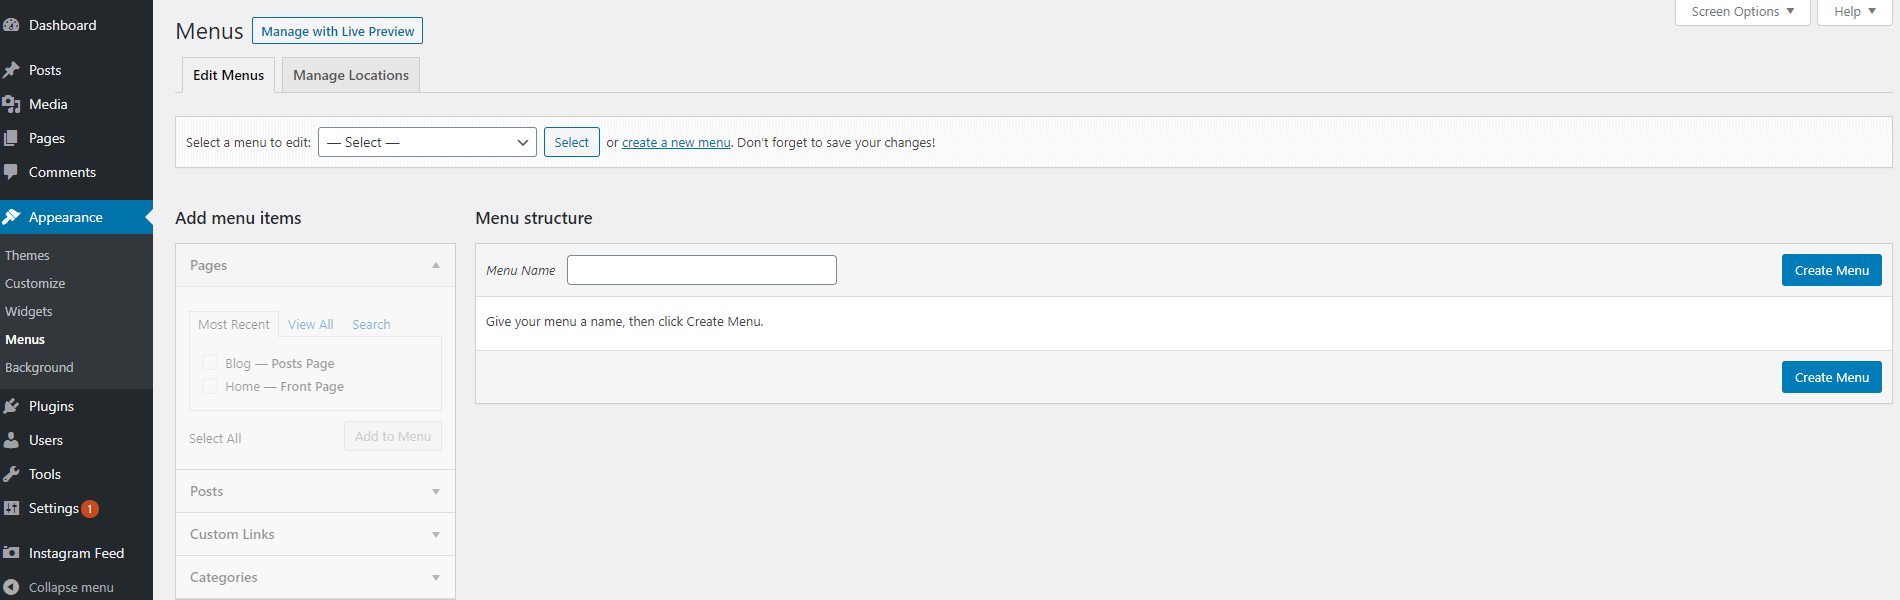
Creating General Menu
1)Defining a Menu
You must define a menu before you can add items to it.
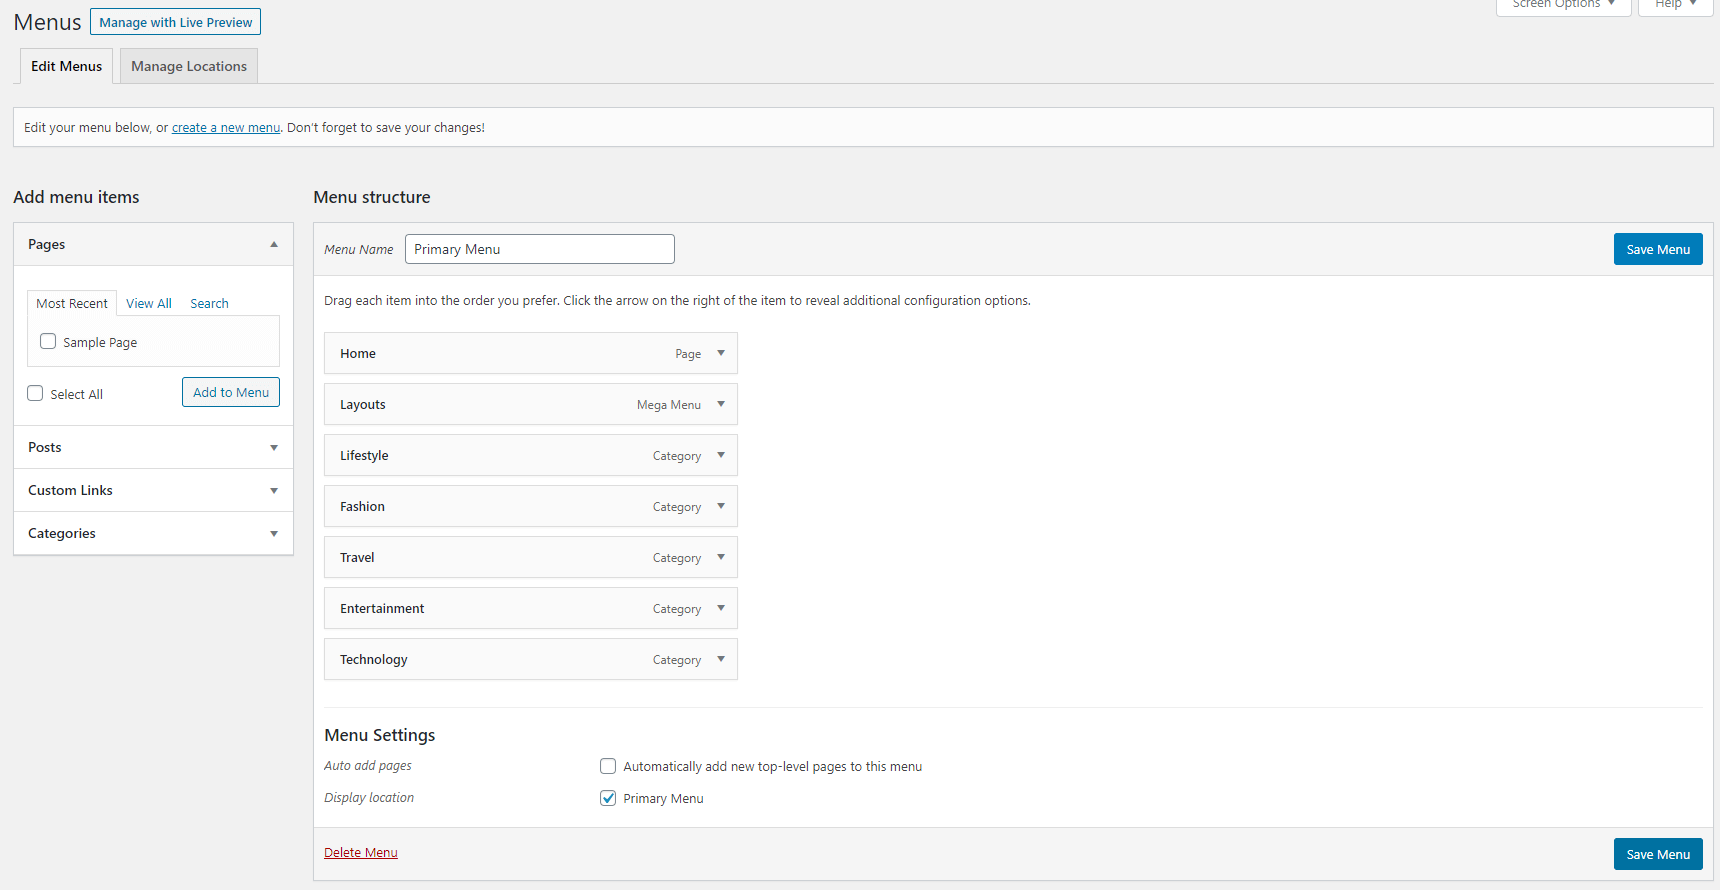
- To create a menu, go to Appearance > Menus to bring up the menu option.
- Click on create a new menu.
- Give the name to your new menu.
- Click on Create Menu button to create the menu.
Your new custom menu is now defined.
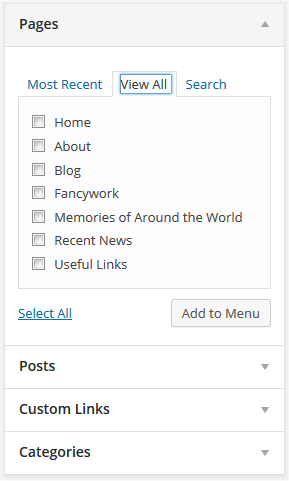
2) Adding Items to a Menu
You can add different link types into your menu, these are split between panes left of the menu you’re currently editing.
- Locate the pane entitled Pages.
- Within this pane, select the View All link to bring up a list of all the currently published Pages on your site.
- Select the Pages that you want to add by clicking the checkbox next to each Page’s title.
- Click the Add to Menu button located at the bottom of this pane to add your selection(s) to the menu that you created in the previous step.
- Click the Save Menu button once you’ve added all the menu items you want.
After you have added the menu items, select the display location of your menu to “Primary Menu” and then click on Save Menu.
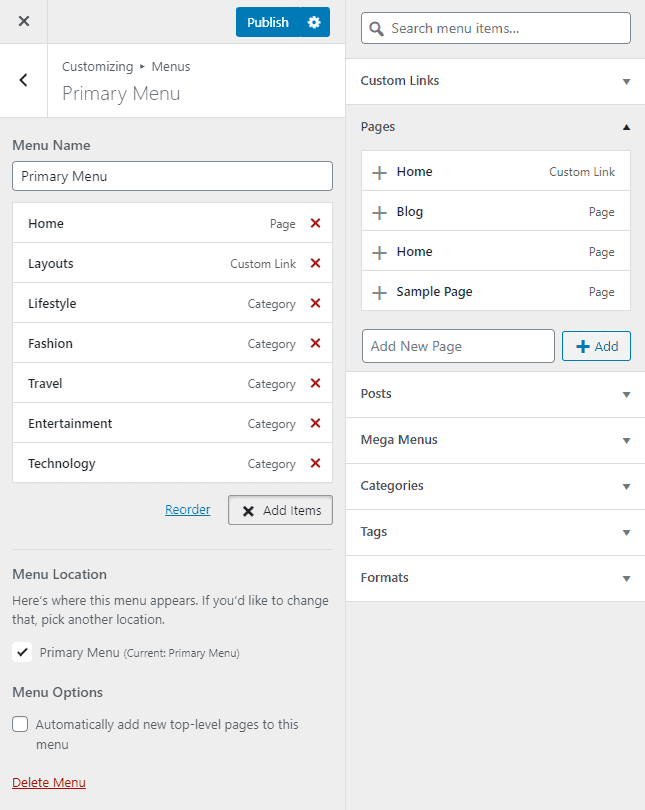
Alternatively, you can create the menu and add its item directly from the customizer.
- To create the menu from the customizer, go to Appearance > Customize > Menus to bring up the menu options.
- Click on create a new menu.
- Give the name to your new menu.
- Choose the location of the new menu.
- Click on the Next button to continue.
- Now add the menu items as per your need and set the menu location to Primary Menu.
- Once done, click to Publish to save.
3) Configuring the menu
After you have created and added the menu on your website:
- Go to Appearance > Customize > Header Option.
- Click on Main Menu tab.
- Enable/Disable Sticky Header.
- Choose the Header Height.
- Show/Hide Search Button, Social Icons and Off-Canvas Menu.
- Choose Header Background Color and Header Bar Background Color for Mobile.
- Enable/Disable Top and Bottom Border.
- If enabled choose Border Color.
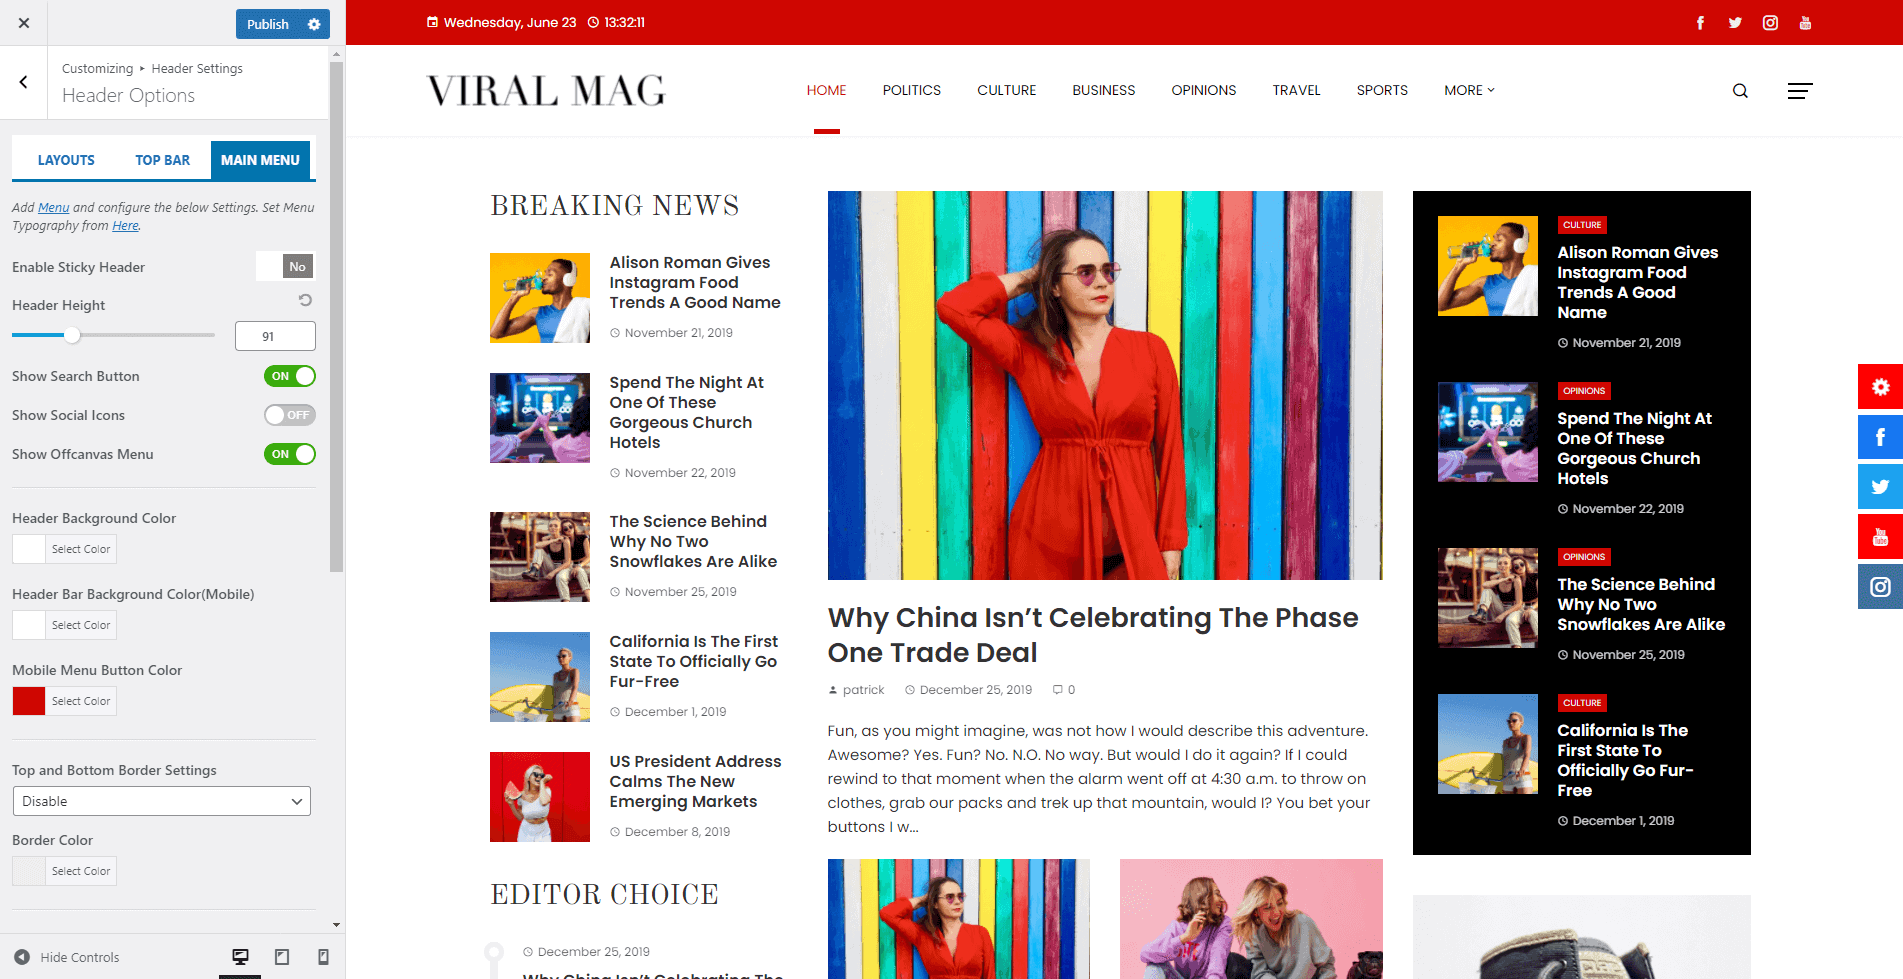
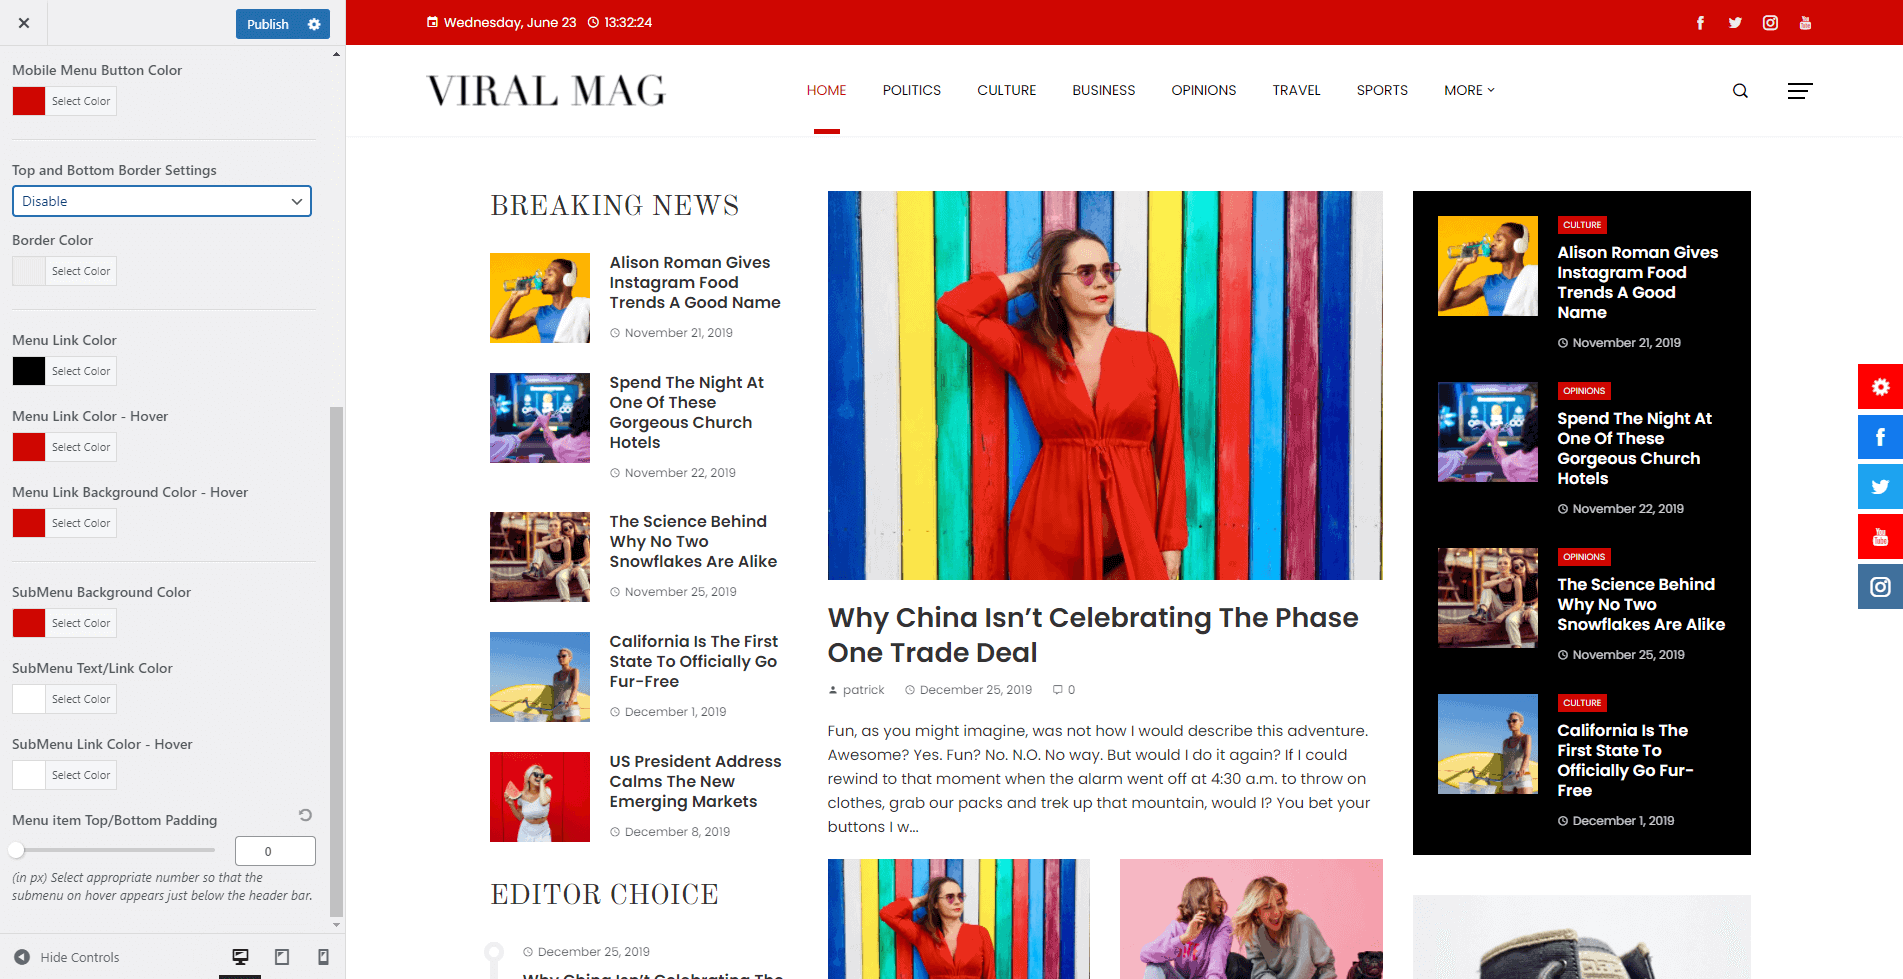
- Now pick the best-matching Background Color, Link Hover Color and Background Color on hover for menu and submenu.
- Set the Top/Bottom Padding for menu items.
You can make the menu responsive after certain px resolution size. To do that, you can go through the article: Enable Responsive Menu
Page Title
The page title setting allows you to makes changes in the showing page title and breadcrumbs on your website.
- Go to Appearance > Customizer > Header Settings > Page Title.
- Select on the settings you want to show while you surf on your website.
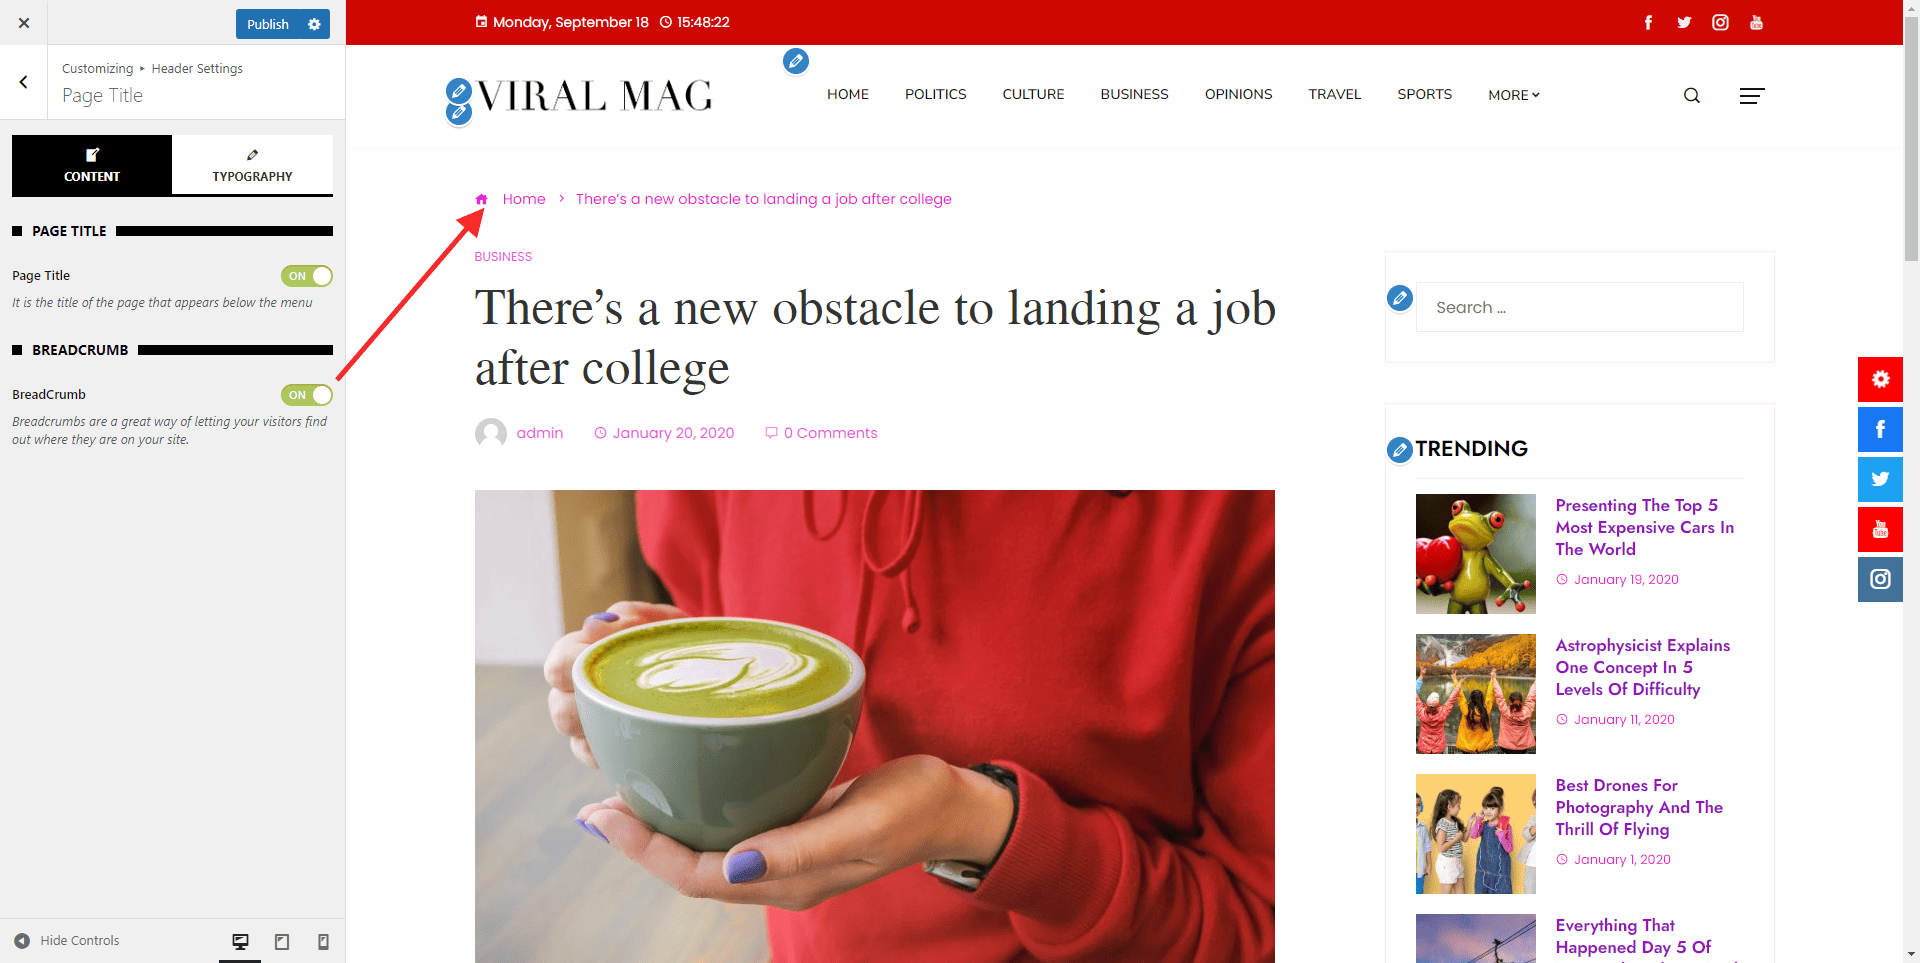
Breadcrumbs serve as a textual guide to your website’s navigation, indicating the path you’ve taken to arrive at the present page.
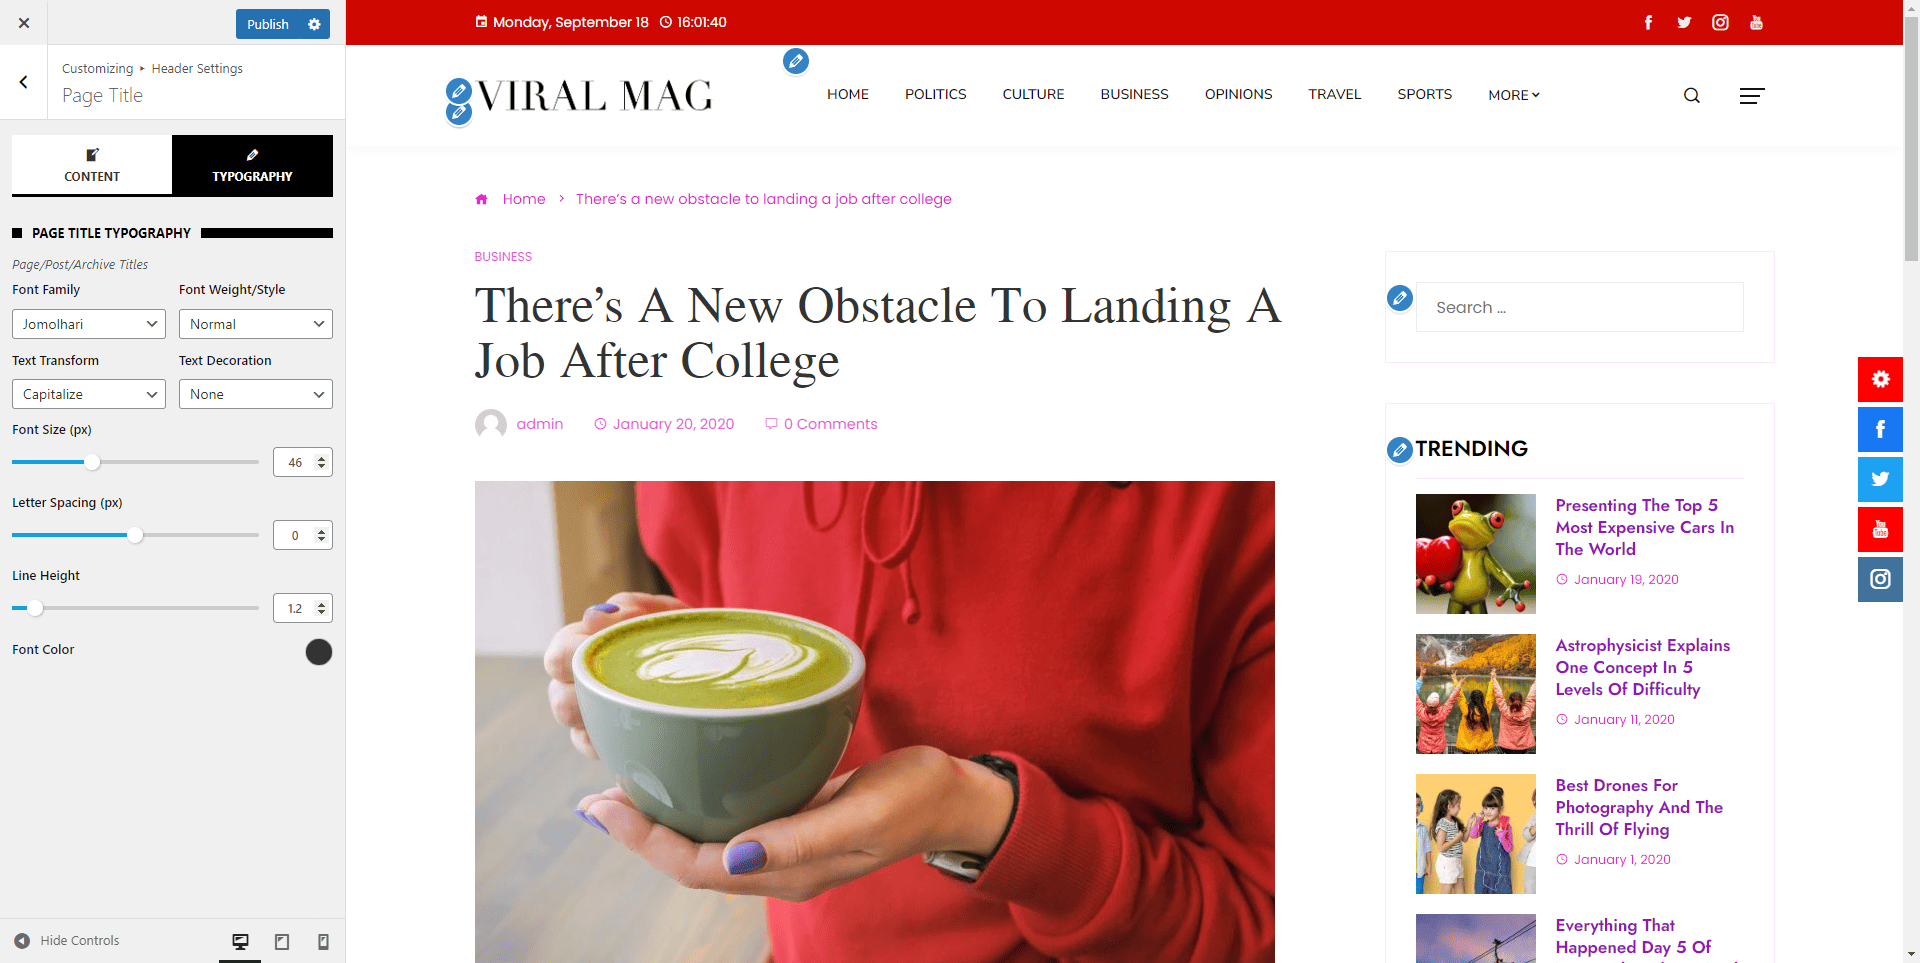
Configure the Typography
You can tweak with the inner section pages content fonts as well.
- Choose the font family and font weight.
- You can make changes in
- Size: Change text size.
- Spacing: Modify letter and line spacing.
- Case: Use uppercase, lowercase, or title case.
Typography Settings
With Typography Settings, you can change the typography parameters like Font Family, Font Style, Text Transform, Text Decoration, Font Size, Line Height and Font Color of each and every element of the website.
Go to Appearance > Customize > Typography Settings.
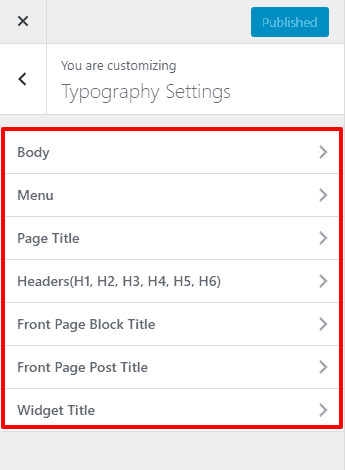
There are 7 setting options for the typography.
1. Body Typography
This typography setting applies to the body content. Choose the best matching font, configure its style/weight, text transform, text decoration, size, line height, and letter spacing. You can also pick your own font color.
2. Menu Typography
This typography setting applies to the menu text. Choose the best matching font, configure its style/weight, text transform, text decoration, size, line height, and letter spacing.
3. Page Title
This typography setting applies to the title of pages, posts, and archives. Choose the best matching font, configure its style/weight, text transform, text decoration, size, line height, and letter spacing. You can also pick your own font color.
4. Headers (H1, H2, H3, H4, H5, H6)
This typography setting applies for all the heading with HTML tag H1, H2, H3, H4, H5, H6. Choose the best matching font, configure its style/weight, text transform, text decoration, leigh height, and letter spacing.
5. Front Page Block Title
This typography setting applies to the block titles that appear on the front page. Choose the best matching font, configure its style/weight, text transform, text decoration, size, line height, and letter spacing.
6. Front Page Post Title
This typography setting applies to the post titles that appear on the front page. Choose the best matching font, configure its style/weight, text transform, text decoration, size, line height, and letter spacing.
7. Widget Title
This typography setting applies for sidebar and footer widget titles. Choose the best matching font, configure its style/weight, text transform, text decoration, size, line height, and letter spacing.
Blog/Single Page Settings
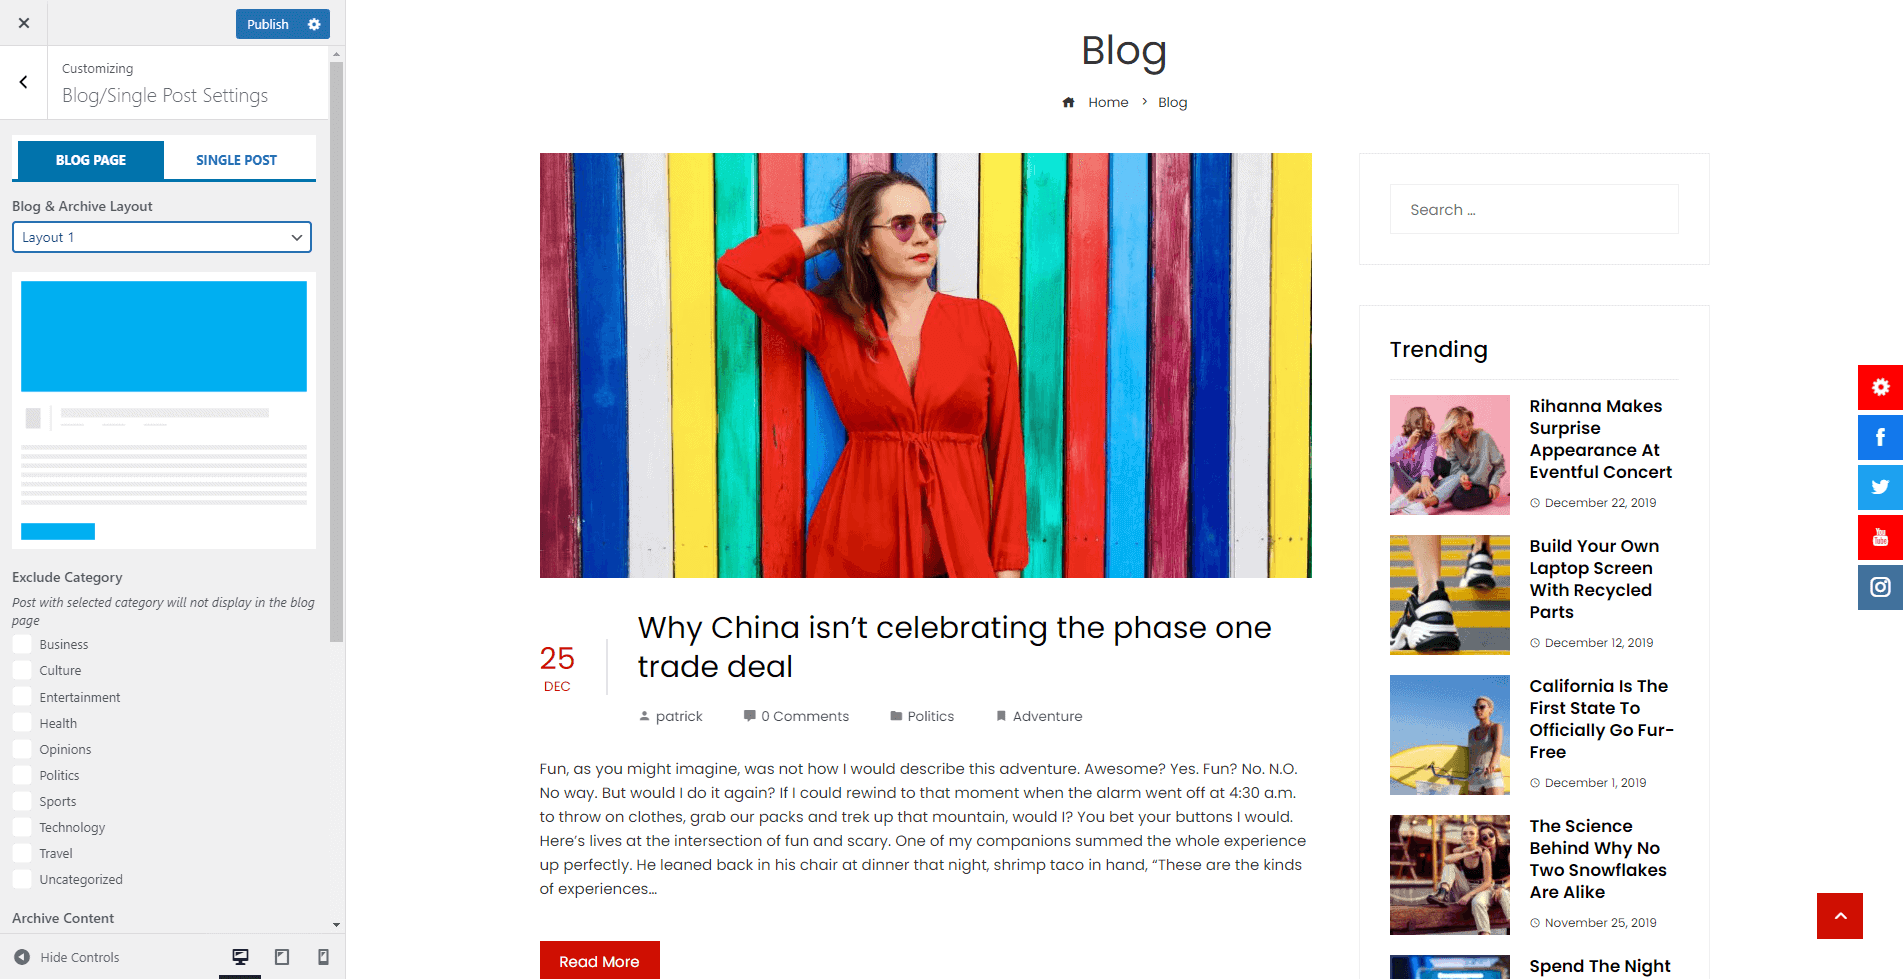
Blog Page Settings
By default, WordPress displays your content in a blog format on the homepage. But you can set a custom homepage as we described earlier and a separate page for blog posts. The blog setting applies to the blog page either you set it on the homepage or set a separate page for the blog. This setting also applies to the archive and search page. To configure the blog/archive page:
- Go to Appearance > Customize > Blog/Single Page Settings.
- By default, the blog tab will be active. If the block tab is not active, click on the Blog Page tab.
- Choose any of the 2 available layouts for your blog archive page.
- If you want to exclude any category on the blog archive page, check the category present in Exclude Category. The checked category won’t be included on the blog archive page.
- You can change the text that links to the full detail page. For that, change the Read More Text option.
- Enable/Disable Posted Date, Author, Comment, Category, Tag.
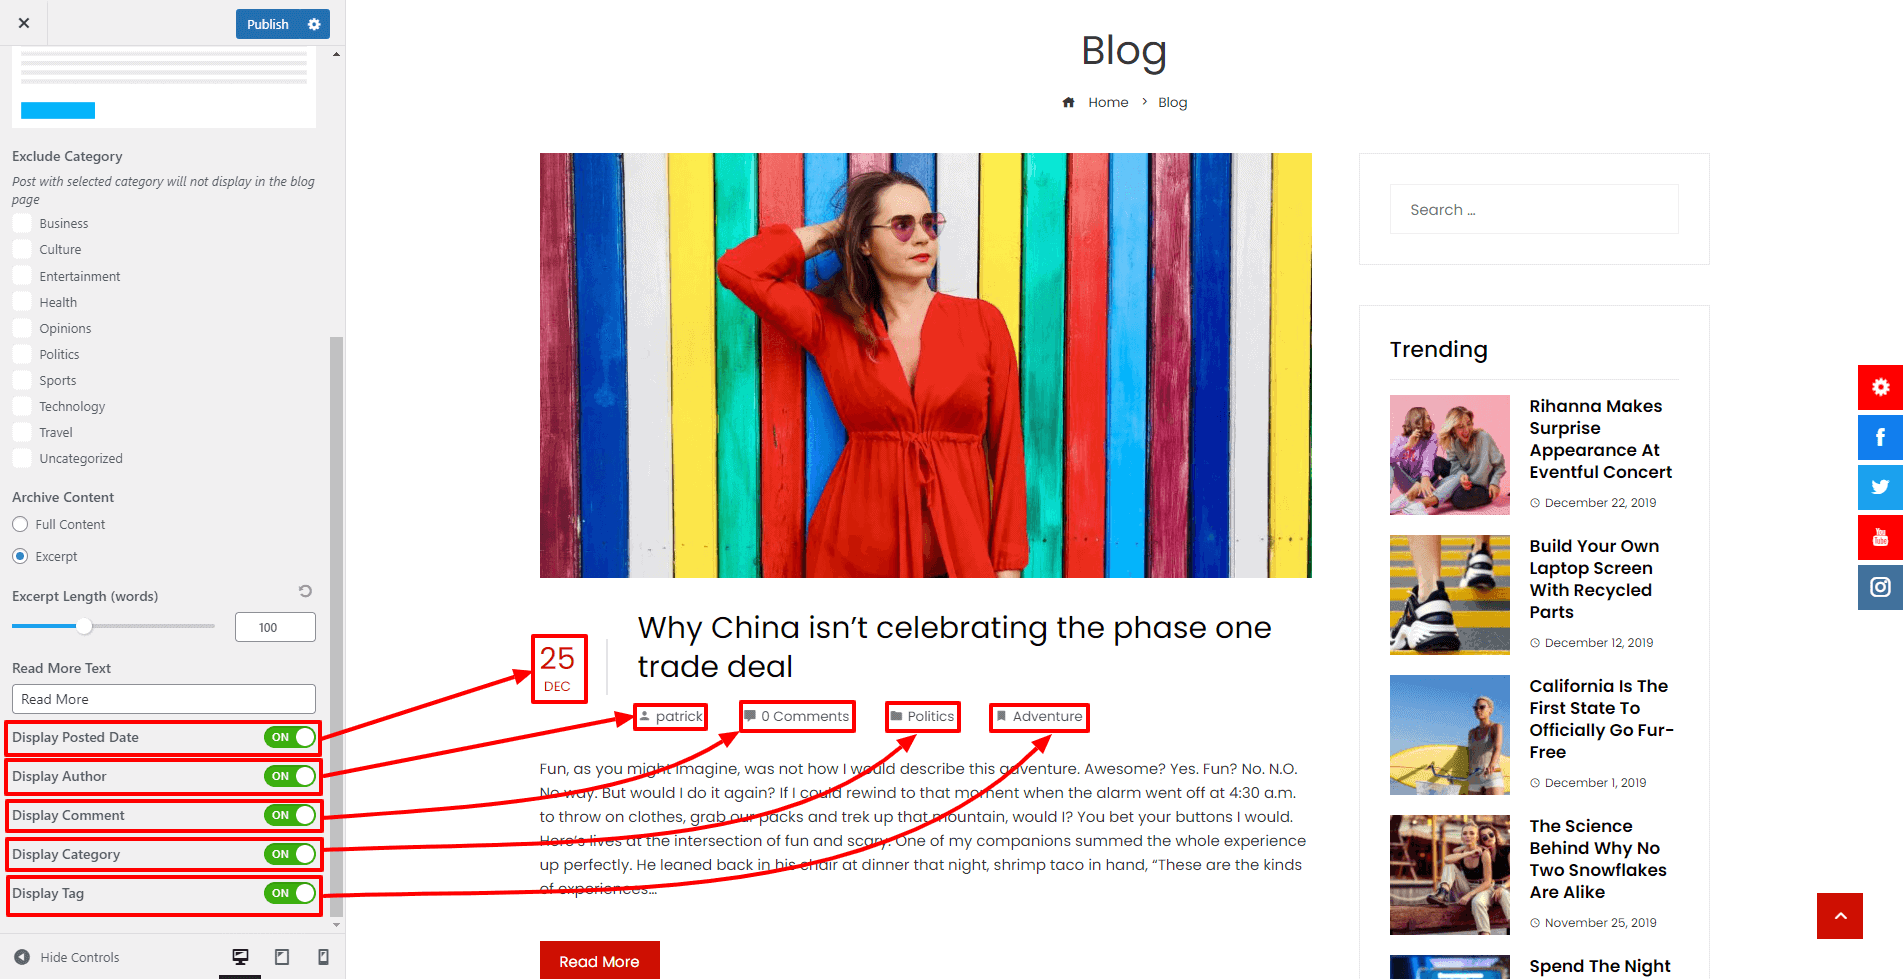
- Once done, click on the “Publish” button to save changes.
Single Post Settings
The theme comes with 2 different single post layouts with tons of configuration options. To configure the post page:
- Go to Appearance > Customize > Blog/Single Page Settings.
- Choose the single post layout.
- Enable/Disable display category, post author, posted date, comment counts, post view, reading time, and tags.
- You can enable/disable the author box to present the detail about the author, previous/next post to display the previous post and next post, and post comments.
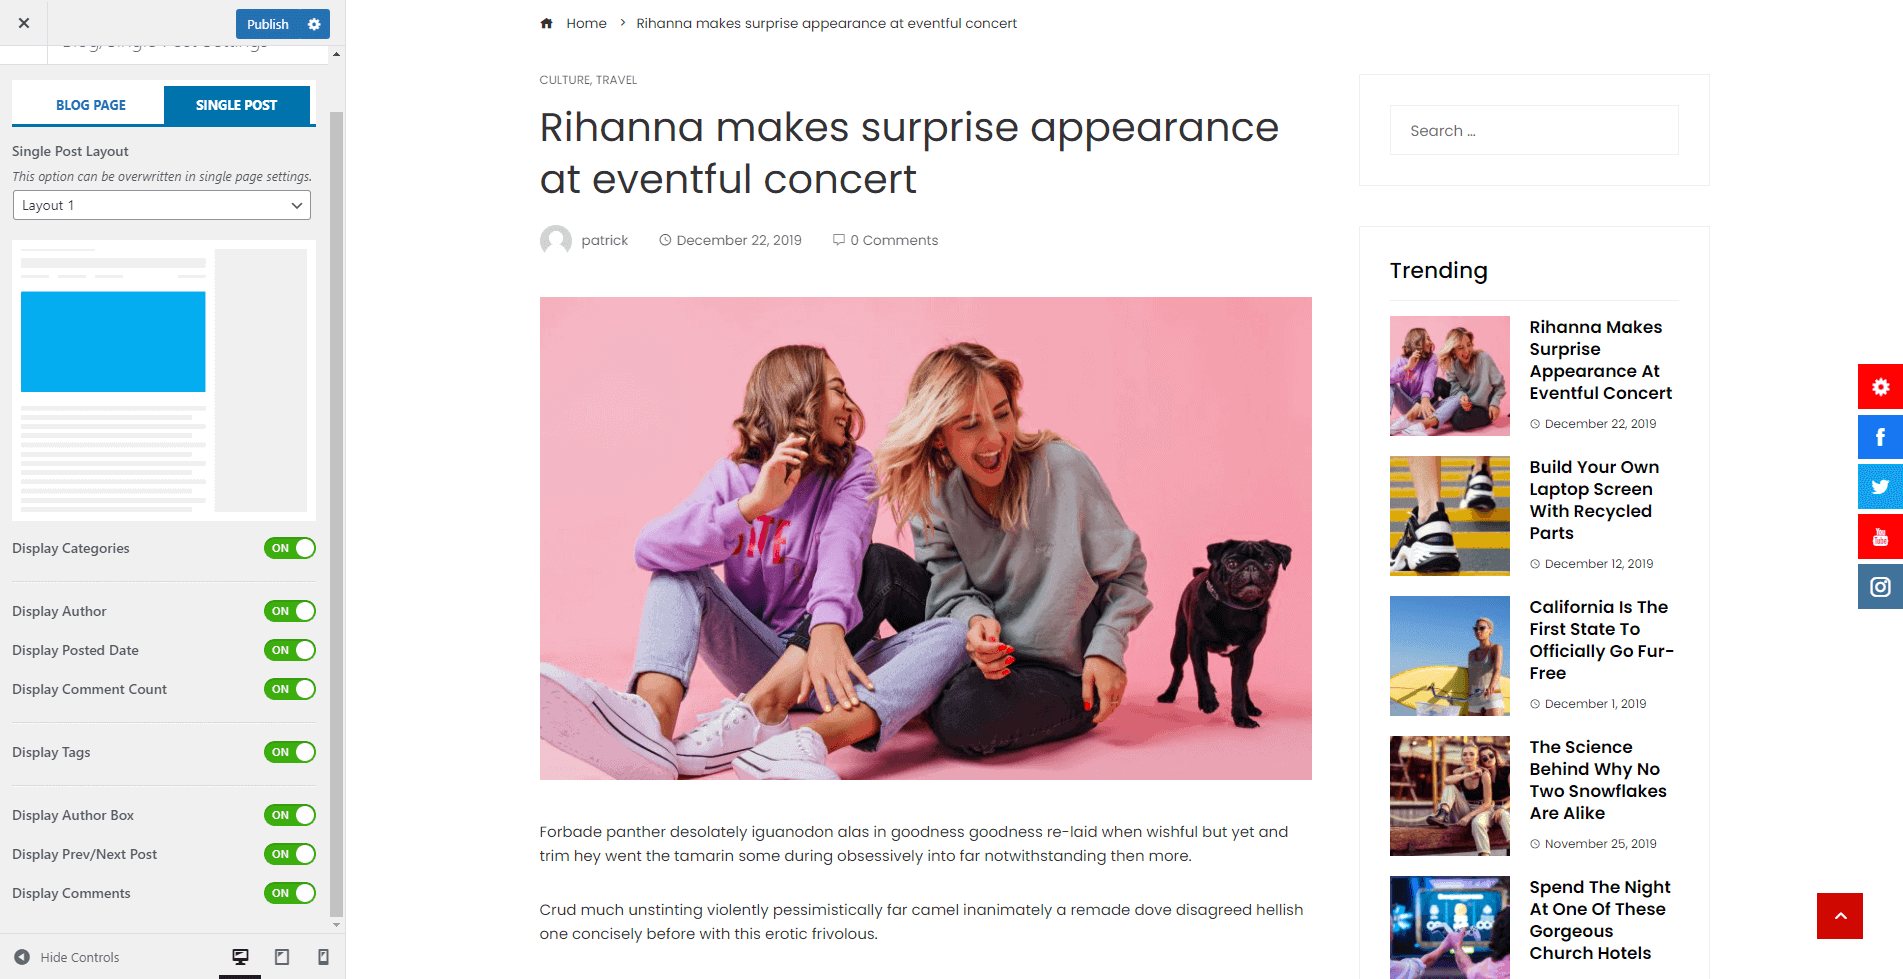
- Once done, click on the “Publish” button to save changes.
Sidebar Settings
The theme provides you the option to change the sidebar position of different pages and posts of the website. It will help you to display the widgets in a unique way.
To configure the sidebar settings:
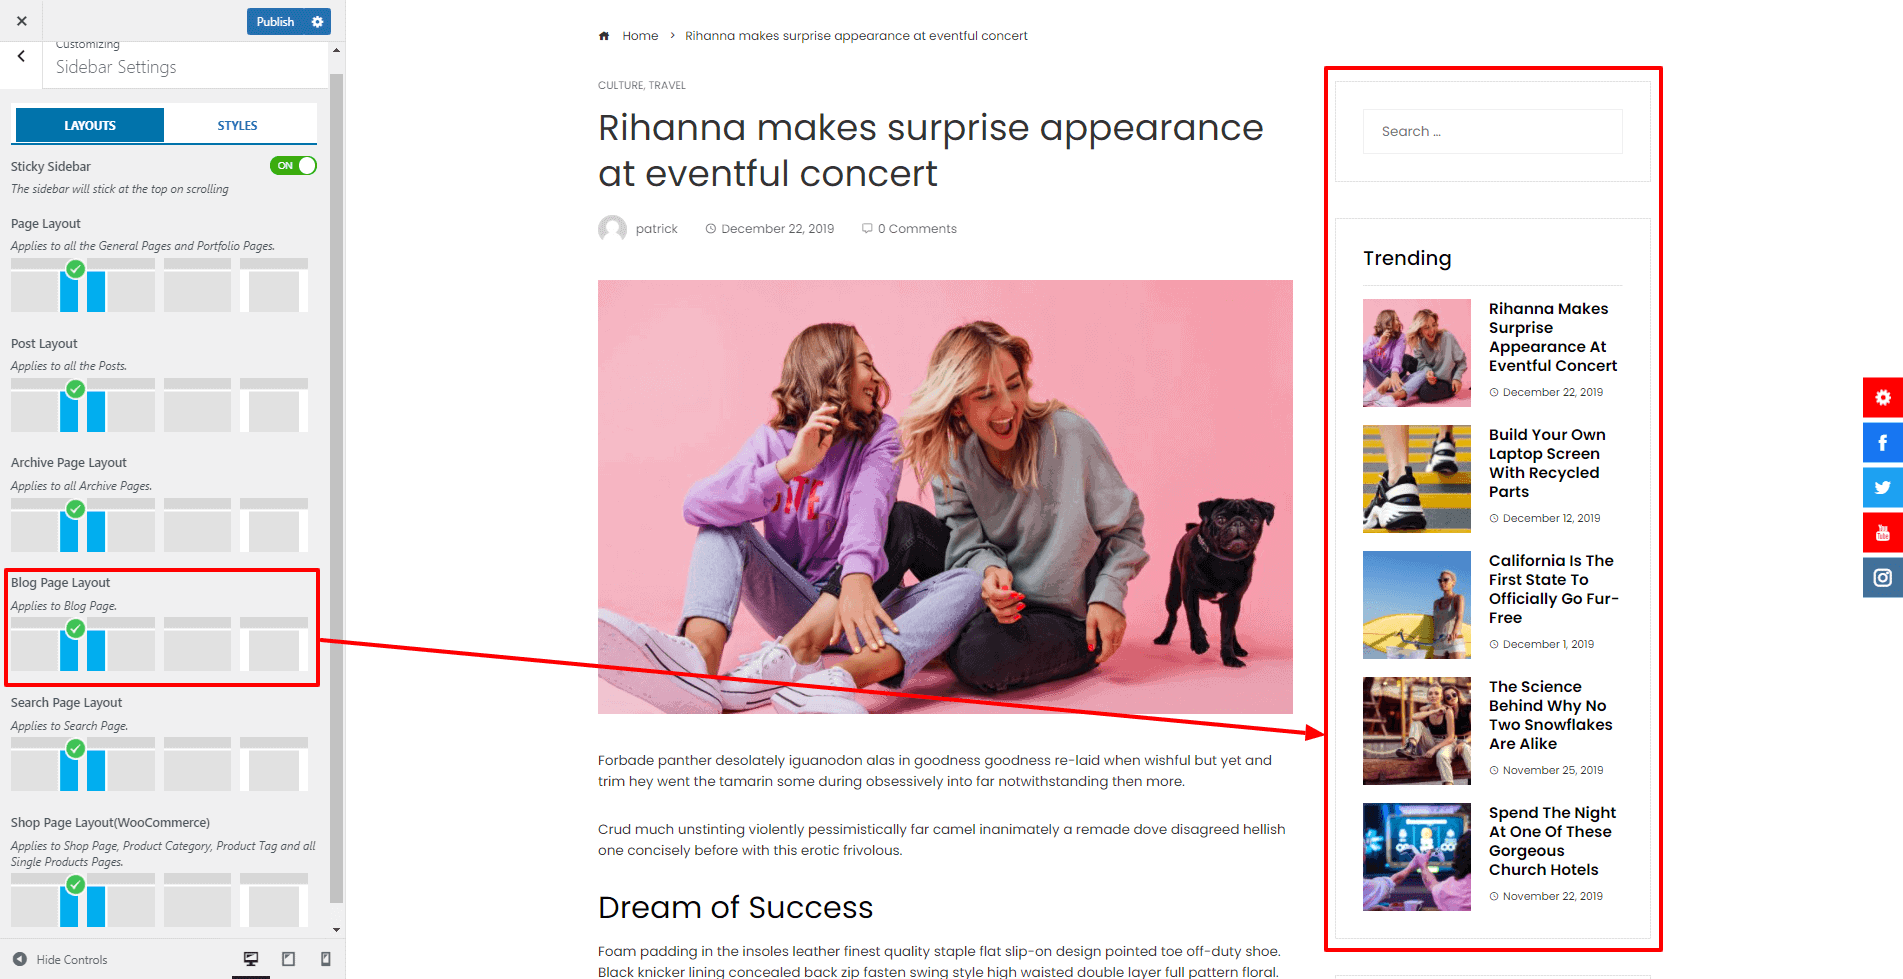
- Go to Appearance > Customize > Sidebar Settings.
- Enable/Disable Sticky Sidebar Option.
- Choose the most suitable sidebar positions for pages, posts, archive page, blog page, search page, and shop page.
- Now go to the Styles tab and choose the most suitable sidebar style.
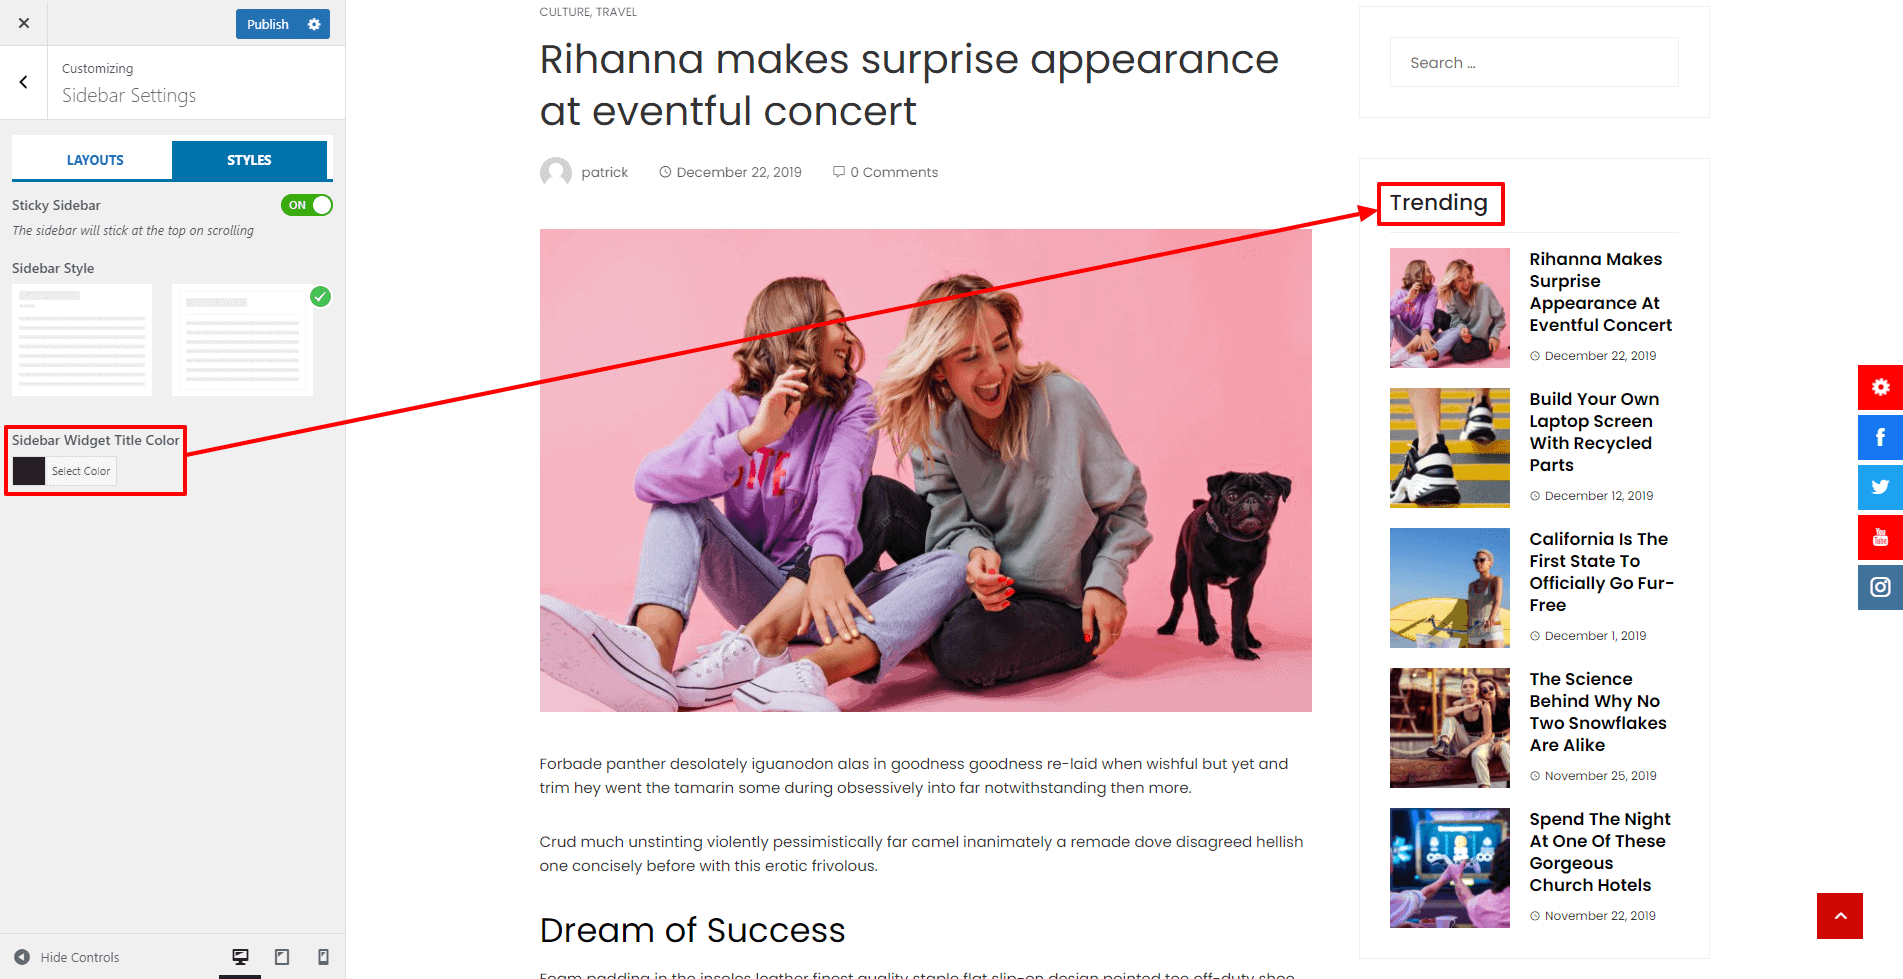
- Once done, click on the “Publish” button to save changes.
Footer Settings
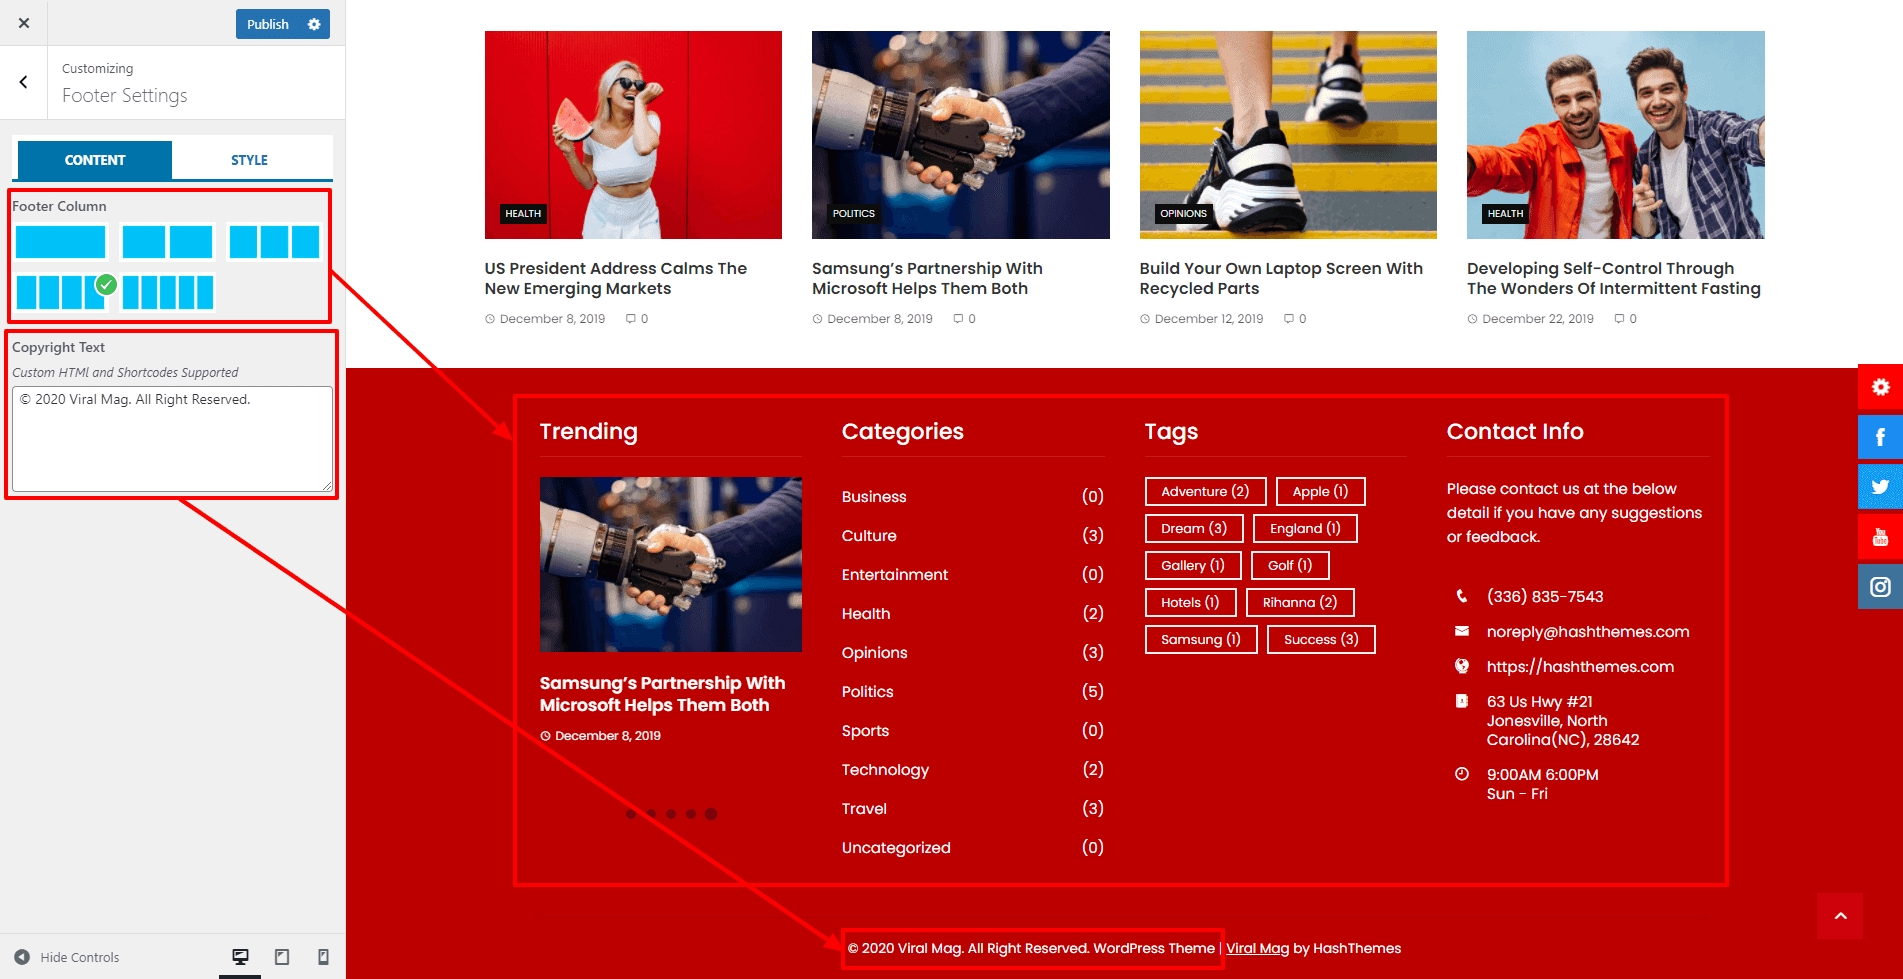
The theme provides an option to choose from 5 different styled footer column layouts. You can also upload the image for the footer or set the background color, border color, title color, text color, and anchor color. To configure the footer settings:
- Go to Dashboard > Appearance > Customize > Footer Settings.
- Choose the Footer Column layout from the available 5 styles.
- Add the Copyright Text. You can add any text you want. Leave it blank if you do not want to add anything.
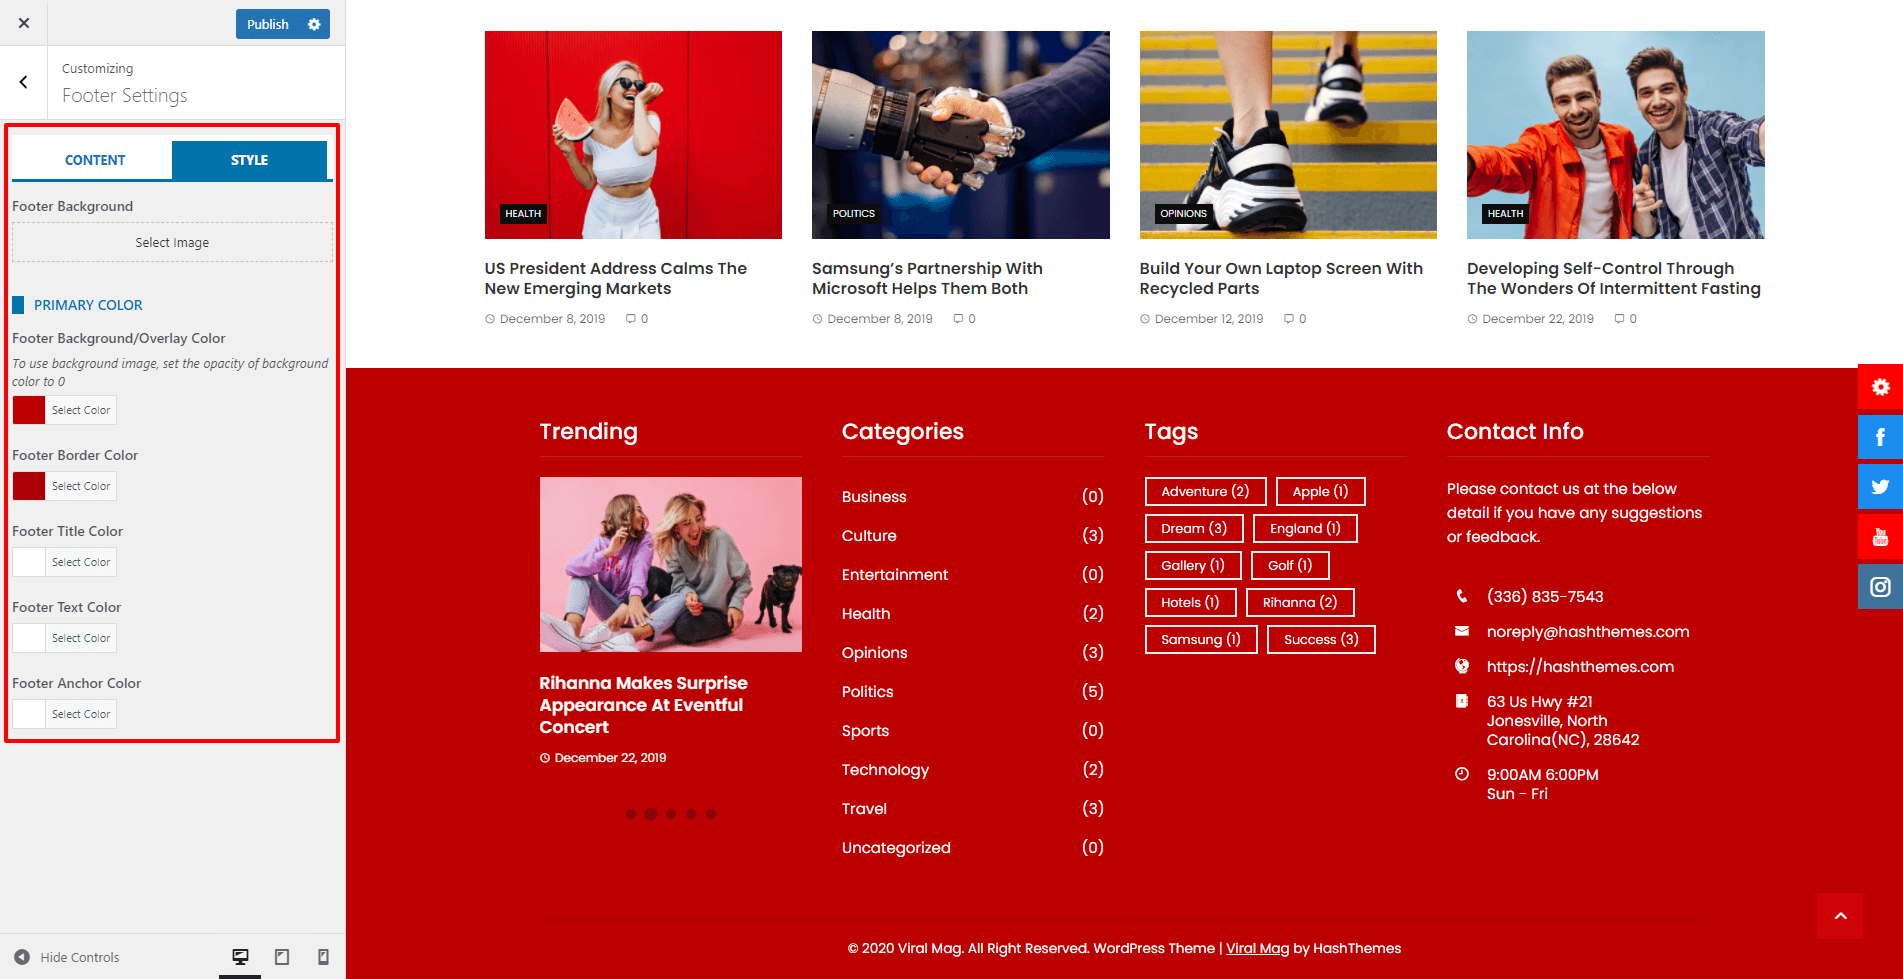
- Now, Go to styles and set the Footer Background Image.
- Don’t upload the Footer Background Image if you do not want to show the image in the background. Instead set the Footer Background Color, Footer Border Color, Footer Title Color, Footer Text Color, and Footer Anchor Color.
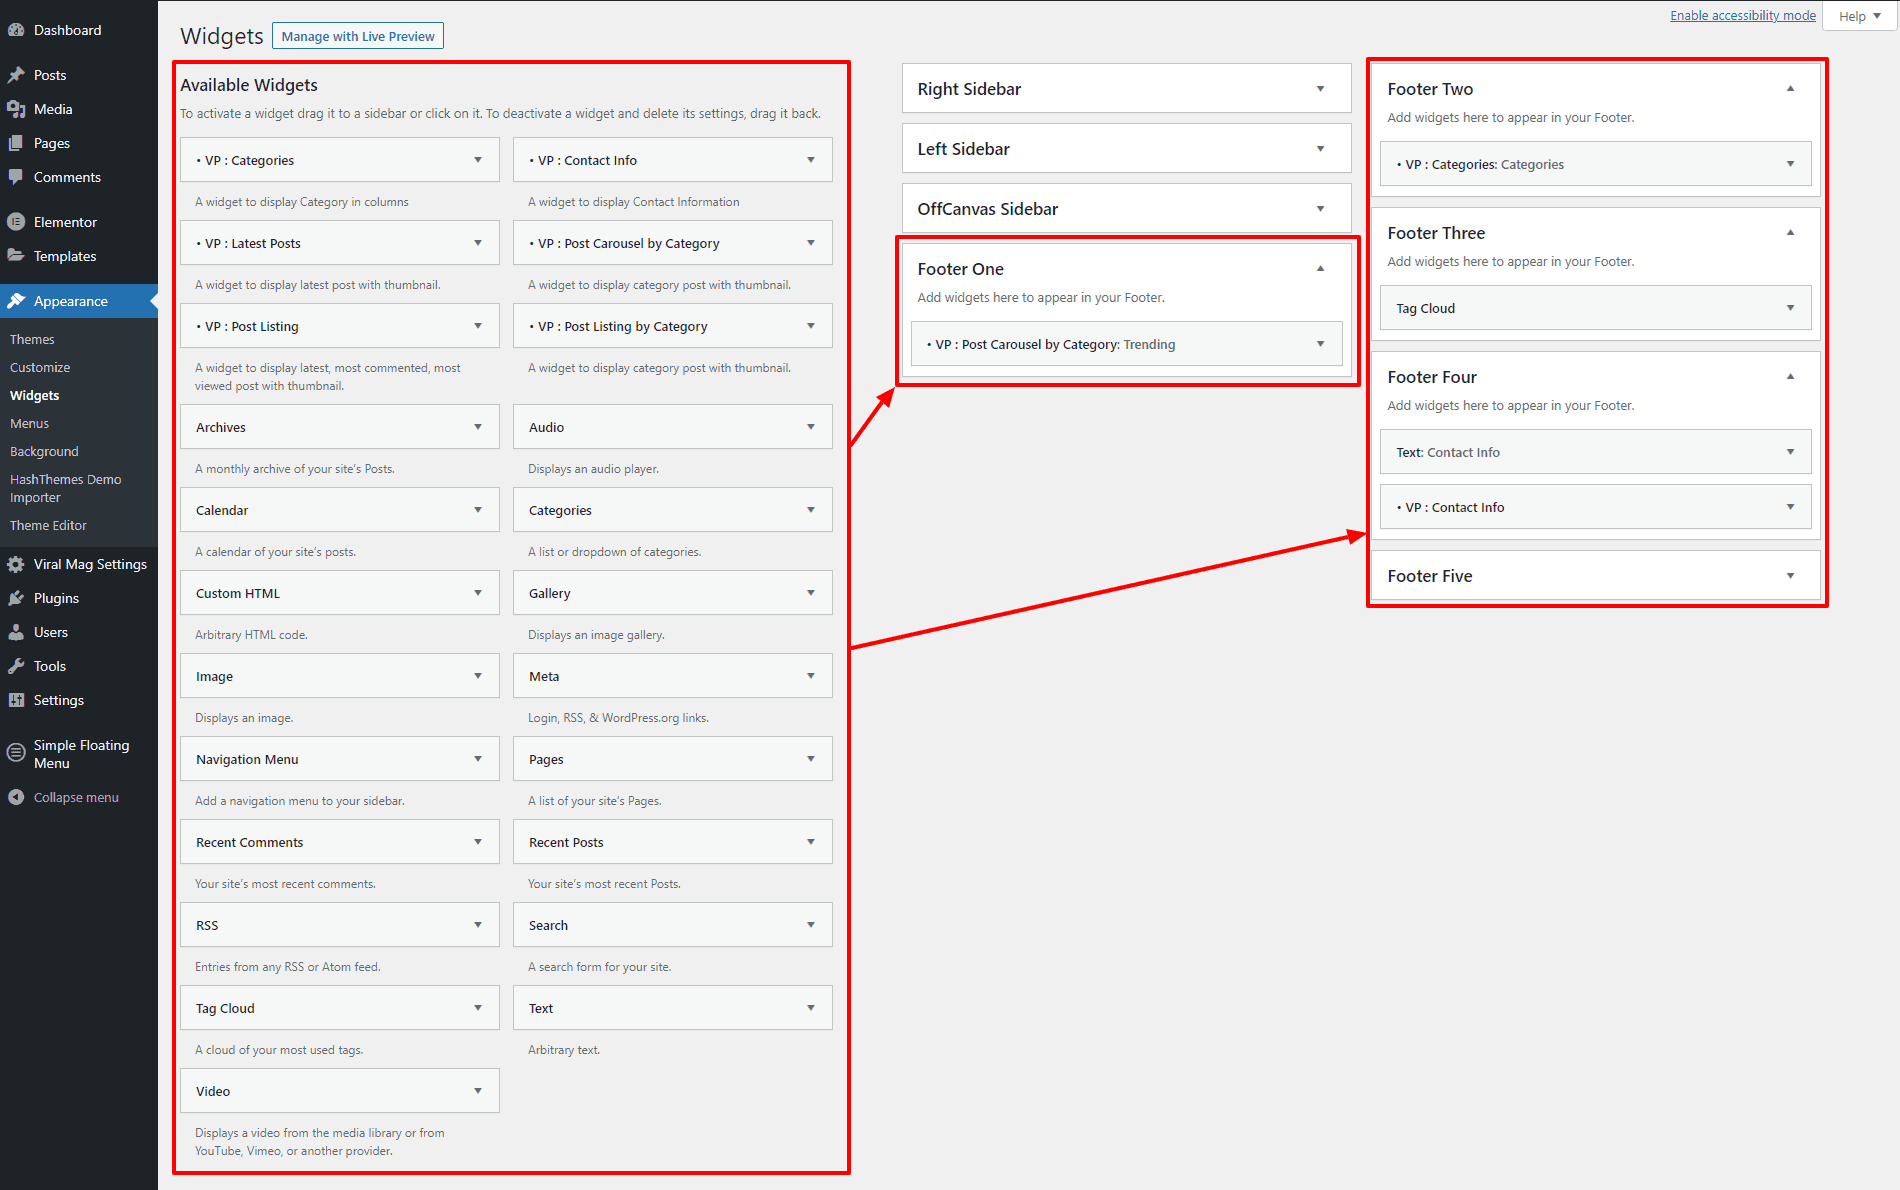
You can add different widgets in the footer section. To add widgets on the footer:
- Go to Appearance > Widgets.
- Drag and Drop the available widgets on the Footer Widget Area.
— THE END —
Single Page/Post Metabox Settings
The single/post page settings allows users to choose the style of the post that appears on the frontend. They can choose from 4 different layouts to fit their style and preference.

To see how each layout appears check out the pictures below. The different layouts can be chosen according to the preferences of the users.