
Tables can be a great way to display your data and information in an understandable and clean format. In the past, you needed to use a plugin or HTML codes to add tables to your WordPress page or post. However, after the release of WordPress version 5.0, you can easily create a table using Gutenberg itself.
Here, we will discuss how to add tables on WordPress pages or posts from Gutenberg, HTML codes, and by using a WordPress plugin. We will cover how to create advanced tables in WordPress with sorting and search features.
Add Tables on WordPress Using Block Editor
Since the release of WordPress version 5.0, creating tables has been super easy using the default WordPress block editor.
Create a new post or page on your WordPress website, or edit an existing one. Once you are inside the content editor, click on the (+) symbol to add a new block.
Now, locate the “Table” block. You can find it under the formatting section or simply type “Table” in the “Search for a block” bar.
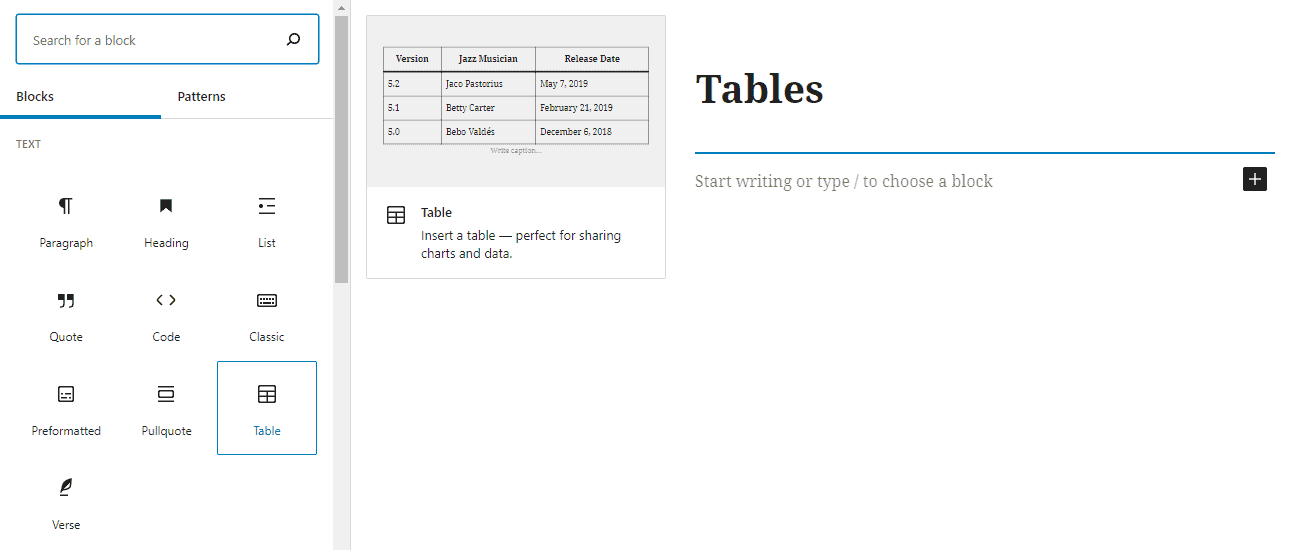
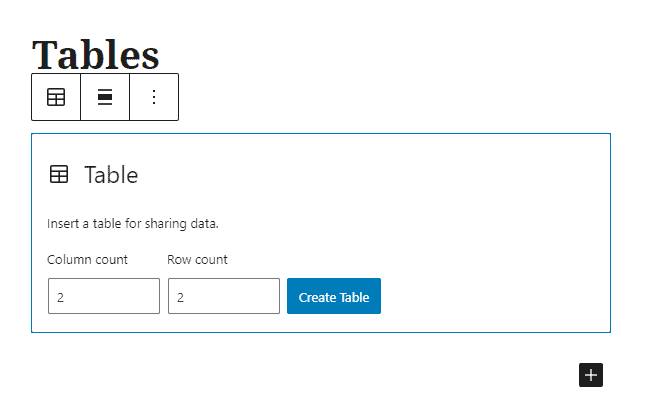
You will be prompted to choose how many columns and rows you want for the table.
Now your table will be set on the editor. You can go to the settings tab to choose the style of your table. Also, you can configure the width of the table cell and choose the header and footer section if you want.
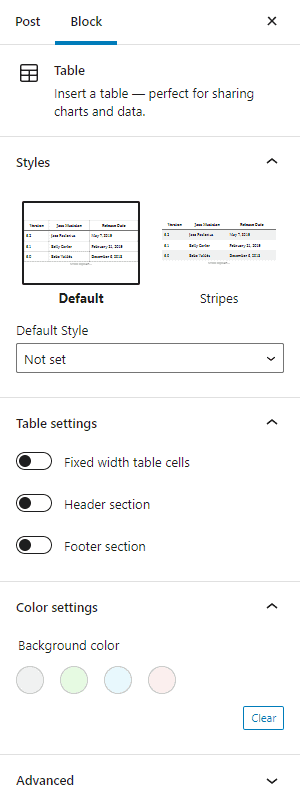
The editor has the option to choose the background color for your table.
Add Tables Using HTML Codes
Another way to add tables to your WordPress page or post is by using HTML codes. This method needs technical skills and a basic understanding of codings.
Create a new page or post on WordPress, add Custom HTML block.
Copy the codes below and paste them on the HTML block:
 <table style="text-align: center; height: 152px;" border="1″ cellspacing="0″ cellpadding="0″ width="390″>
 <tbody>
 <tr style="background-color: #e9e9e9; font-weight:bolder;"><td>Title 1 </td>
 <td>Title 2</td>
 <td>Title 3</td>
 <td>Title 4</td>
 </tr>
 <tr>
 <td>Detail One</td>
 <td>Detail Two</td>
 <td>Detail Three</td>
 <td>Detail Four</td>
 </tr>
 <tr>
 <td>Detail One A</td>
 <td>Detail Two A</td>
 <td>Detail Three A</td>
 <td>Detail Four A</td>
 </tr>
 </tbody>
 </table>
Now switch to the HTML option and change whatever information you want to show in the table.
Click preview to see the result. You can adjust the width and length by dragging the cursor as you normally do.
To add extra rows by using the following codes:
 <tr>
 <td>Detail One</td>
 <td>Detail Two</td>
 <td>Detail Three</td>
 <td>Detail Four</td>
 </tr>
Add Tables Using Online Table Generator
Another quick way to add tables to your WordPress page or post is from an online table generator. If you search on Google, you can find different table generator tools that allow you to add tables by just entering the dimensions of your requirement.
Here we will use INAR MEDIA to generate a table and add it to your WordPress pages or posts.
Visit INAR MEDIA and give the title for your table. Then, insert the number of rows and columns that you want for your table. Also, set the text alignment, and enable/disable the first row as table header or first column as table header, bordered table, striped table, 100% width, and scrollable table option. You can preview all the options that you enabled simultaneously on the HTML preview.

Now, copy the HTML output and create a new post or edit your existing post. Then paste the copied HTML codes and start entering the data in the table.
Adding Tables Using TablePress Plugin
The final way to add tables to your WordPress page or post is by using a WordPress plugin. You can find lots of WordPress plugins to add tables to your WordPress website.
Here, we will be using the TablePress plugin to show you how to add tables to your WordPress page or post.
The first thing you need to do in this method is installed and activate the TablePress plugin on your WordPress website.
Once the plugin is activated, you can see “TablePress” on the left menu of your WordPress dashboard.
Click on it and “Add New Table”.
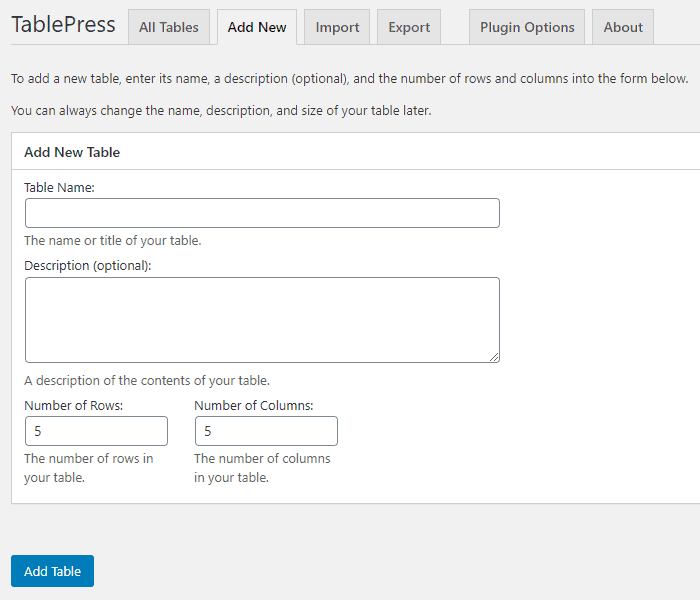
Now, give the name and description to your table and set the number of rows and columns.
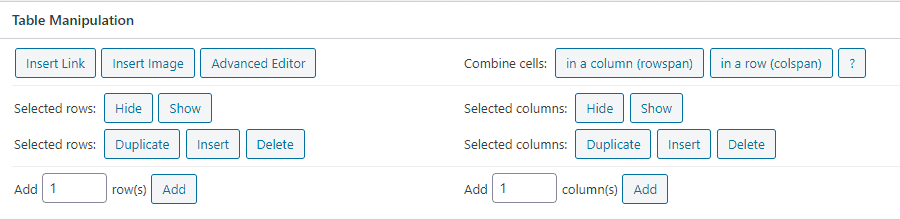
Once done, simply add the data that you want to the table. You can insert links, images, and advanced editors from table manipulation. Also, you can show, hide, duplicate, insert or delete any rows and columns.
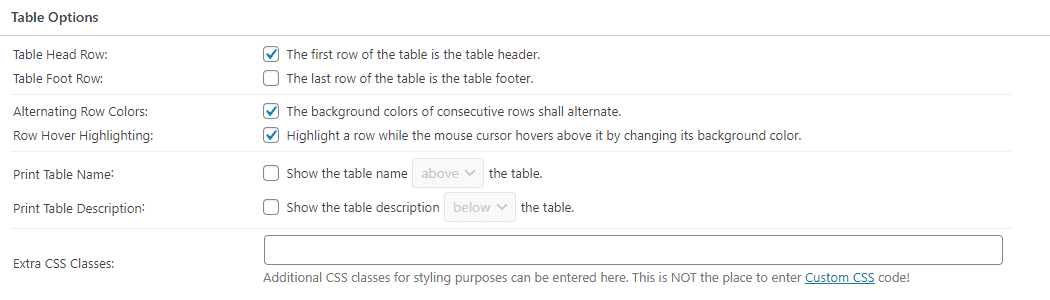
The plugin also has a table option to display the first row as the table header and the bottom row as the table footer. Also, you can enable alternate the row color and highlight row while using the mouse cursor. Besides, you can also show the table name and description above or below your table.
Once done, click on “Save Changes”. Then, copy the generated shortcode and paste it on the page or post where you want to display your table.
Adding Tables Using Posts Table Pro
Posts Table Pro is another easy way to add searchable & sortable tables to any WordPress page or post.
First of all, you’ll want to install and activate the Posts Table Pro plugin on your WordPress site.
Afterwards, an automatic setup wizard will guide you through the process of creating your first table. This step-by-step process makes it easy for you to create a sortable table that suits your needs.
To start, you’ll need to name your table, and select the post type that you want to display. Next, you’ll choose the posts or pages to include in the table.
Your table can feature posts, pages, and custom post types. For example, if you’re building a database or library and want to include documents, you can select the custom post type option and proceed accordingly.
Afterwards, you can choose which columns to display in what order. You can add new columns or reorder them as needed.
You can also add as many filters to your table as you like, which appear as dropdowns. Customize sorting options for your table, and, if you’re dealing with large amounts of data, enable lazy-loading to improve performance.
Finally, you have two options for displaying your table: use the ‘Post Table’ block in the Gutenberg editor, or copy the shortcode and paste it anywhere on your site.
To make sure that you have no confusion here is a tutorial video of the plugin: