
Looking for a smoother, more enjoyable shopping journey? Discover the convenience of our Mini Ajax Cart for WooCommerce – the perfect shopping companion.
Mini Ajax Cart for WooCommerce plugin on your e-commerce site provides a user-friendly, convenient, and engaging way for shoppers to interact with their cart throughout their shopping journey. By addressing common issue points and simplifying the process, it can increase the likelihood of users completing their purchases.
Table of Contents
What is a Mini Floating Cart?
A mini floating shopping cart is a frequently employed functionality in e-commerce websites, aimed at enhancing the user experience. It offers effortless accessibility for users to review the items they’ve chosen for purchase and enables them to make alterations to their selections while continuing to shop.
Advantages of Adding a Mini Floating Cart
Let’s look at some of the advantages of the mini floating cart which will allow you to know how to easily function this plugin after you install it on your site.
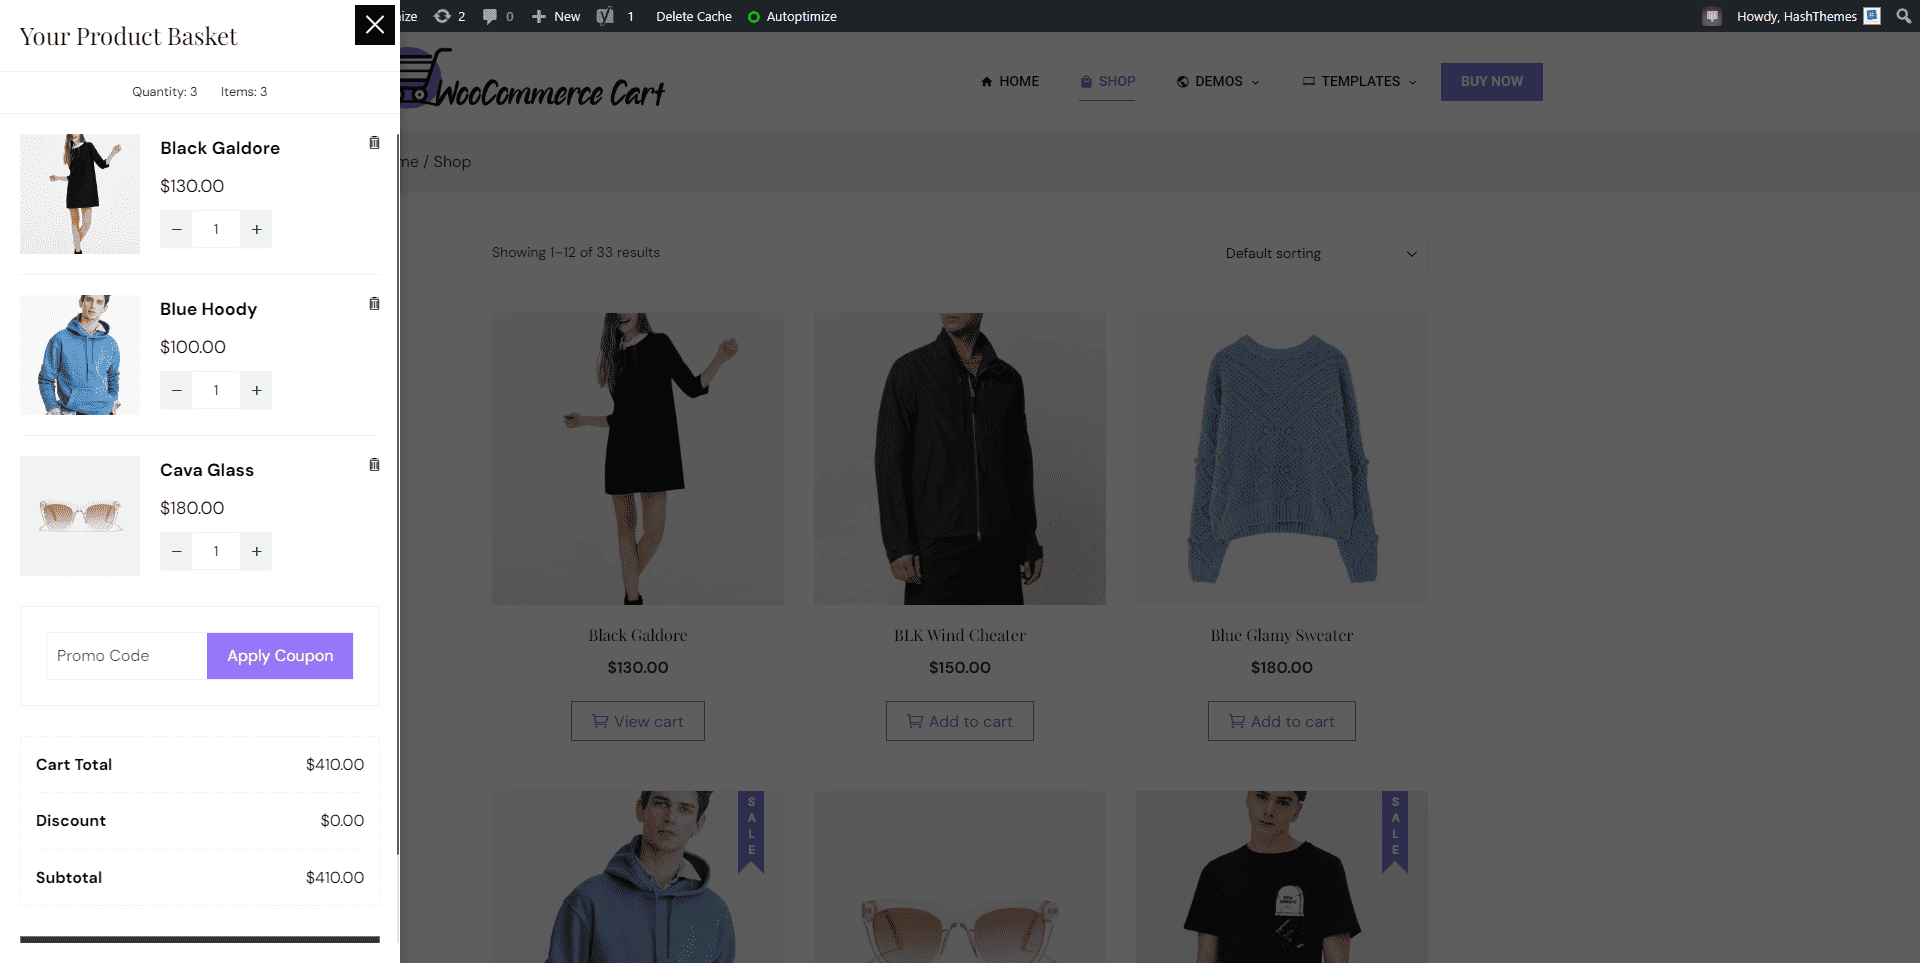
- Enables users to effortlessly see their selected items without the need to navigate to separate pages.
- Adding discount/promo codes directly in the cart simplifies the shopping process, helping users shop and save effortlessly.
- Modify product quantities and remove unwanted items directly from the convenient mini floating cart.
- You can create unlimited carts and display each of them on selective pages.
- Change button and icon size, button, and text colors to meet your brand image.
- Choose from many open/close cart icons.
Add a Mini Floating Cart on Your Online Store
Now that you’ve recognized the significance of integrating a mini floating cart into your e-commerce store to enhance the user experience, let’s outline a straightforward process for adding the plugin to your WordPress site.
If you’re already acquainted with WooCommerce, you can proceed with the installation of the Mini Ajax Cart for WooCommerce plugin. However, if you’re new to it, we recommend a comprehensive step-by-step guide for your understanding.
Step 1: Install WooCommerce Plugin
WooCommerce is an open-source e-commerce plugin that seamlessly integrates with WordPress, catering to the needs of online merchants ranging from small businesses to large enterprises. This widely acclaimed plugin is known for its diverse features, which enhance e-commerce websites in various ways.
If you haven’t already integrated WooCommerce into your website, the first step is to install this tool.
Step 2: Choose a Compatible Theme
Select a WooCommerce compatible WordPress theme. The Mini Ajax Cart for WooCommerce is compatible with almost all themes.
Step 3: Install a Mini Ajax Cart for WooCommerce Plugin
To enhance your cart’s functionality and user experience, consider installing a specialized WooCommerce mini cart plugin. Here, we’ll walk you through the steps to install a mini AJAX cart plugin.
In this tutorial, we are going to use the Mini Ajax Cart WooCommerce plugin as a cart reference.
Let’s guide you through the process of installing the plugin and making the necessary adjustments to get started. You can download the plugin directly by clicking on this link.
- Go to your WordPress dashboard.
- Navigate to “Plugins” > “Add New.”
- Search for “Mini AJAX Cart”.
- Click “Install Now” and then activate the chosen plugin.

Now, that you have installed and activated the plugin to make the mini cart visible on your website:
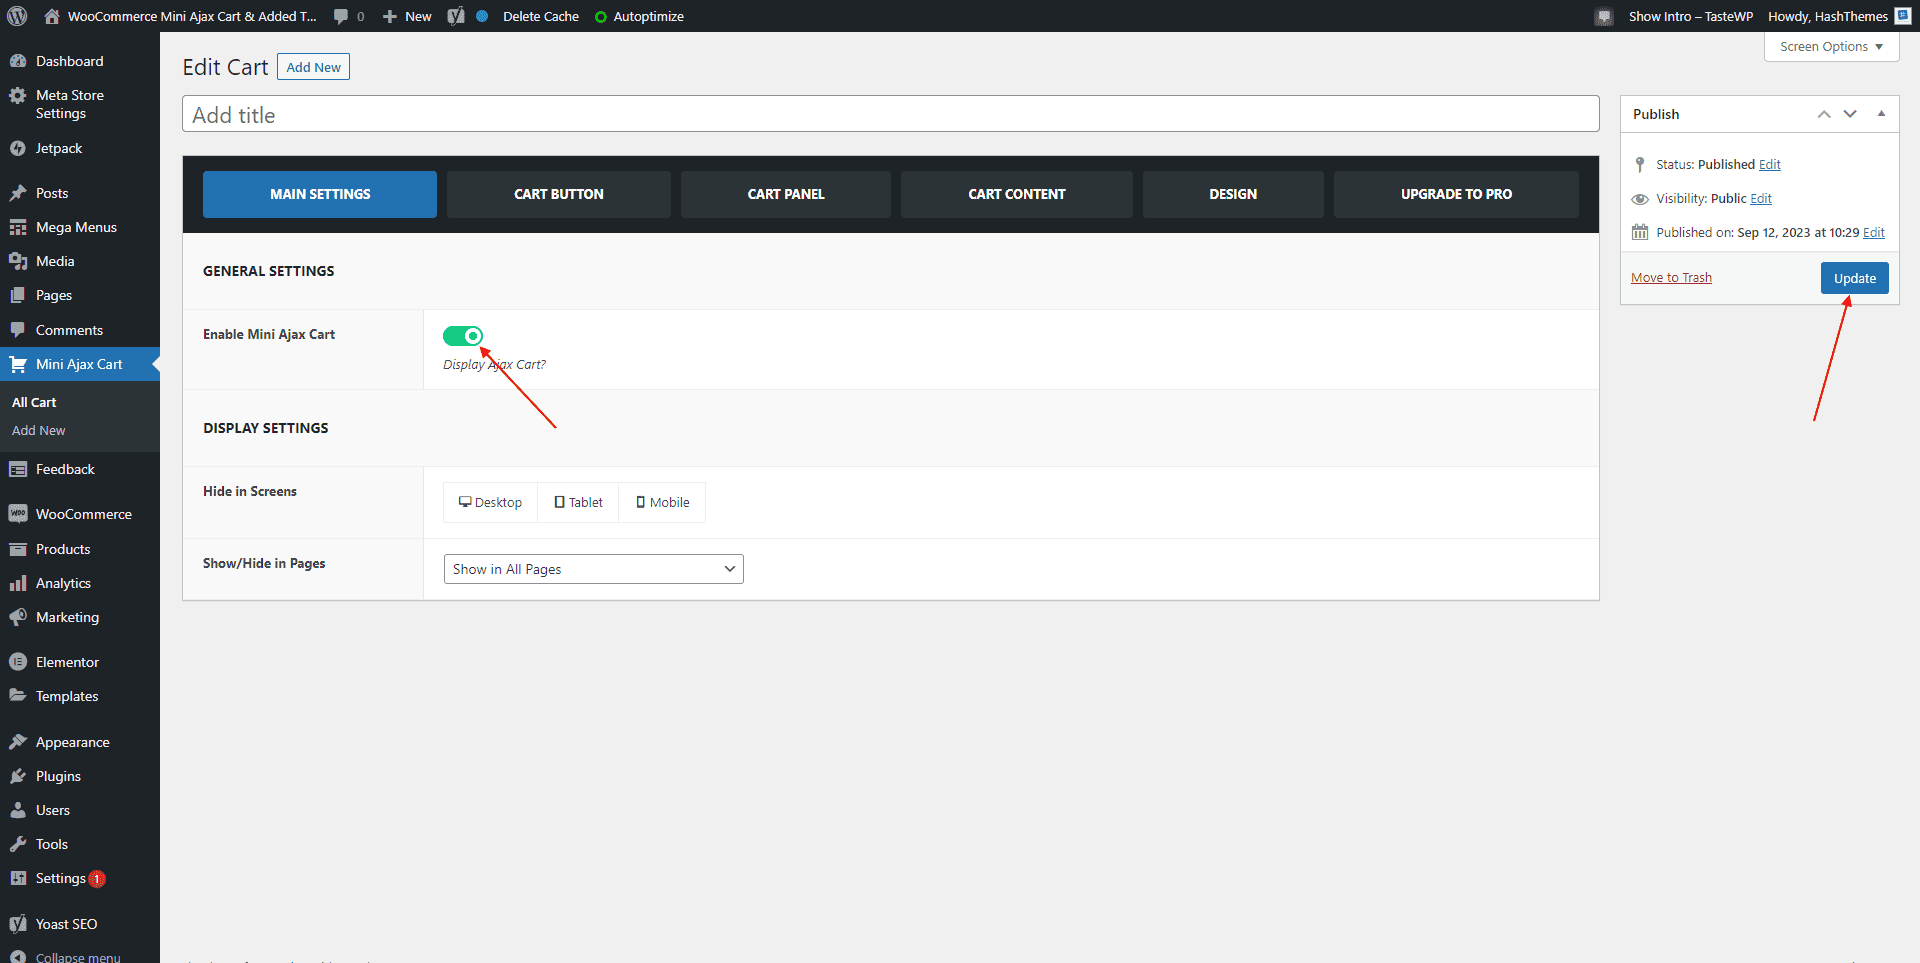
- Go to your WordPress dashboard
- Navigate to Mini Ajax Cart > Main Settings.
- Add Cart Title
- Toggle the “Enable mini cart” button on.
- Make sure you “Publish/Update” all the necessary changes you have made.
Need to display the cart only on the selected pages? No need to worry. You can selectively show or hide the cart on selective pages only. Configure the “Show/Hide in Page” option for it as required. Also display the cart either on all devices or on desktop, tablet, or mobile selectively.
Head to your e-commerce site and you can see that the mini floating cart is visible for the easy user experience.
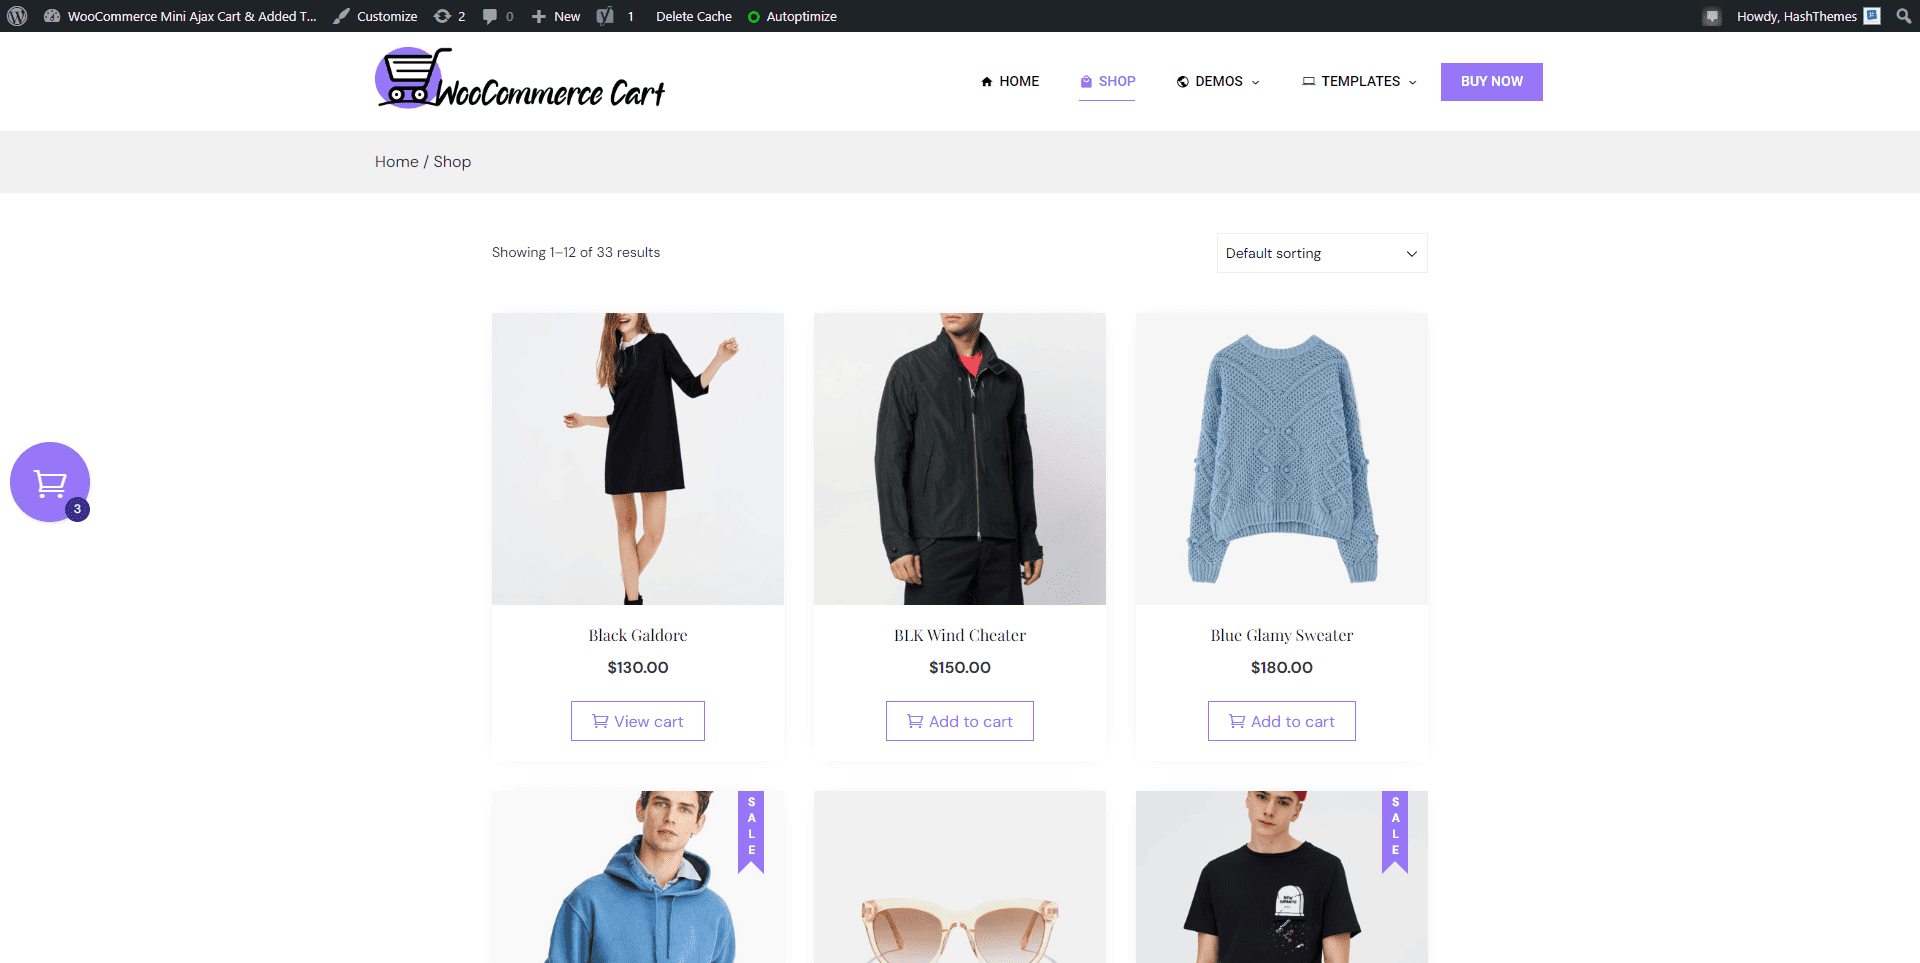
Now, users can easily see and modify the cart items added to the cart from any page without needing to navigate to the Shop page.
Step 4: Configure the Mini Cart
The next step is to configure the mini cart plugin. After you have installed and activated the mini cart plugin, you can configure the desired cart behavior. Let’s have a brief on what alterations you can make to each of the sections.
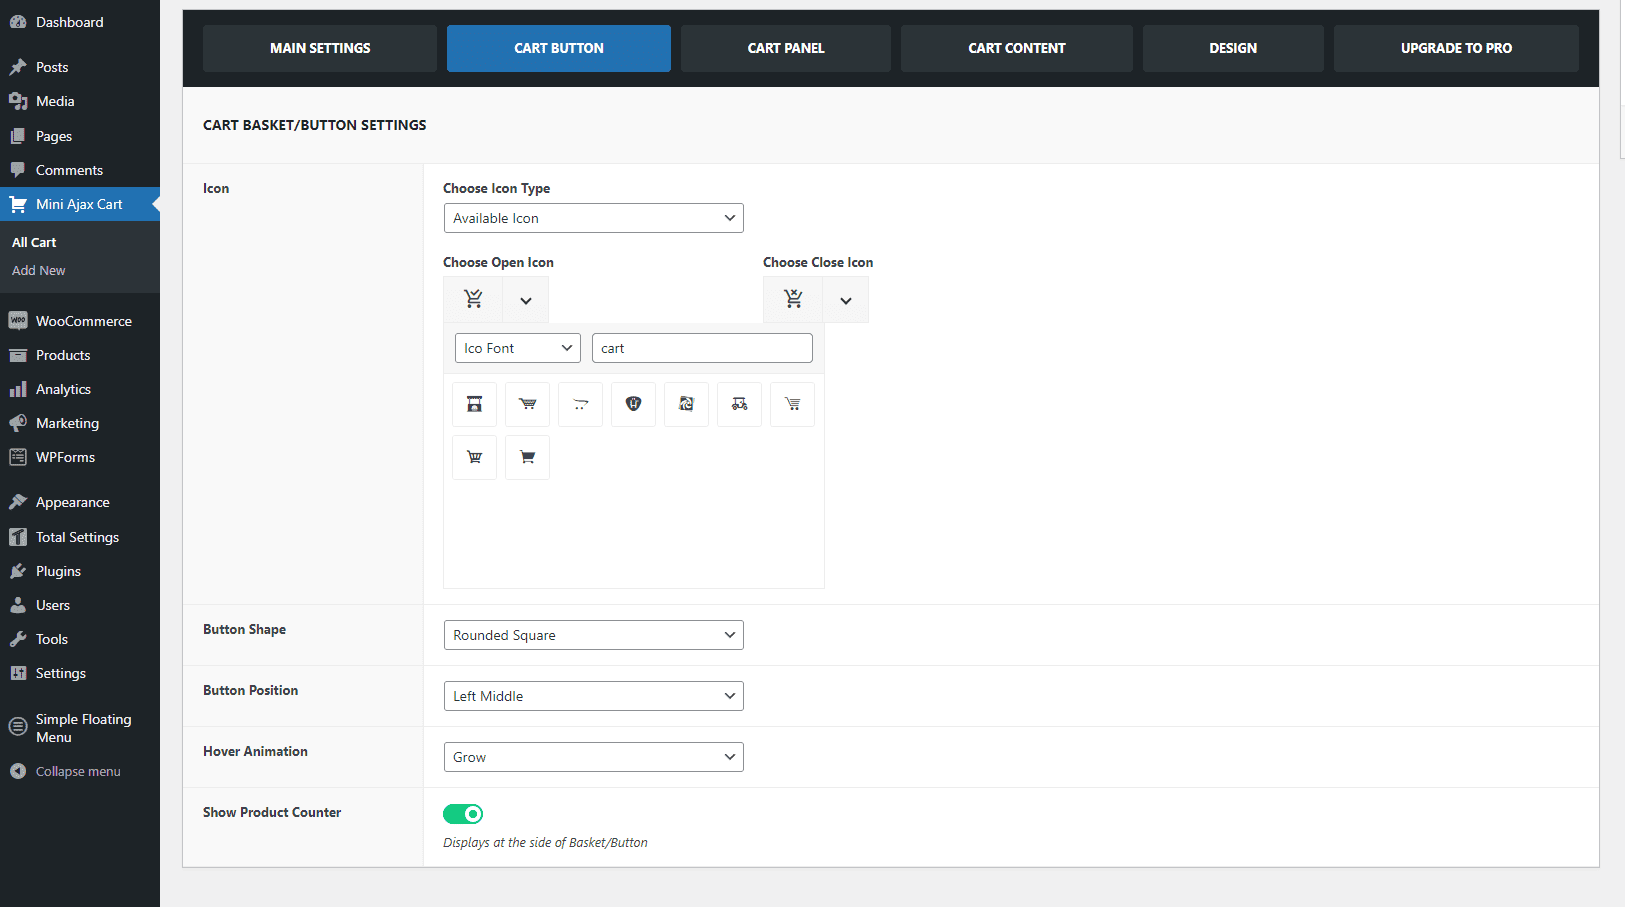
i) Cart Basket/ Button Settings
This section enables you to personalize the appearance of the shopping cart button on your e-commerce website.
- In the icon options, you have the freedom to pick from a range of cart icons to feature on your website.
- Furthermore, apart from the cart design, you can also specify the shape you prefer for your cart icon.
- When it comes to button placement, you have the ability to position the cart in your preferred location. Keep in mind, though, that for the Mini Ajax Cart, you only have two available options: “Left Middle” and “Right Middle” to place your button.
- Lastly, you can choose the animation of the cart when you hover around it. The available options that you have are: Grow, Shrink, and Pulse.
Note: Should you desire more advanced customization options, consider upgrading to the pro version for enhanced settings.
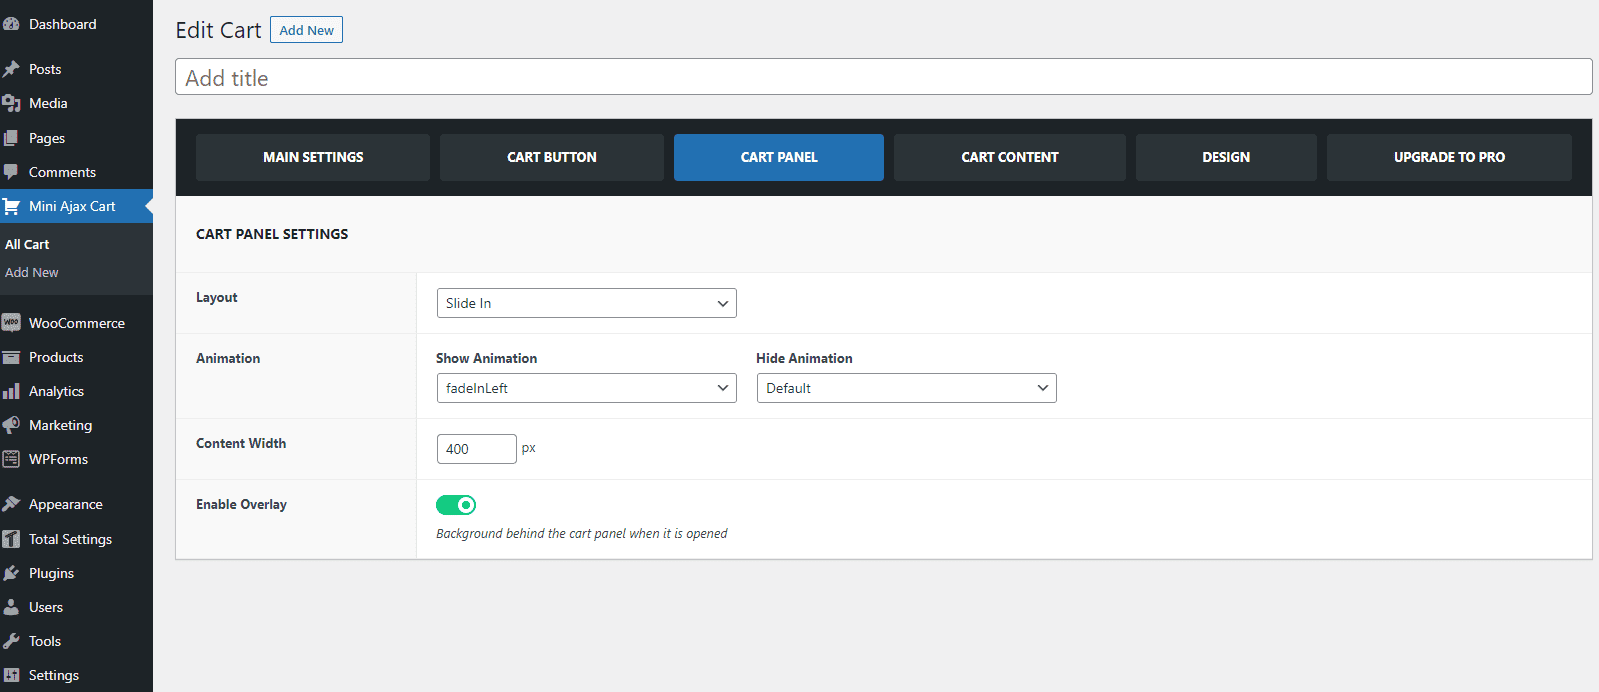
ii) Cart Panel
Within this settings section, you can make the following changes:
- You have the ability to choose animations when you open and close the Mini Ajax Cart.
- Head over to the Animation option and select and view the animation that you think you like the most.
- Additionally, you can pick the content width to determine how much space the cart panel will occupy on your website.
iii) Cart Content
In this section, you can make changes in the Header, Cart products, Coupon, and Button fields of the Mini Ajax Floating Cart.
- In the header section, you can edit the header title text and select the available icon.
- Whether you prefer to display your cart contents in a list or a grid format, you have the flexibility to adjust the product layout to your liking in the Cart Products settings.
- Pay attention to the discount coupon fields, as they play a crucial role when you want to offer enticing deals to your valued customers. Customers can easily input a promo code to receive items at a reduced price. If you don’t need this feature, you can simply switch off the Enable Coupon Field.
- In the button configuration section of the settings, you have the liberty to include the buttons that are essential for presentation. You can easily enable/disable the buttons you wish to display by toggling them on/off.
In the above video tutorial, you can see what changes you can make in the cart content section.
Step 5: Customize the Appearance
Most of the mini floating cart plugins allow some degree of customization in terms of colors, styles, and layout. Let’s see further in detail what customizations you can make.
Design
This section allows you to alter the cart basket colors. Choosing the colors and styles that resonate with your brand and company products helps create your own brand image.
You have the option to modify typography in various ways. You can select from a diverse range of typefaces and also pick colors that align with your design. You can in addition tweak the letter spacing, font size, and line height.
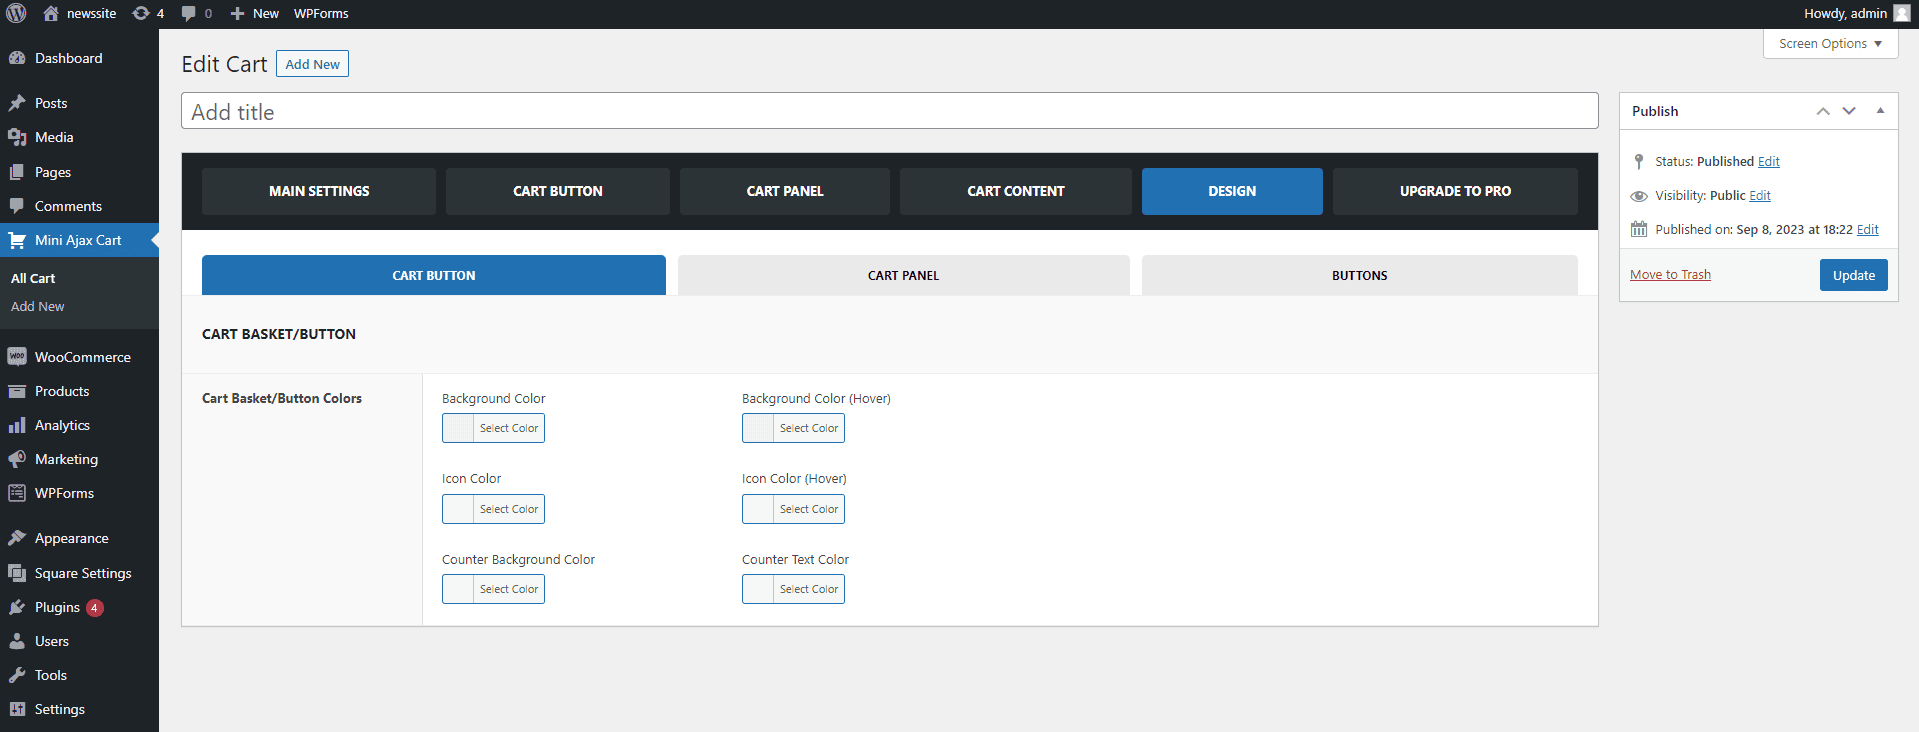
Furthermore, you have the flexibility to select color schemes for various elements, such as Button Typography, Coupon Button, Continue Shopping Button, Cart/Checkout Button, and Remove Product Button in the Grid Layout.
Step 6: Test the Mini Cart
Prior to launching your floating mini cart on your live website, it’s crucial to perform a thorough quality check. Verify that everything functions flawlessly as anticipated: add and remove products, adjust quantities, and confirm that the add to cart button is responsive and fully operational.
By following these steps and using the right combination of WooCommerce, a compatible theme, and a mini cart plugin, you can easily add an AJAX mini cart to your WordPress e-commerce website without the need for coding.
Unlock Premium Features
The free version has the basic features required to deploy the mini floating cart on your site. But it is always a better decision to upgrade to the Pro version to make full use of the plugin.
Let’s see some of the features of the Pro version:
- 15+ ready-made templates for easy import
- Ajax checkout option on the cart panel
- 3 different cart panel layouts: Slide In, Floating, Popup
- Additional elements for cart customization: Header, Cart Products, Coupon, Shipping Bar, Buttons, Suggested Items
- Customizable icons for the cart basket/button
- 11 different cart button shapes
- Various cart button animations, including hover and idle state animations
- Cart panel animations and entrance/exit animations
- Customizable cart button positions
- Elementor compatibility with 15+ Ajax Cart elements
- Import/export settings between carts
- Trigger cart panel from different website elements using class names
- Option to hide cart basket when the cart is empty
- Open cart panel when a product is added to the cart
- Show/hide and customize a fancy scrollbar
- Display active coupon codes and coupon form
- Configure grid layout columns for cart items
- Remove all items from the cart with a single button
- Customize icons and text when the cart is empty
- Glass Morphism background for cart button and cart panel
- Custom CSS option for further styling
The Mini Ajax floating cart has minimal features and you can keep using it if you are satisfied with it. However, if you need more features, you can upgrade to the premium version to make the best use of this plugin.
So, Why not upgrade it to take your shopping cart to the next level? Click the below button to view the demos and upgrade to the premium version.