
Are you seeing a “Failed to Load Resource” Error in WordPress or in your browser’s inspection tool? This error generally occurs when a resource of the website is missing or fails to load. It can be anything like an image or other media files, JavaScript, or CSS stylesheet. You may think this error is harmless but it can cause your website to misbehave or not function properly. So, if you are serious about your site, you need to resolve it as soon as you find it.
Why Failed to Load Resource Error Occurs on your Website?
Failed to Load Resource Error is caused when your website is unable to load a file while generating the page. The file can be anything such as images, script, stylesheet, and more. These files are loaded to the user’s browser during the page load.
So, if the browser is unable to load a specific file then, it will go on to display your web page without that file and will place a notice of the error in the console tab for debugging. This can impact user experience in a negative way, just like slow page speed, and so it should be rectified as soon as possible. While there are several resources available on how to increase page speed in WordPress, in this brief guide, we will focus on the “Fix Failed To Load Resource” Error.
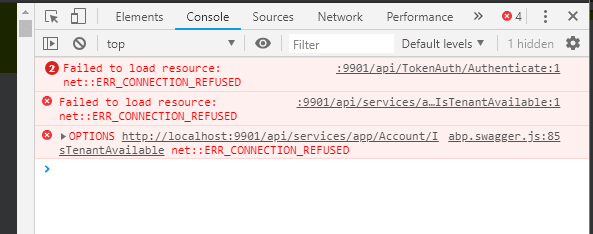
In most cases, you will see this error in your browser console while using the inspection tool.
Below are some examples how the error looks like:
Failed to load resource net::ERR_CONNECTION_REFUSED
Failed to load resource: the server responded with a status of 404 (Not Found)
Failed to load resource: the server responded with a status of 500 (Internal Server Error)
Failed to load resource net::ERR_NAME_NOT_RESOLVED
Failed to load resource net::ERR_BLOCKED_BY_CLIENTS
This won’t affect the loading of your website as the rest of the web page will continue to load. But you need to fix the error to avoid any unexpected issues that may occur due to the error.
Fixing “Failed to Load Resource” Error in WordPress
As we have discussed above, this error is mainly caused when your browser is unable to load the file mentioned on your website’s code.
It can be caused due to various reasons. We will try to look at them and eliminate them.
Replace the Missing Resource:
This is the most common solution to fix the error. If the failed to load resource is an image of your blog post or page, try looking for it in the media library.
If you can see the missing image, try to add it again by editing the post or page. If you cannot see the missing image, try to upload it again.
In some cases, you may see broken images in the media library instead of the images. That time, you will need to fix the file permission.
Replace Theme or Plugin File:
Another common cause for “Failed to Load Resource” can be the theme and plugin compatibility. In that case, you will need to reinstall the theme or plugin that is causing the error.
Firstly, deactivate your current WordPress theme by visiting the Appearance >> Themes page. If you have another theme installed on your WordPress website, just go ahead and activate it. It will deactivate your current WordPress theme. If not, you need to activate a default WordPress or install a new WordPress theme.
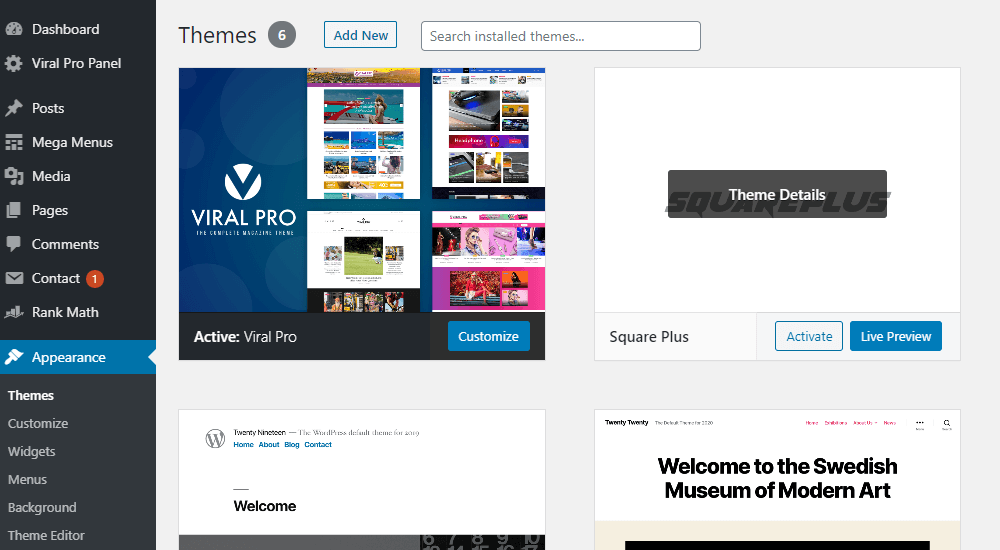
Once another WordPress theme is activated, you can visit your website to check whether the error is resolved or not.
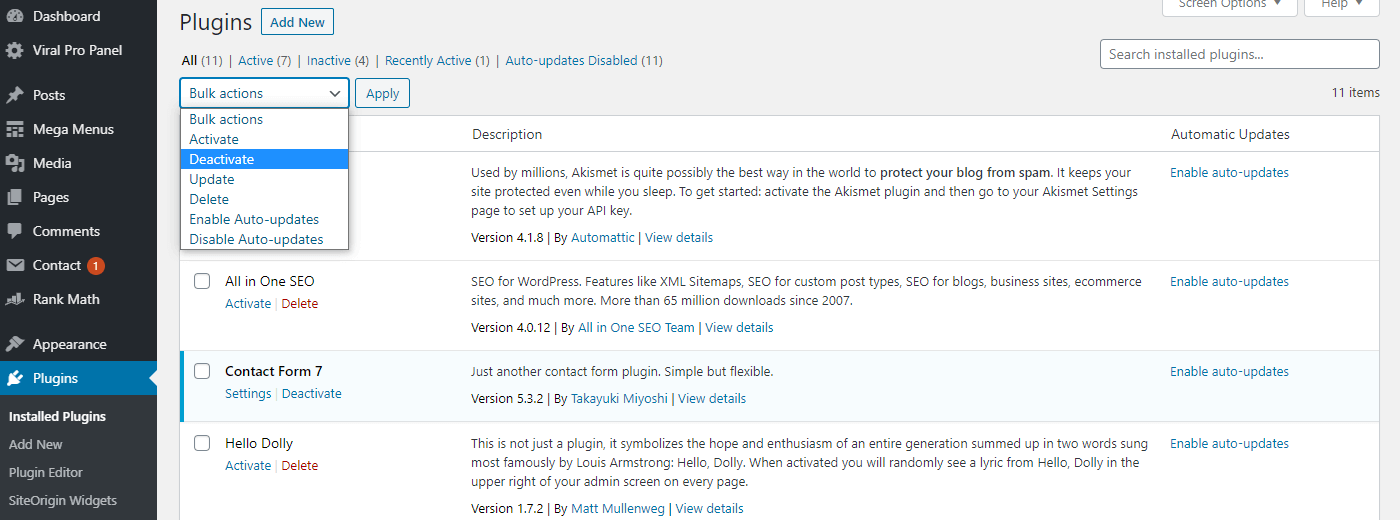
If the missing resource is a plugin file, you will need to delete the plugin and reinstall it again.
Change the Default WordPress URL
WordPress treats www and non-www URLs as two different web addresses. So, if you have installed an SSL certificate, it switches your website from HTTP to HTTPS and there will be changes to URLs. This way, the WordPress system, and plugins might be confused about whether to fetch the resource from old HTTP or new HTTPS, and the “Failed to Load Resource” error is caused.
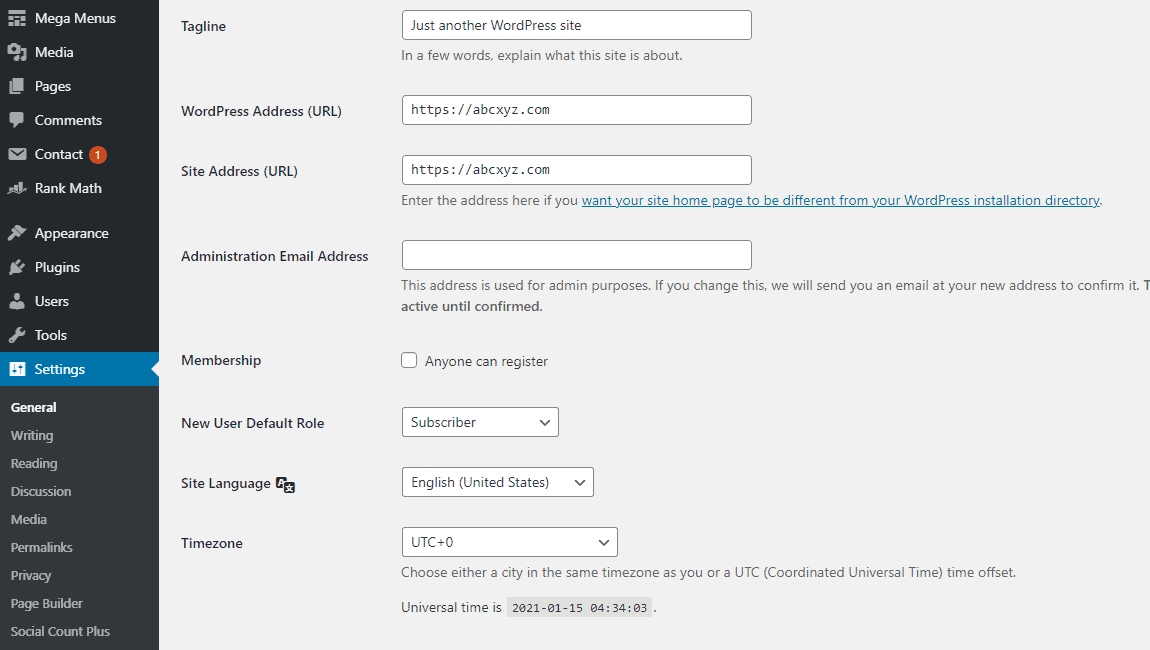
To resolve that, go to Settings >> General page and look for the WordPress Address and Site Address option. Make sure both the URL are correct and the same. Once done, click on the “Save Changes” button to save the editing.