
One of the great features of WordPress is that it allows you to schedule the date and time to publish your blog posts. It means you can set the plan to make your post live even when you are not there.
But when you run a website where you need to schedule lots of posts per day like an online newspaper, scheduling them one by one can be a real-time consumer. In that circumstance, using a bulk scheduling plugin can be a handy option.
In this article, we will discuss how easily you can bulk schedule WordPress posts by using a WordPress plugin:
Bulk Schedule Posts in WordPress
Step 1:
The first thing you need to do is install and activate Auto Post Scheduler plugin on your WordPress website.
Step 2:
Upon activation, go to Settings > Auto Post Scheduler to set up the bulk scheduling.
Click on “Enable Auto Post Scheduler” to run the plugin with the default option.

If you want to configure the option available on the plugin, we recommend to you the “Enable Auto Post Scheduler” only after the configuration.
Step 3:
Now, set the Auto Post Schedule time range between each post to be published.

By default, the time range will be 24 hrs. If you keep it unchanged, a post will be published everyday.
Step 4:
Next, there is the “Restart to Publish” option. Checking the box will reset the scheduler check time when the post is published manually.

Also, you can set the time delay to publish your post from “Start Scheduling Delay”. By default, it is set 0 seconds. It means your first schedule post will be published immediately after the scheduler is enabled.
Step 5:
Next, there are options to limit check the post types and categories. By default, the plugin will select the “Post” on the Limit check to these Post Types.
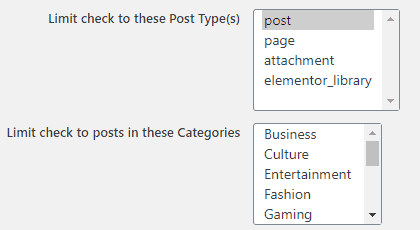
Similarly, you can select the category and author to limit check the category for schedule the posts.
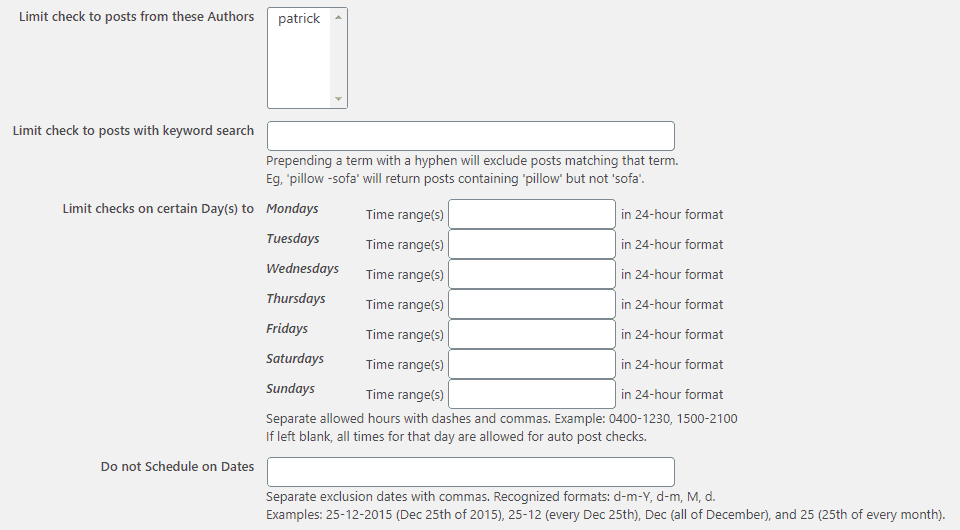
You can also limit check the post with keyword search and certain days in the time range.
Besides, you can choose the dates when you don’t want to schedule the posts.
Step 6:
After that, you can check the eligible post statuses for scheduled posting.

Step 7:
Below that you will have the option to recycle or republish your old posts. These settings are useful if you want to update your old posts and publish them with a new date.
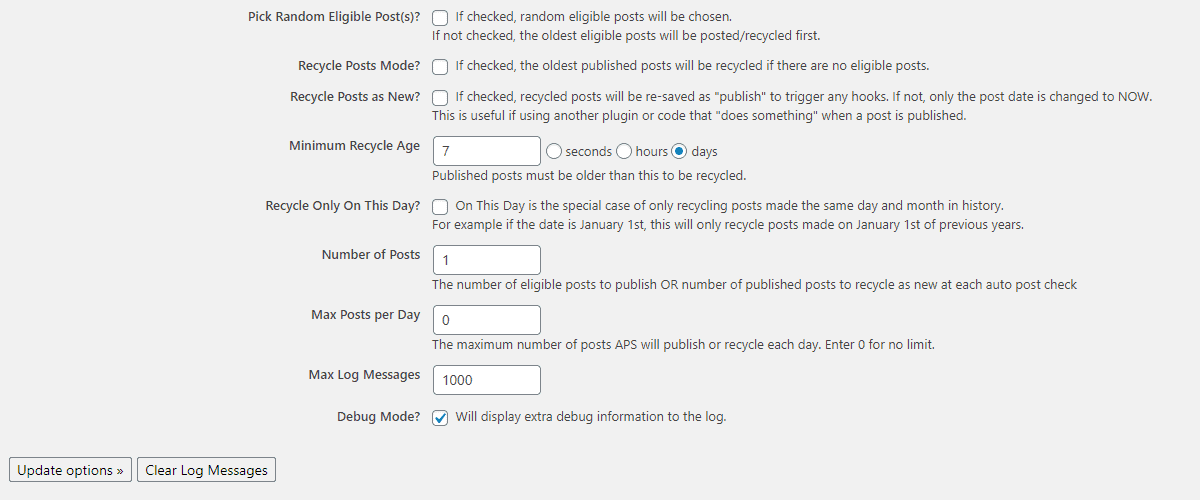
Once done, click on the “Update option” button to save the editing that you have made.
Then, scroll to the top and click on “Enable Auto Post Scheduler” to enable the bulk schedule posts on your WordPress website.