One of the popular ways to monetize your website and earn money online is by using Google AdSense. It allows you to automatically sell the advertisement space of your website and have a passive earning for your business.
In this article, we will show you how you can add Google Adsense to the WordPress website. Before going through the process to set up Google AdSense, let’s discuss what actually is Google Analytics and why should you consider adding it to your WordPress website.
Google AdSense – Introduction
Google AdSense is a Cost Per Click (CPC) network run by Google to allow webmasters to showcase the advertisement on the website. The advertisement can be a text, image, or video and will be displayed accordingly as per the browsing history of your audience. That means, the advertisement will differ from each of your visitors based on the history of their browser.
Google AdSense provides a hassle-free process to earn the money as you won’t have to deal with advertisers or worry about collecting money. Google administers will automatically maintain the relationship with the advertisers and collect the payment from them. Then, they will deduct their management fee and send the rest of the money to you.
Starting Up with Google AdSense
Now that, you have got the idea of Google AdSense. Let’s get started by creating the Google AdSense account.
To create the Google AdSense account, visit the Google AdSense website.
Here you will need to enter the URL of your website and the email address from which you want to register. Also, you can select the option to whether you want to be added to the mailing list for tips to run Google AdSense.
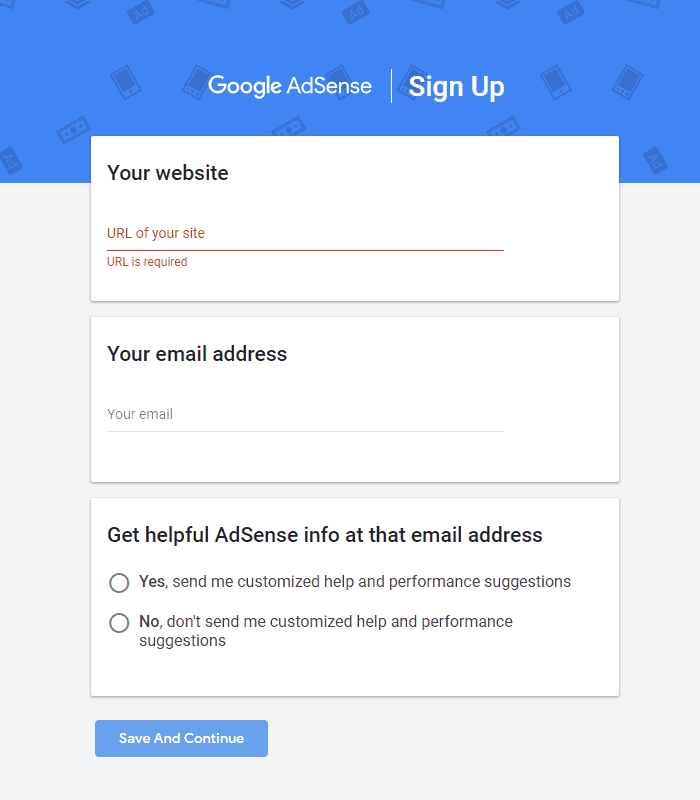
Choose the option of your choice and click on “Save and Continue” to proceed.
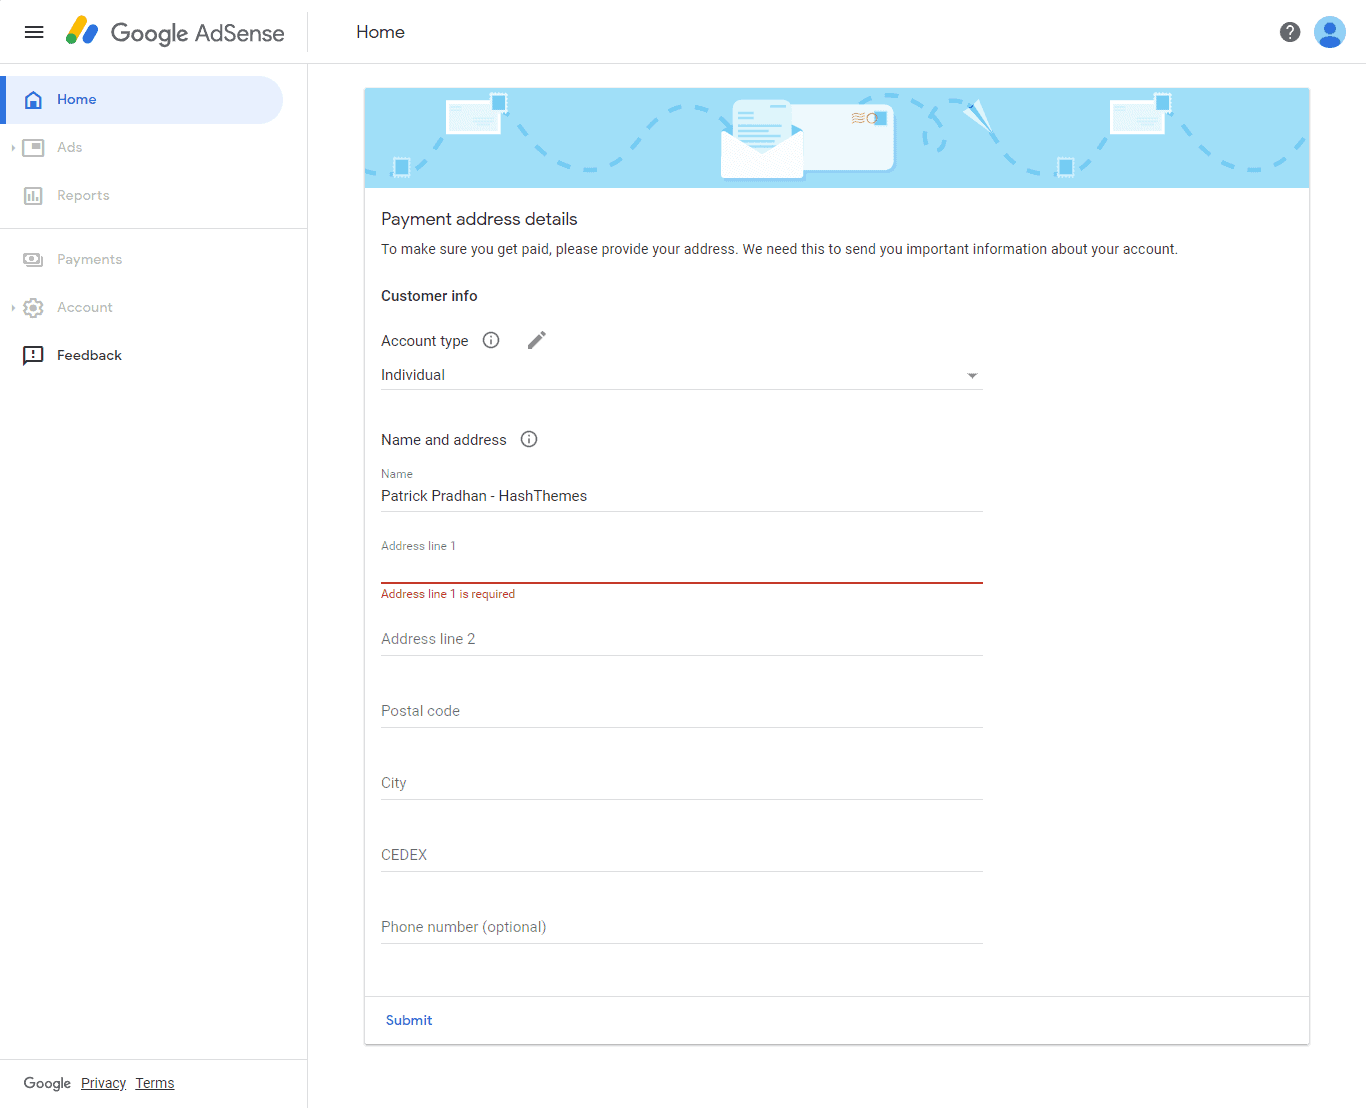
Next, you will need to choose your home country and check the terms and condition box to proceed.
Finally, click the Create Account button.
If you can see the Google AdSense homepage, it means you have created your Google AdSense account. After this, you will need to connect your WordPress website to Google AdSense.
To connect your website to Google AdSense, you will need to copy the HTML code available on the homepage to your site header.
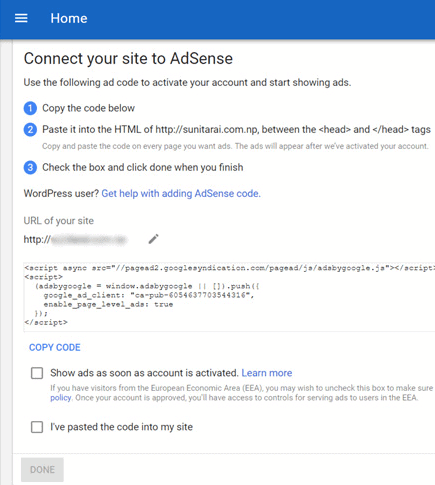
Establishing a Connection with AdSense and Verifying Your Website
To integrate your website with Google AdSense, follow these steps to incorporate the HTML code found in your AdSense account into your site’s header. You can manually add this code to your WordPress site or utilize the free Advanced Ads plugin, simplifying the process. The plugin offers dedicated AdSense options, allowing you to manage your AdSense ads without editing your theme files’ code.
Here’s a straightforward guide:
- Log in to your WordPress dashboard, navigate to Plugins, and select Add New.
- Enter Advanced Ads into the search bar in the top right corner and press Enter to initiate the search.
- Locate Advanced Ads in the search results and click the Install Now button.
- Activate the plugin.
- You should now see the new Advanced Ads item in your WordPress menu.
Once the plugin is activated:
- Go to Advanced Ads > Settings and click on the AdSense tab.
- Connect to your AdSense account using the “Connect to AdSense” button.
- Log in to your AdSense account and verify Advanced Ads.
- Enable the Auto Ads option for site verification—no additional coding is required.
Advanced Ads now incorporates the AdSense verification code into your website’s header.
With the code successfully added to your website’s header:
- Return to the Google AdSense page and select “I’ve pasted the code into my site.”
- Click the “Done” button.
You’ll receive a brief notification from Google AdSense that they are reviewing your website. Typically, approval occurs within a few days, but it may sometimes take a couple of weeks.
Creating Google AdSense Unit
Once your Google AdSense account is approved, you will get access to all the AdSense options. So, it’s time to create an AdSense unit.
To get started, click on the Ads menu and select overview. Now, you need to select the “By ad unit” and click on the “Display ads” option.
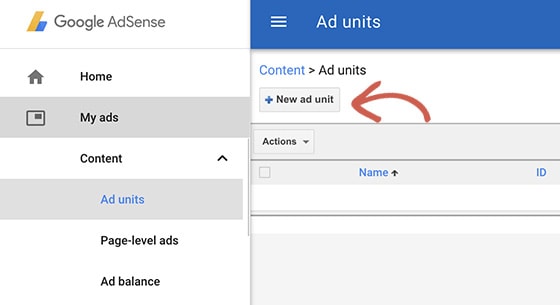
Next, give the name of your ad unit and select the ad size, type, style, and color of your preference.
From Ad size, you can choose the dimension of your advertisement. While choosing make sure to choose one that is listed under the Recommended for the best result.
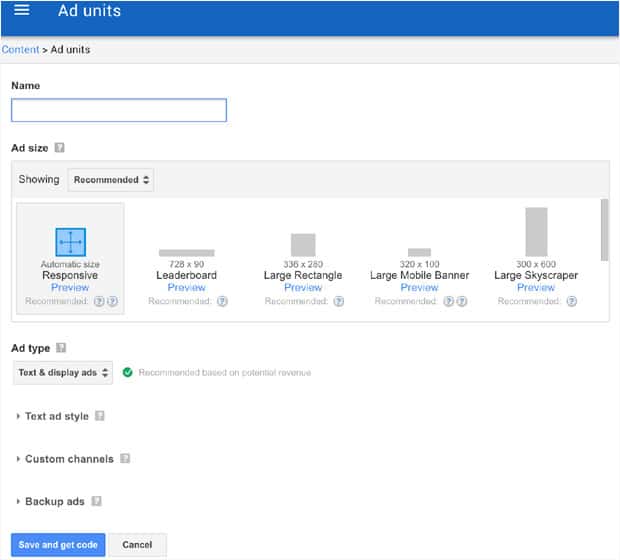
Now, choose the Ad style to customize the look of your text-based ad unit. You can change the design and color of your ad.
The next option is a custom channel option that allows you to track the performance of your advertisement. This feature is optional, so you may skip this process if you don’t want to use it.
The last option is If no ads are available. It lets you set what you want to display if Google can find any relevant advertisement for your client.
Once you have configured all the options, click on the “Save and get code” button.
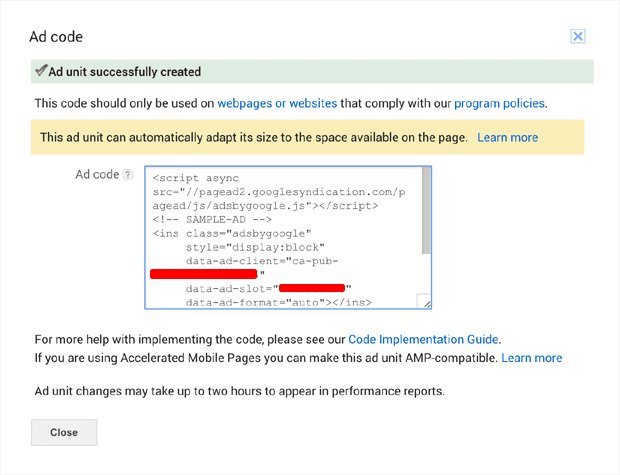
Copy the Ad and save it somewhere safe as you will need it in the next step.
Add Google AdSense to WordPress Website
Now that you have created the Ad unit for your website, it’s time to add Google AdSense to your WordPress website.
Advertisements are normally displayed on the widgets area of your websites like the sidebar and footer. You can easily place the Google AdSense code on the sidebar or footer widget area by using the Custom HTML widget.
The first thing you need to do is log in to your WordPress dashboard. Then, go to Appearance > Widgets.
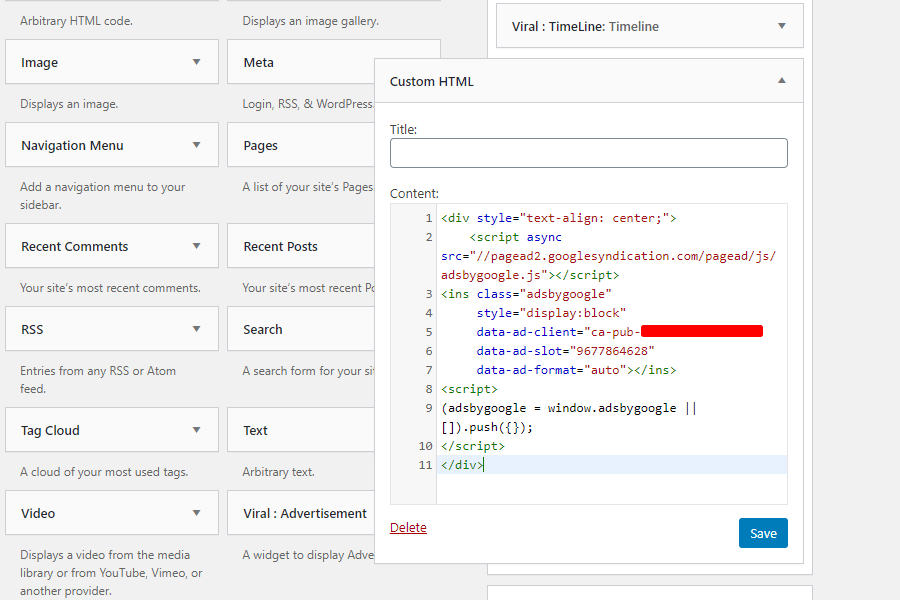
Next, drag and drop the Custom HTML widget to your selected sidebar and paste the code that you have copied in the above step.
After that, click on the Save button.
If you are using an advertisement-ready WordPress theme like our own Viral, Viral News, or Viral Pro, you can add the AdSense code on the advertisement space available in the template.
Conclusion:
In this way, you can add Google AdSense to your WordPress website. Google AdSense will allow you to monetize your website and lets you earn money online. So, if want to add Google AdSense to your WordPress website, you can follow the tutorial.


