
Including the social media button in WordPress website can be a great way to build a social community. It enables your audience to connect with you socially and convert them into your followers. This will not only increase the social reach of your website but will also create a reliable relationship between the web owner and visitors.
How to add Sticky Social Media Button in WordPress Website?
Now let’s talk about how to add a social media button in your WordPress website. There are many WordPress themes that come with options to include social media buttons on different locations. However, the options will be very limited and you won’t be able to customize the social media buttons as you want.
So, in order to add social media buttons the way you like, you might consider using a WordPress plugin.
Here, we will use Simple Floating Menu to show you how to add social media buttons on your WordPress website. It is a free WordPress plugin that allows you to place different elements like social icons, CTA buttons, scroll to the top button on your WordPress website.
Major Features of Simple Floating Menu:
- 5 Pre Available Icon Pack with 5000+ Icons to Choose from
- Add Unlimited Menu Buttons
- 8 Different Position to Display Menu
- 9 Different Button Shape to Choose From
- Customizable Height / Width, Icon Size, Color, Tooltip of Button
- 600+ Google Fonts to Choose From for Tooltips
- Add Internal, External, Social Media, or One Page Scrolling Link
Adding Sticky Social Media Buttons in WordPress
Now let’s add a social media button in WordPress website using Simple Floating Menu.
The first thing you need to do is get the copy Simple Floating Menu from WordPress.org.
Then, install it on your WordPress website. Once the plugin is installed, activate it.
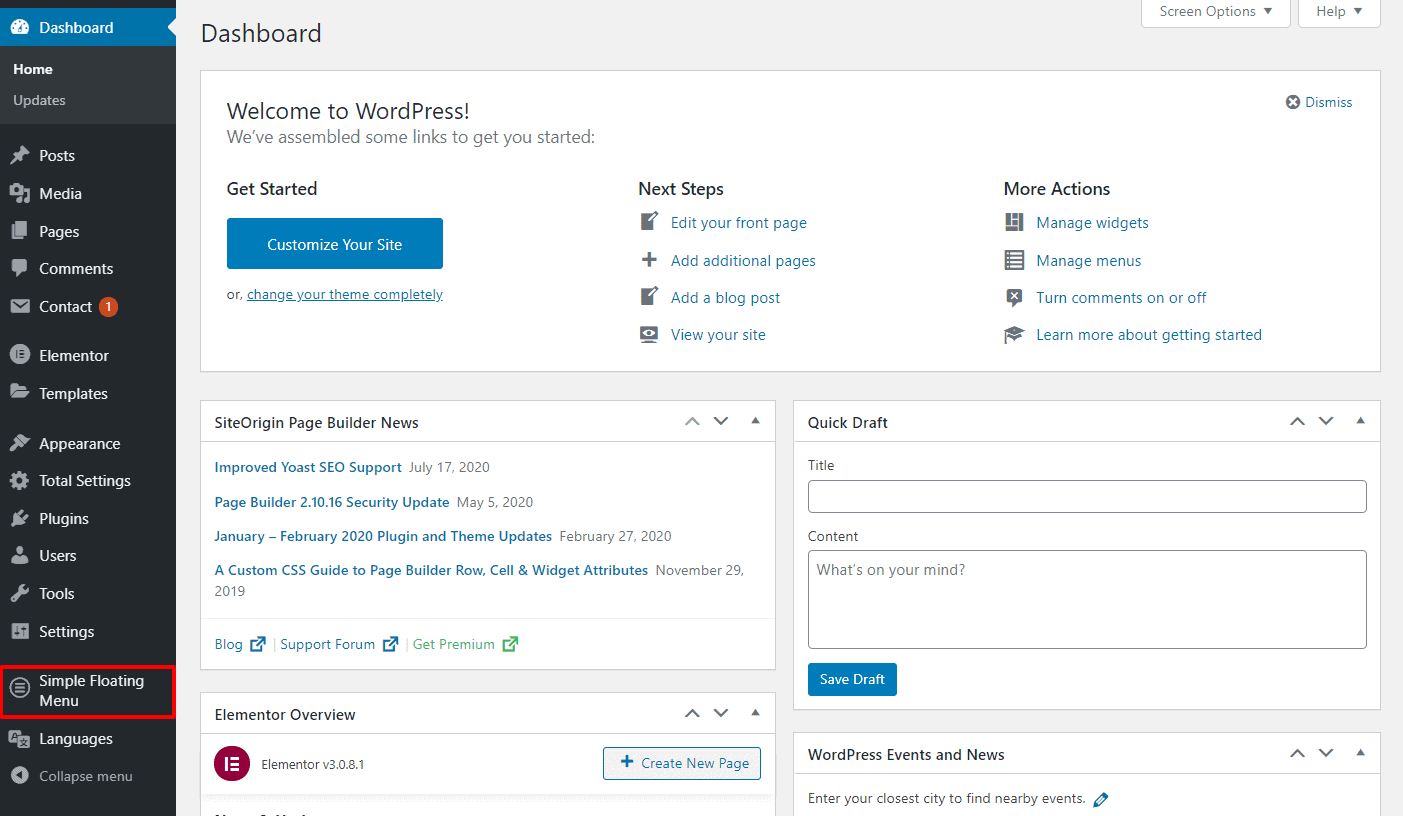
Upon activation, you can see Simple Floating Menu on the left menu of your WordPress dashboard. Click on it to continue.

You will land on the buttons page from where you can add social media buttons.
To add social media buttons, click on “Add New”.
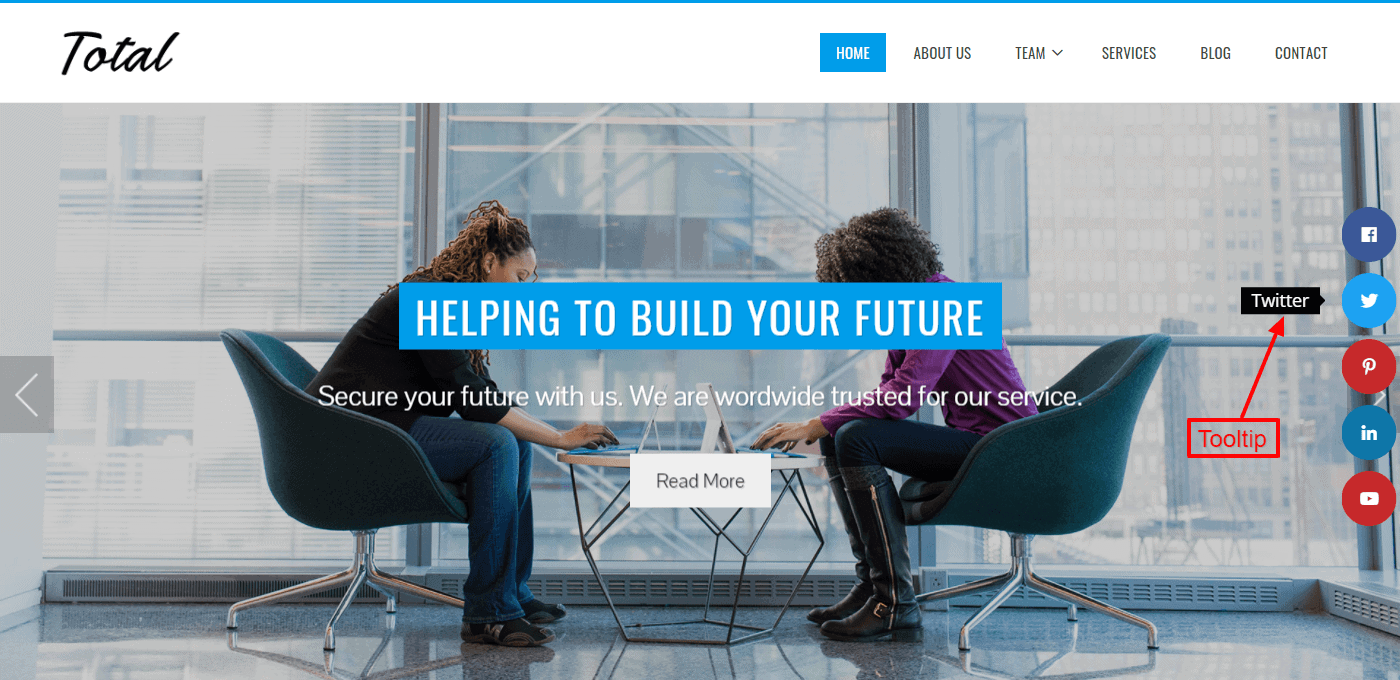
Now, select the suitable icon for the button, and enter the URL of your social media channels. Also, give the tool tips text.
After that, choose the favorable color for the button background, button icons, and tool tips.
Simple Floating Menu Settings:
After you have added all the social media button on your WordPress, go to the settings tab to configure it. It contains different options to configure and customize the buttons. Here are some of them below:
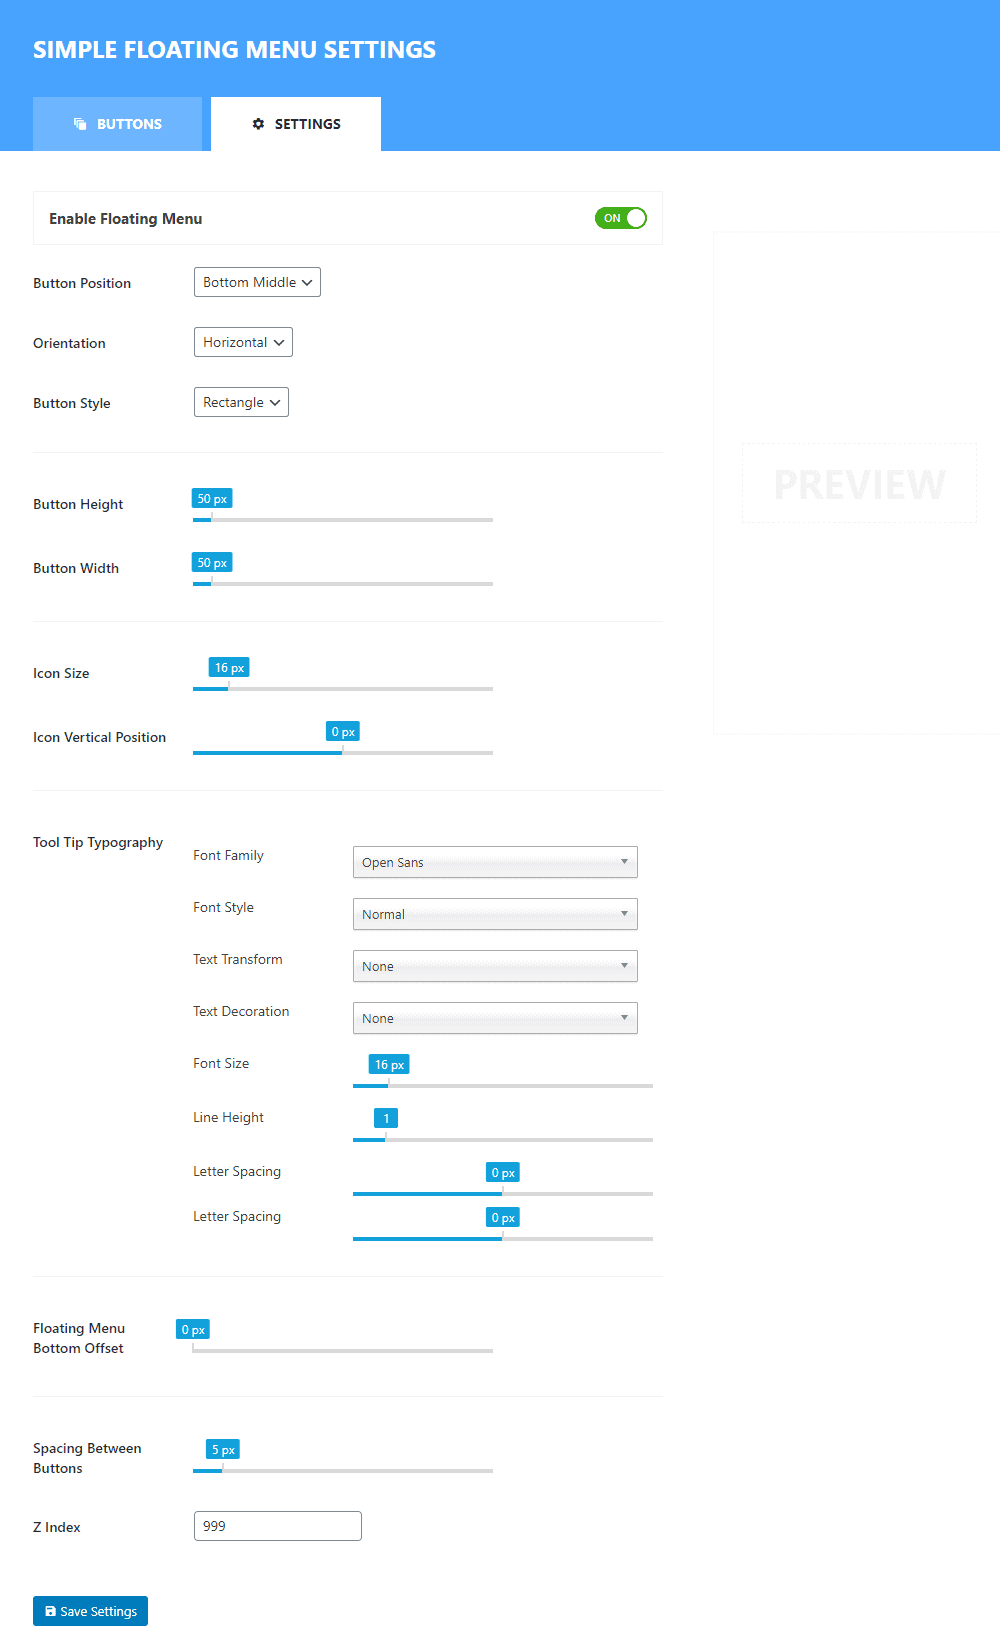
Button Position:
The button position will allow you to choose the placement of your social media button. The plugin comes with the option to showcase your floating social button in 8 different positions i.e. Top Left, Top Middle, Top Right, Bottom Left, Bottom Middle, Bottom Right, Middle Left, and Middle Right. Test all the positions and choose the most suitable.
Orientation:
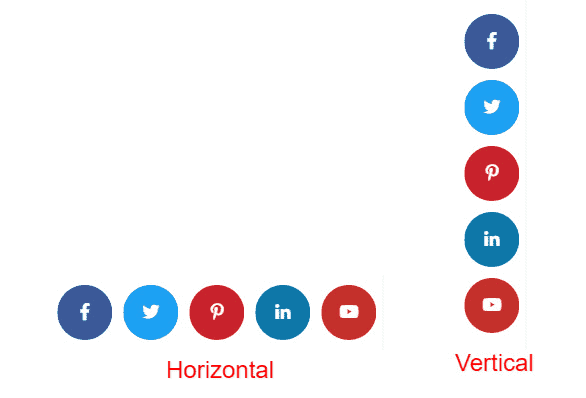
From the orientation option, you can either display button horizontally or vertically on your website.
Button Style:
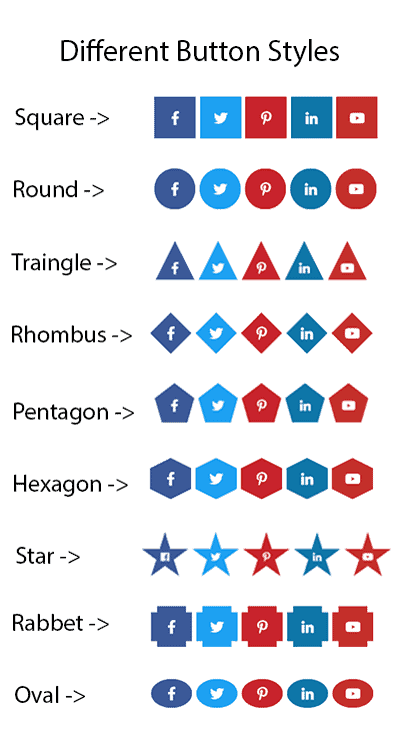
From here, you can choose the most suitable button style. The plugin consists of 9 different inbuilt button styles i.e. Rectangle, Round, Triangle, Rhombus, Pentagon, Hexagon, Star, Rabbet, and Oval. You can choose the most suitable button type of your choice and display them on your WordPress website.
Button Height and Width:
If you want to configure the height and width of your social media button, you can do it from here. You will be allowed to choose any height and width to beautifully display them on your WordPress website.
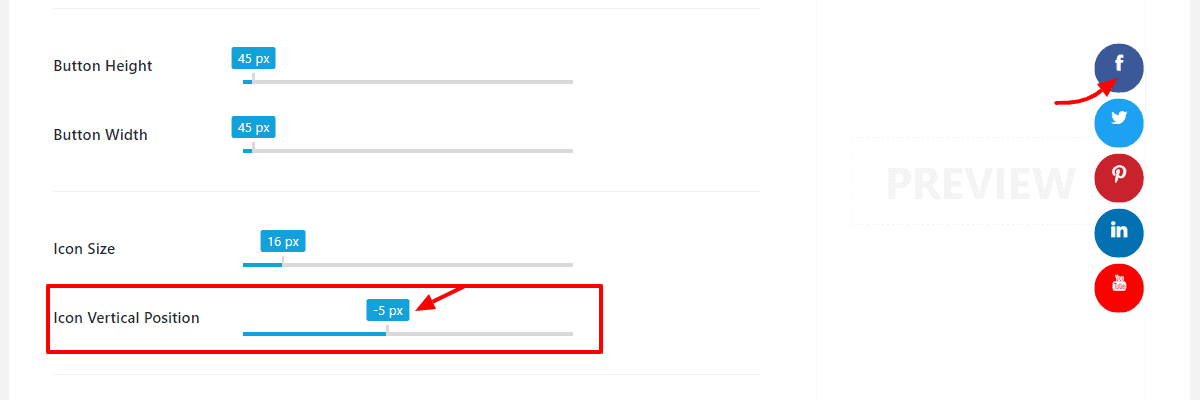
Icon Size:
As you increase or decrease the height and width of your social button, the icons may turn out to be bigger or smaller. In that case, you can configure icons size to make match the size of icons with the button.
Icon Vertical Position:
This setting will allow you to move the icon vertically up or down in the box.

Tool Tip Typography:
This option allows you choose the most suitable typography for the tooltip. You choose the suitable font family, font style, text transform, and text decoration.
Floating Menu Offset:
Floating Menu Offset option will allow you to configure the offset spacing of your button.
It will allow you to move the social media buttons on the top, bottom, left, or right side of your screen depending upon the button position you have chosen.
There are mainly 4 different floating menu offsets:
- Left Offset
- Right Offset
- Top Offset
- Bottom Offset
Space Between the Buttons:
This option allows you to add spacing between the buttons. It is helpful to if you are looking to add multiple floating buttons on your WordPress website.

Z Index:
In some of the WordPress theme, the menu will override your floating section. If you have installed such type of theme on your website, you can use this setting to bypass the menu.
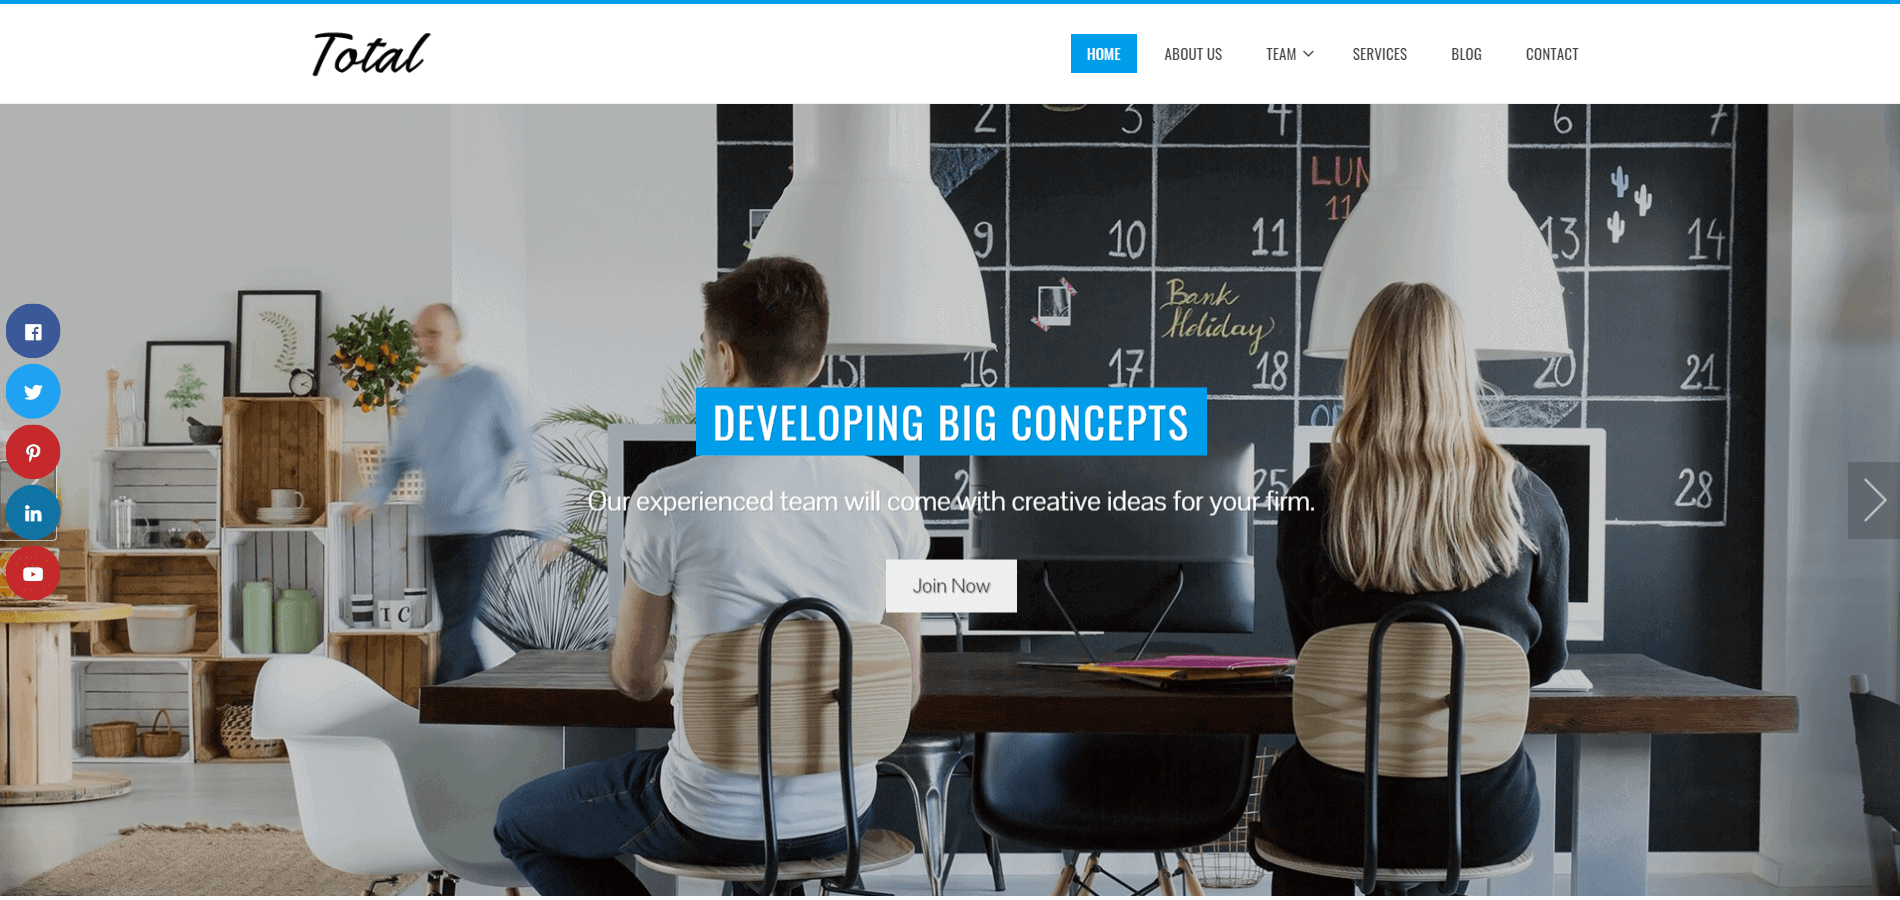
Once done, click on Save settings and view the social media button from the frontend of your website.
You can see the social button like the one in screenshot below:

You can also check the similiar tutorial to How to Create a One Page Navigator in WordPress?