Google Search Console is one of the must-have tools for all site owners. It gives an incredible amount of information about how your website is performing in search engines. This way, you will be able to understand what’s working on your website and what’s not. You can then plan for your content strategy accordingly.
In this article, we will provide a tutorial to connect WordPress website to Google Search Console. But before we begin, let’s know what Google Search Console actually is and why it is important for the SEO of your website.
What is Google Search Console?
Google Search Console is a free tool offered by Google that allows the website owner to monitor their website presence in Google search results.
It helps you track down the search ranking of your web content. Besides, the Google Search Console will also keep you updated with site issues, security issues, and indexing issues that may occur and affect the search performance of your website.
So, if you are serious about the SEO of your site, you must connect your WordPress website to Google Search Console from day one.
With that being said, let’s get the tutorial started:
How to Connect WordPress Website to Google Search Console?
To connect your WordPress website to Google Search Console, the first thing you need to do is visit the Google Search Console website and click on “Start Now”.
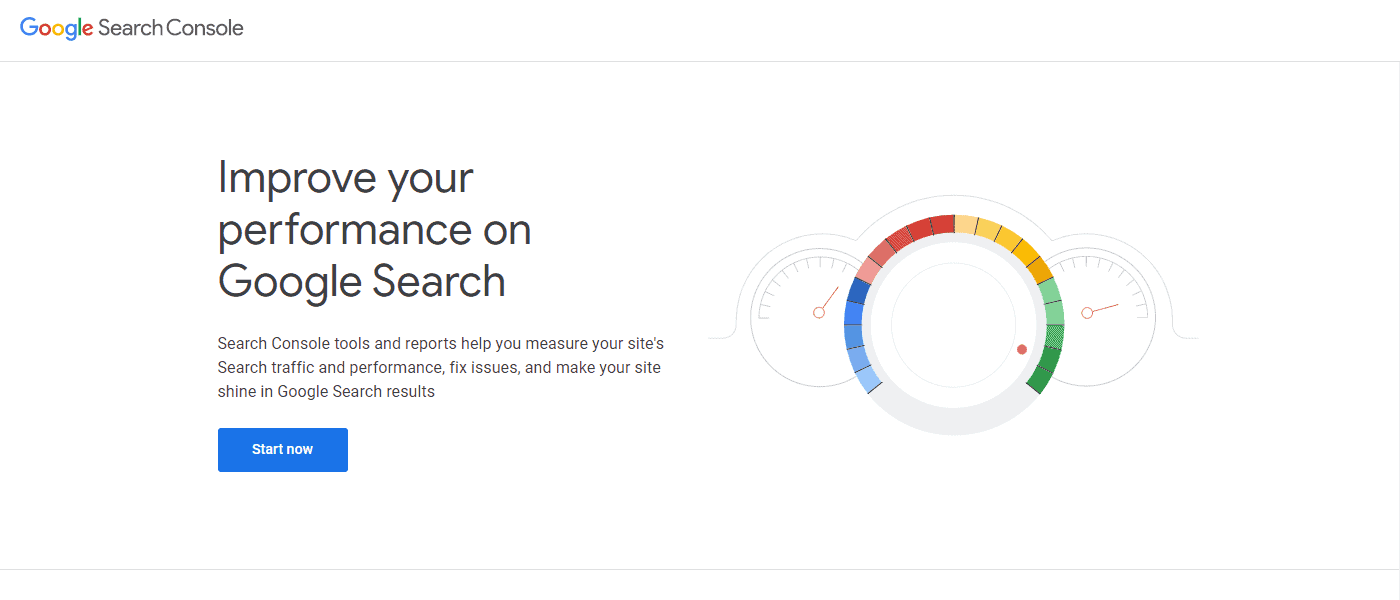
Next, you will need to sign in with the Google/Gmail account.
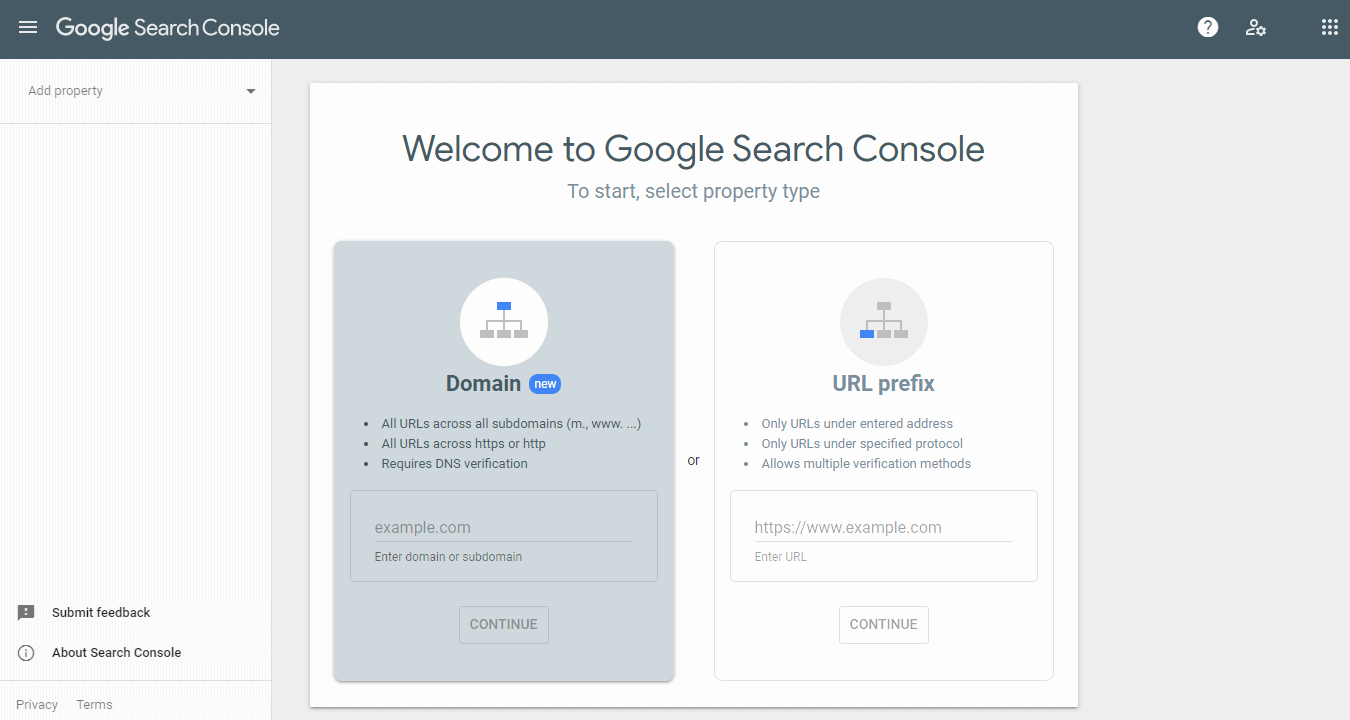
Once you have logged in, you will be asked to enter the URL of your website for verification. There are 2 different methods to verify your site.
We recommend you use the URL prefix method as it offers more flexibility to verify your site. However, you need to keep in mind that Google will consider HTTP and HTTPS as two different websites. Also, it will consider WWW and non-WWW as two different sites.
So, if you are unsure about your website, you can go to Settings >> General Page to check the URL of your website.
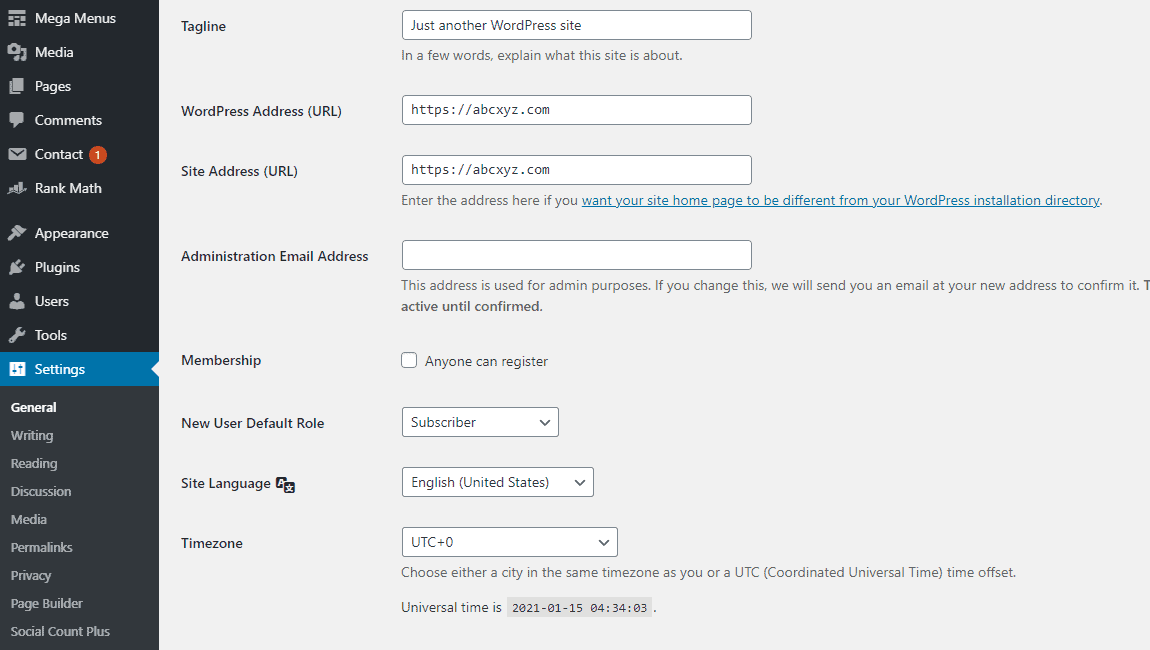
There, you will be able to see the URL of your website in the site URL field.
Now, enter the correct website URL in the Google Search Console tool setup wizard and click on the “Continue” button to proceed.
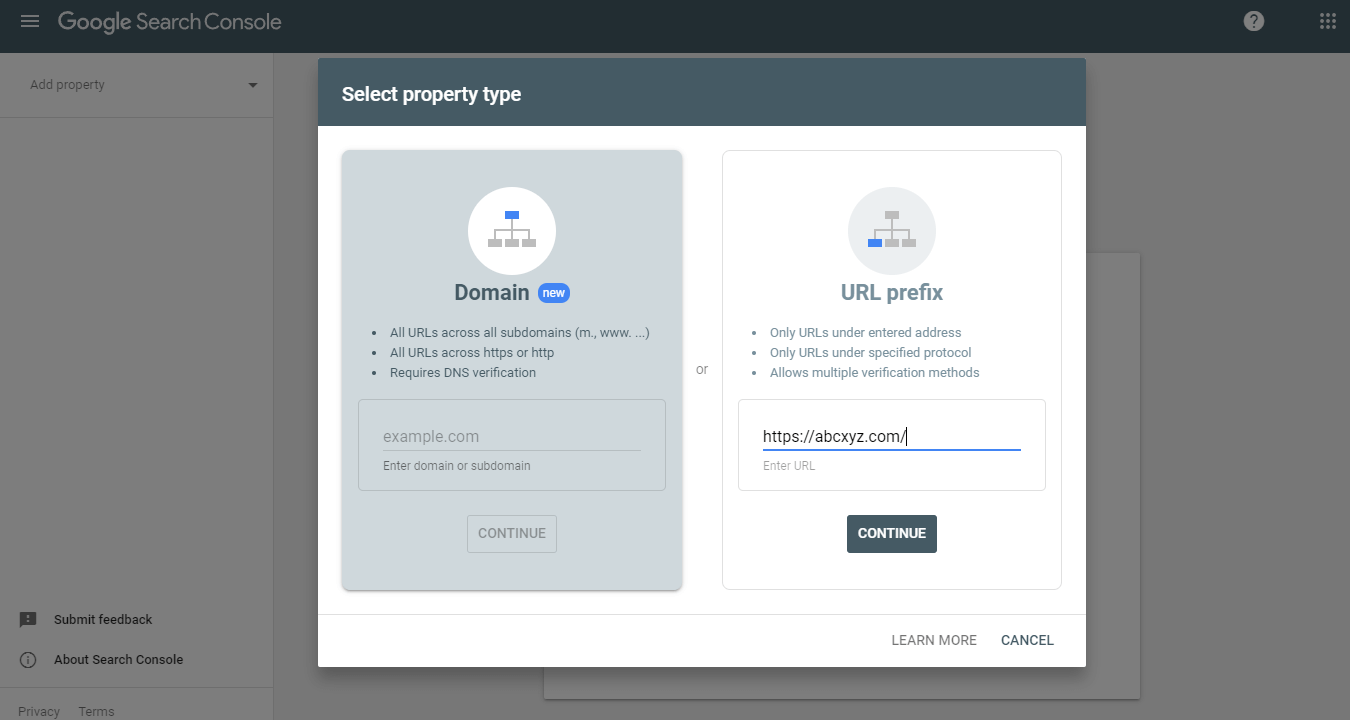
Now, you will be asked to verify the ownership of your website.
There are 5 different ways to do so. They are:
1) HTML file
This is the recommended method to verify your website in Google Search Console.
Here, you need to download the HTML verification file given in the hyperlink.
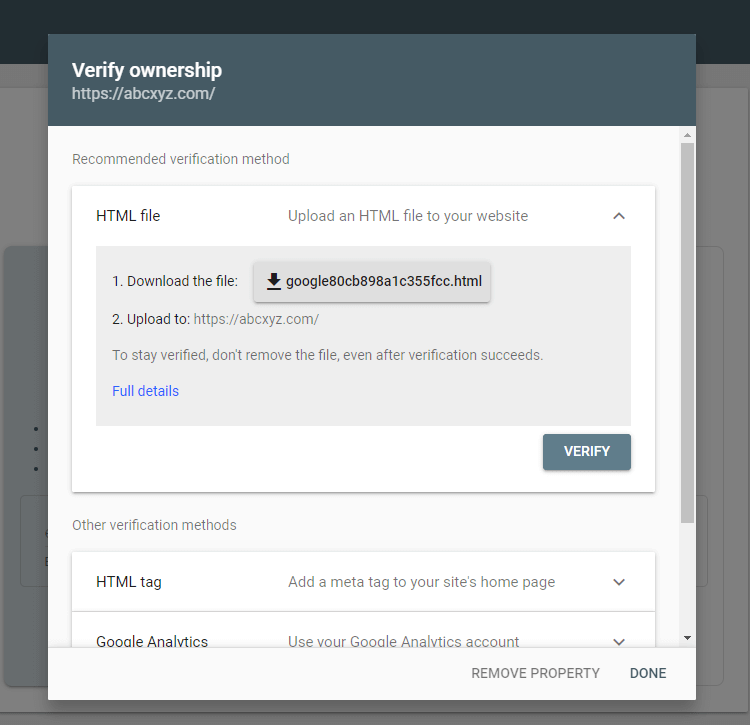
Then, log in to the FTP client such as FileZilla and upload the file to the root directory of your website. (the root directory is the wp-content folder, the wp-config.php file, etc)
Now return to the Google Search Console, and click on the “Verify” button to complete the process.
2) HTML Tags
This is one of the easiest ways to verify your website to Google Search Console. However, you need to use WordPress SEO plugins like Rank Math, Yoast SEO, or All in One SEO.
Here, we will use Rank Math to show you how the process is carried out:
The first thing you need to do is install and activate the Rank Math plugin on your WordPress website.
Now, click on the HTML tag to expand it and then copy the code inside it.
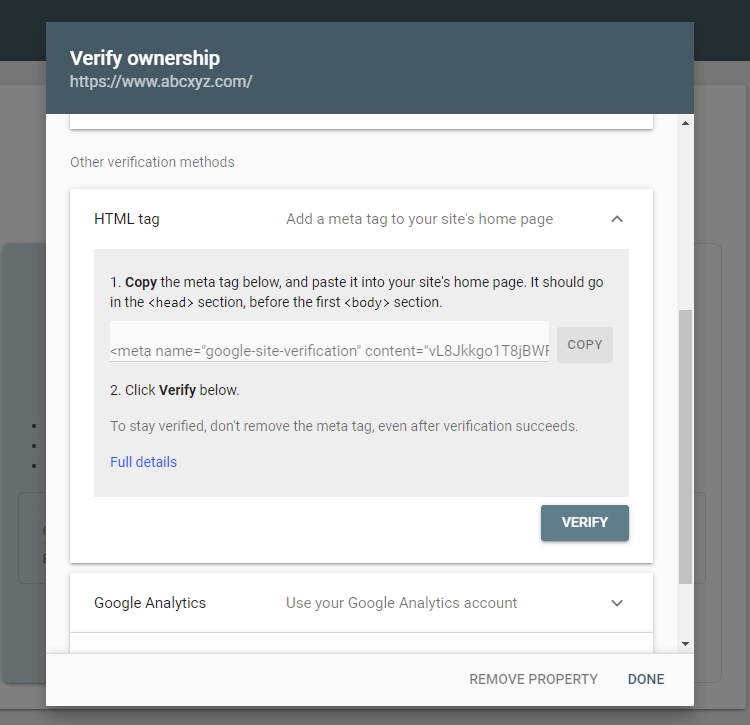
Then, go to Rank Math >> General Settings and go to Webmaster Tools.
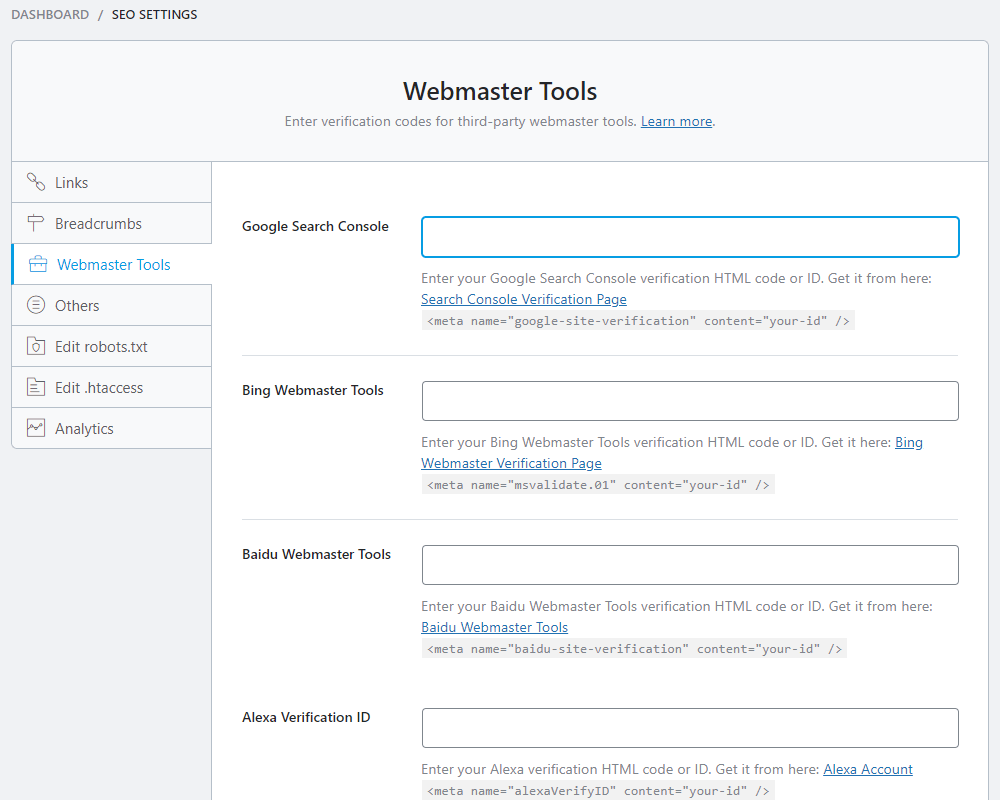
Next, paste the copied code inside the Google Search Console area and click on the “Save Changes” button to save the process.
Now return to the Google Search Console, and click on the “Verify” button to complete the process.
3) Google Analytics
If you already connect your website to Google Analytics (you are planning to), you can verify your website from Google Analytics as well.
Click on Google Analytics to expand it.
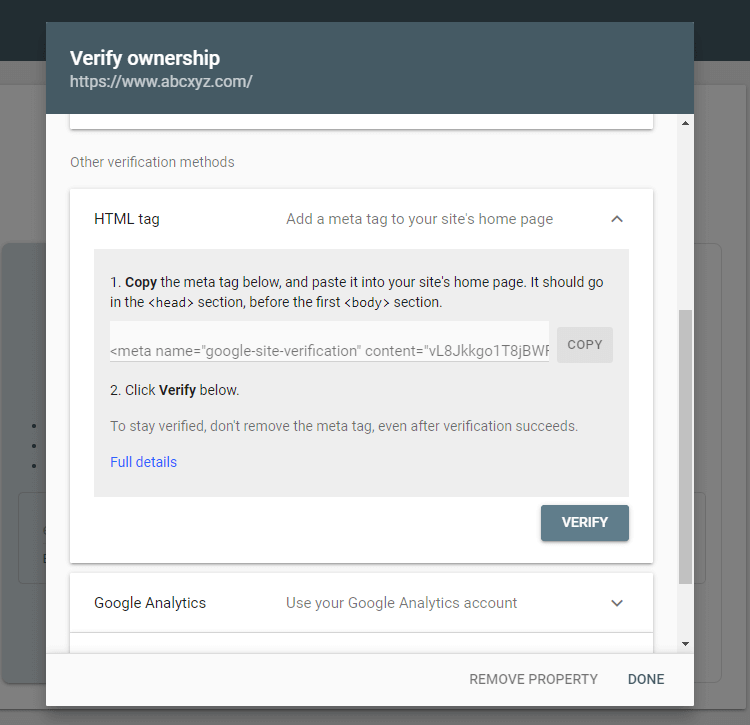
Now, click on the “Verify” option and the Google Search Console will automatically use the Asynchronous Tracking Code to verify your WordPress website.
If you have not yet connected your WordPress website to Google Analytics but are looking for the process to do so, you can check out the article: How to Install Google Analytics in WordPress?
4) Google Tag Manager
Similar to Google Analytics, you can also verify your website from Google Tag Manager.
Click on the Google Tag Manager to expand it.
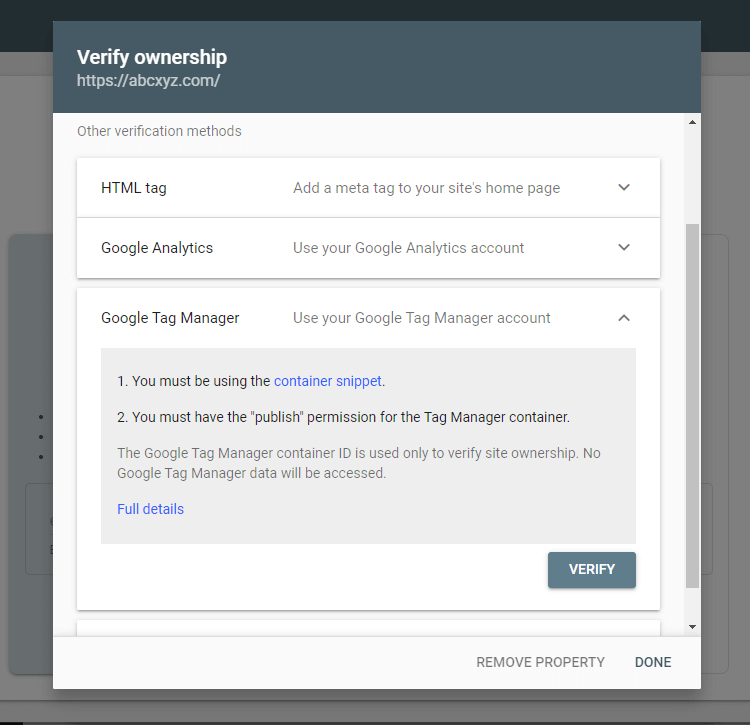
Now, click on the “Verify” option and Google Tag Manager will automatically connect your WordPress website to Google Search Console.
5) Domain Name Provider Method
This method is suitable for those who do not want to install a new plugin.
Click on the Domain name provider to expand it and then copy the TXT record.
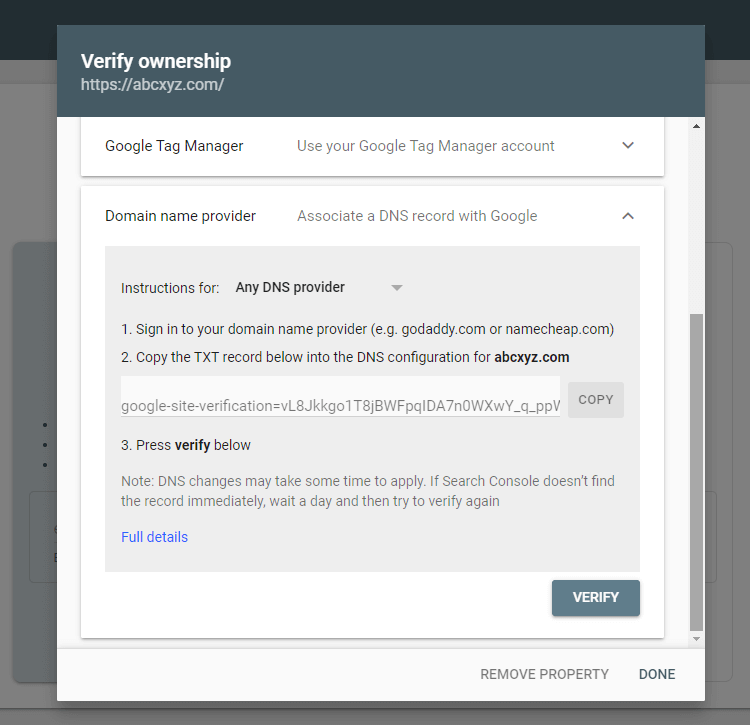
Now, login to your Domain Name Provider and paste the copied TXT record file. (This step may vary, based on your DNS provider).
How to Add XML Sitemap to Google Search Console?
An XML sitemap is a file that lists all the contents of your website in an XML format. It enables search engines like Google to discover and index your web content.
If you have already installed a WordPress SEO plugin like Rank Math in the above steps, the XML sitemap of your website will already be added to the Google Search Console.
You can check the XML sitemap of your website from Rank Math >> Sitemap Settings.
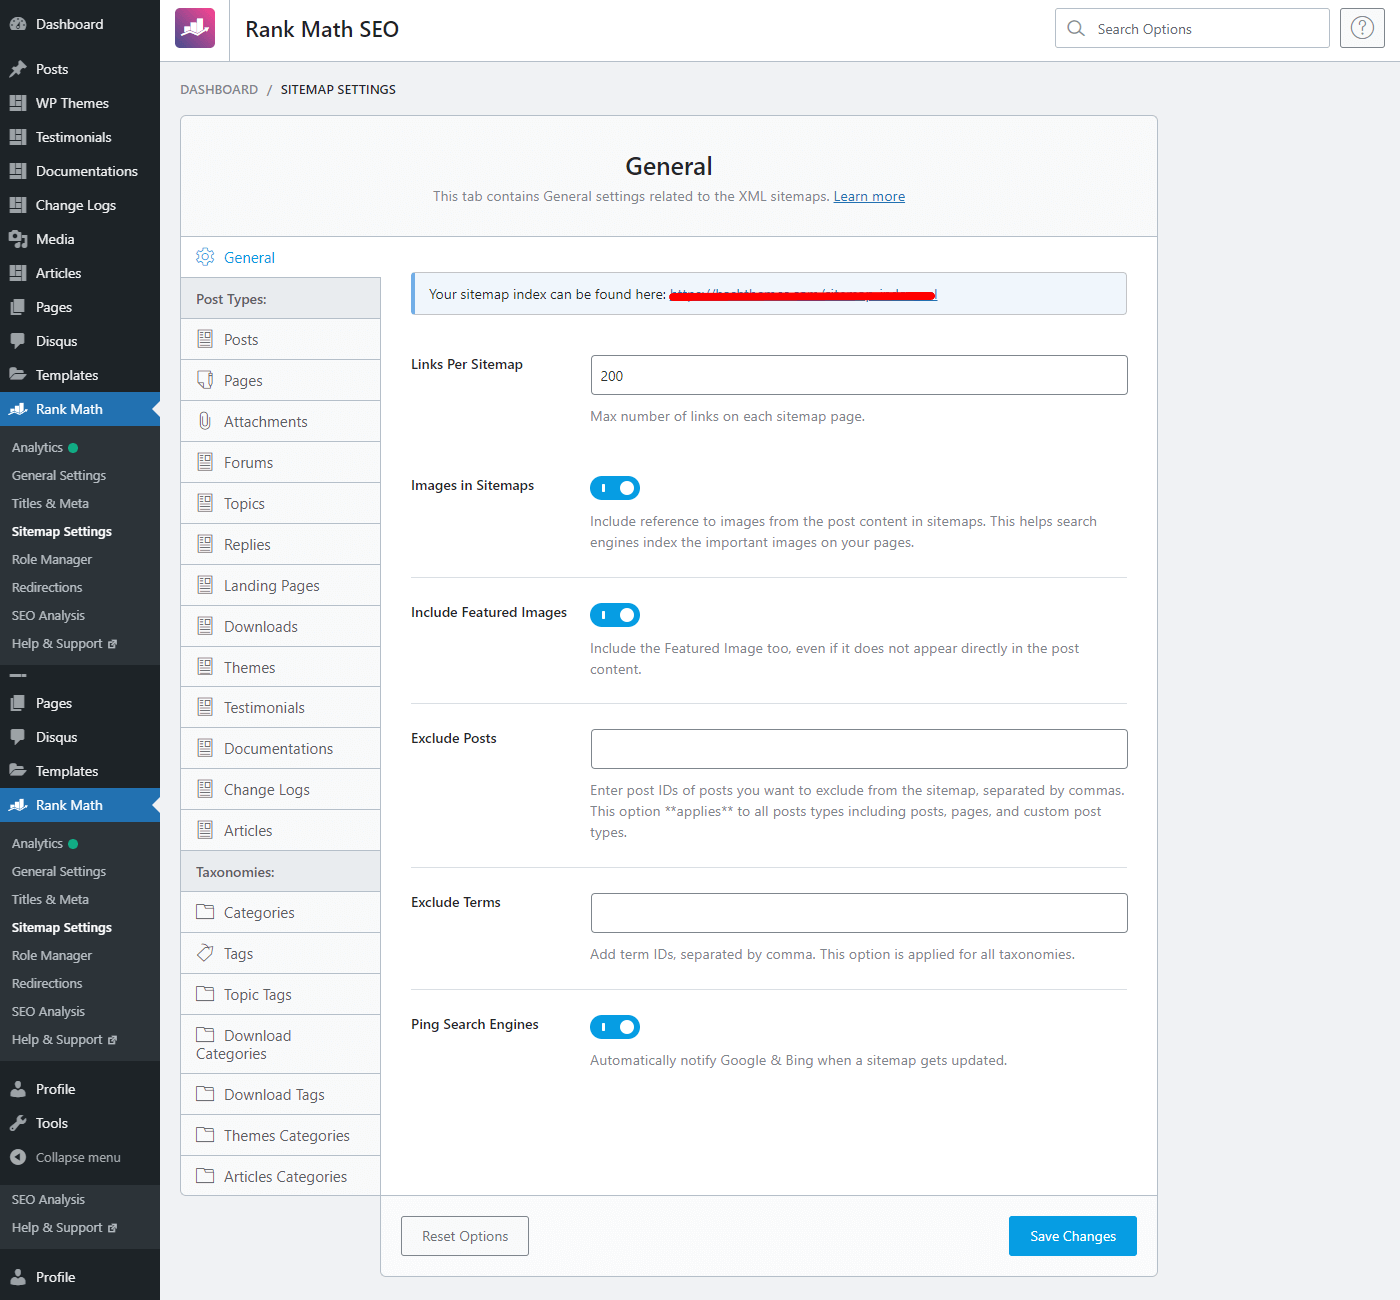
Here enable the sitemap for all the post types and taxonomies that you want to index on the search engine.
Once done, click on the “Save Changes” button.
If you have not installed any WordPress plugins, you can manually submit the XML sitemap of your website to Google Search Console.
Access to your XML sitemap by adding sitemap_index.xml at the end of your website address.
Like for example, your web address is
You can view its site map at
https://www.abcxyz.com/sitemap_index.xml
Now that you have the sitemap ready, visit the Google Search Console website and click on the Sitemap.
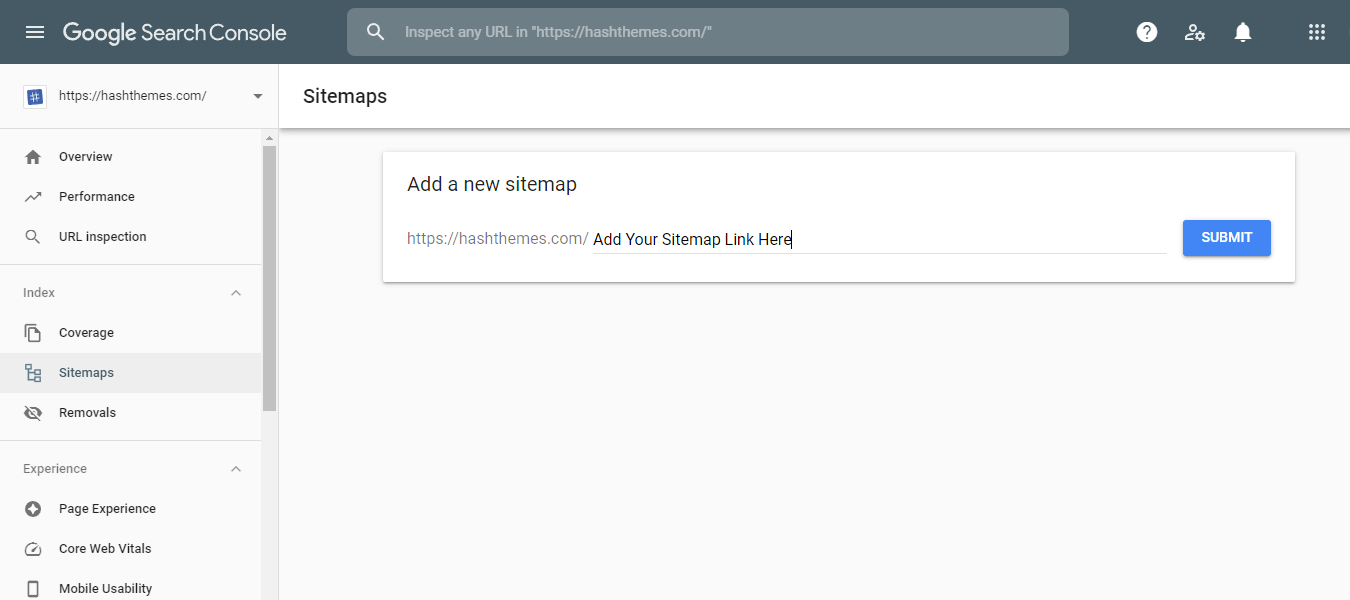
You can submit a new sitemap anytime by entering the sitemap URL.
Conclusion:
This way, you can connect your WordPress website to Google Search Console. It is one of the essential steps to optimize the SEO of your website. So, if you haven’t add your WordPress website to Google Search Console, we recommend you to do it right now.

