Are you experiencing “The Link You Followed Has Expired” error on your WordPress website? It is a common error that you might encounter when trying to upload themes and plugins via admin area.
Like other WordPress errors, this error also has a straightforward fix. However, due to the lack of description of the error message, many beginners may not have any clue about the error and find it a bit difficult to resolve it.
Here, we will discuss the cause of “The Link You Followed Has Expired. ” Error in WordPress in WordPress website and provide an easy solution to resolve it.
So, let’s get started:
Cause of “The Link You Followed Has Expired” Error
This error is usually caused by the file upload size limit defined by the web host. In most cases, the limit is set high enough to avoid these kinds of errors. However, if the file size upload limit is low and the theme or plugin you are trying to upload is beyond the limit, you are likely to face the error.
The error will look something like this with the message “The link you followed has expired. Please try again.”

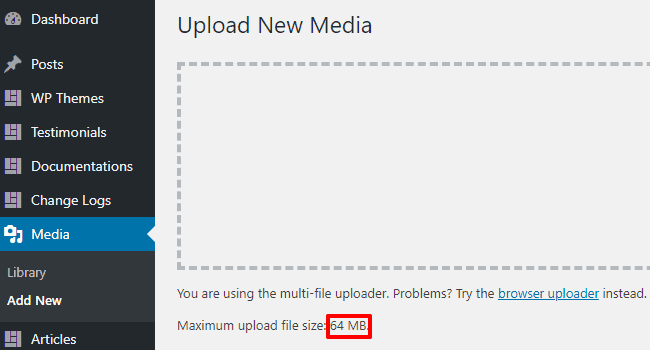
If you have faced such an error, you need to check the file size upload limit of your server. To check the media upload size of your WordPress site, go to Media >> Add New.

Resolving “The Link You Followed Has Expired” Error
Since this error is caused by the upload limit size set by your web host, the quickest way to fix it is by increasing the file upload size, PHP memory and execution time limits of your website.
There are multiple ways to do it. We will discuss all of them which will allow you to choose the easier one as per your hosting environment.
By Increasing the File Upload Limit Size in .htaccess file
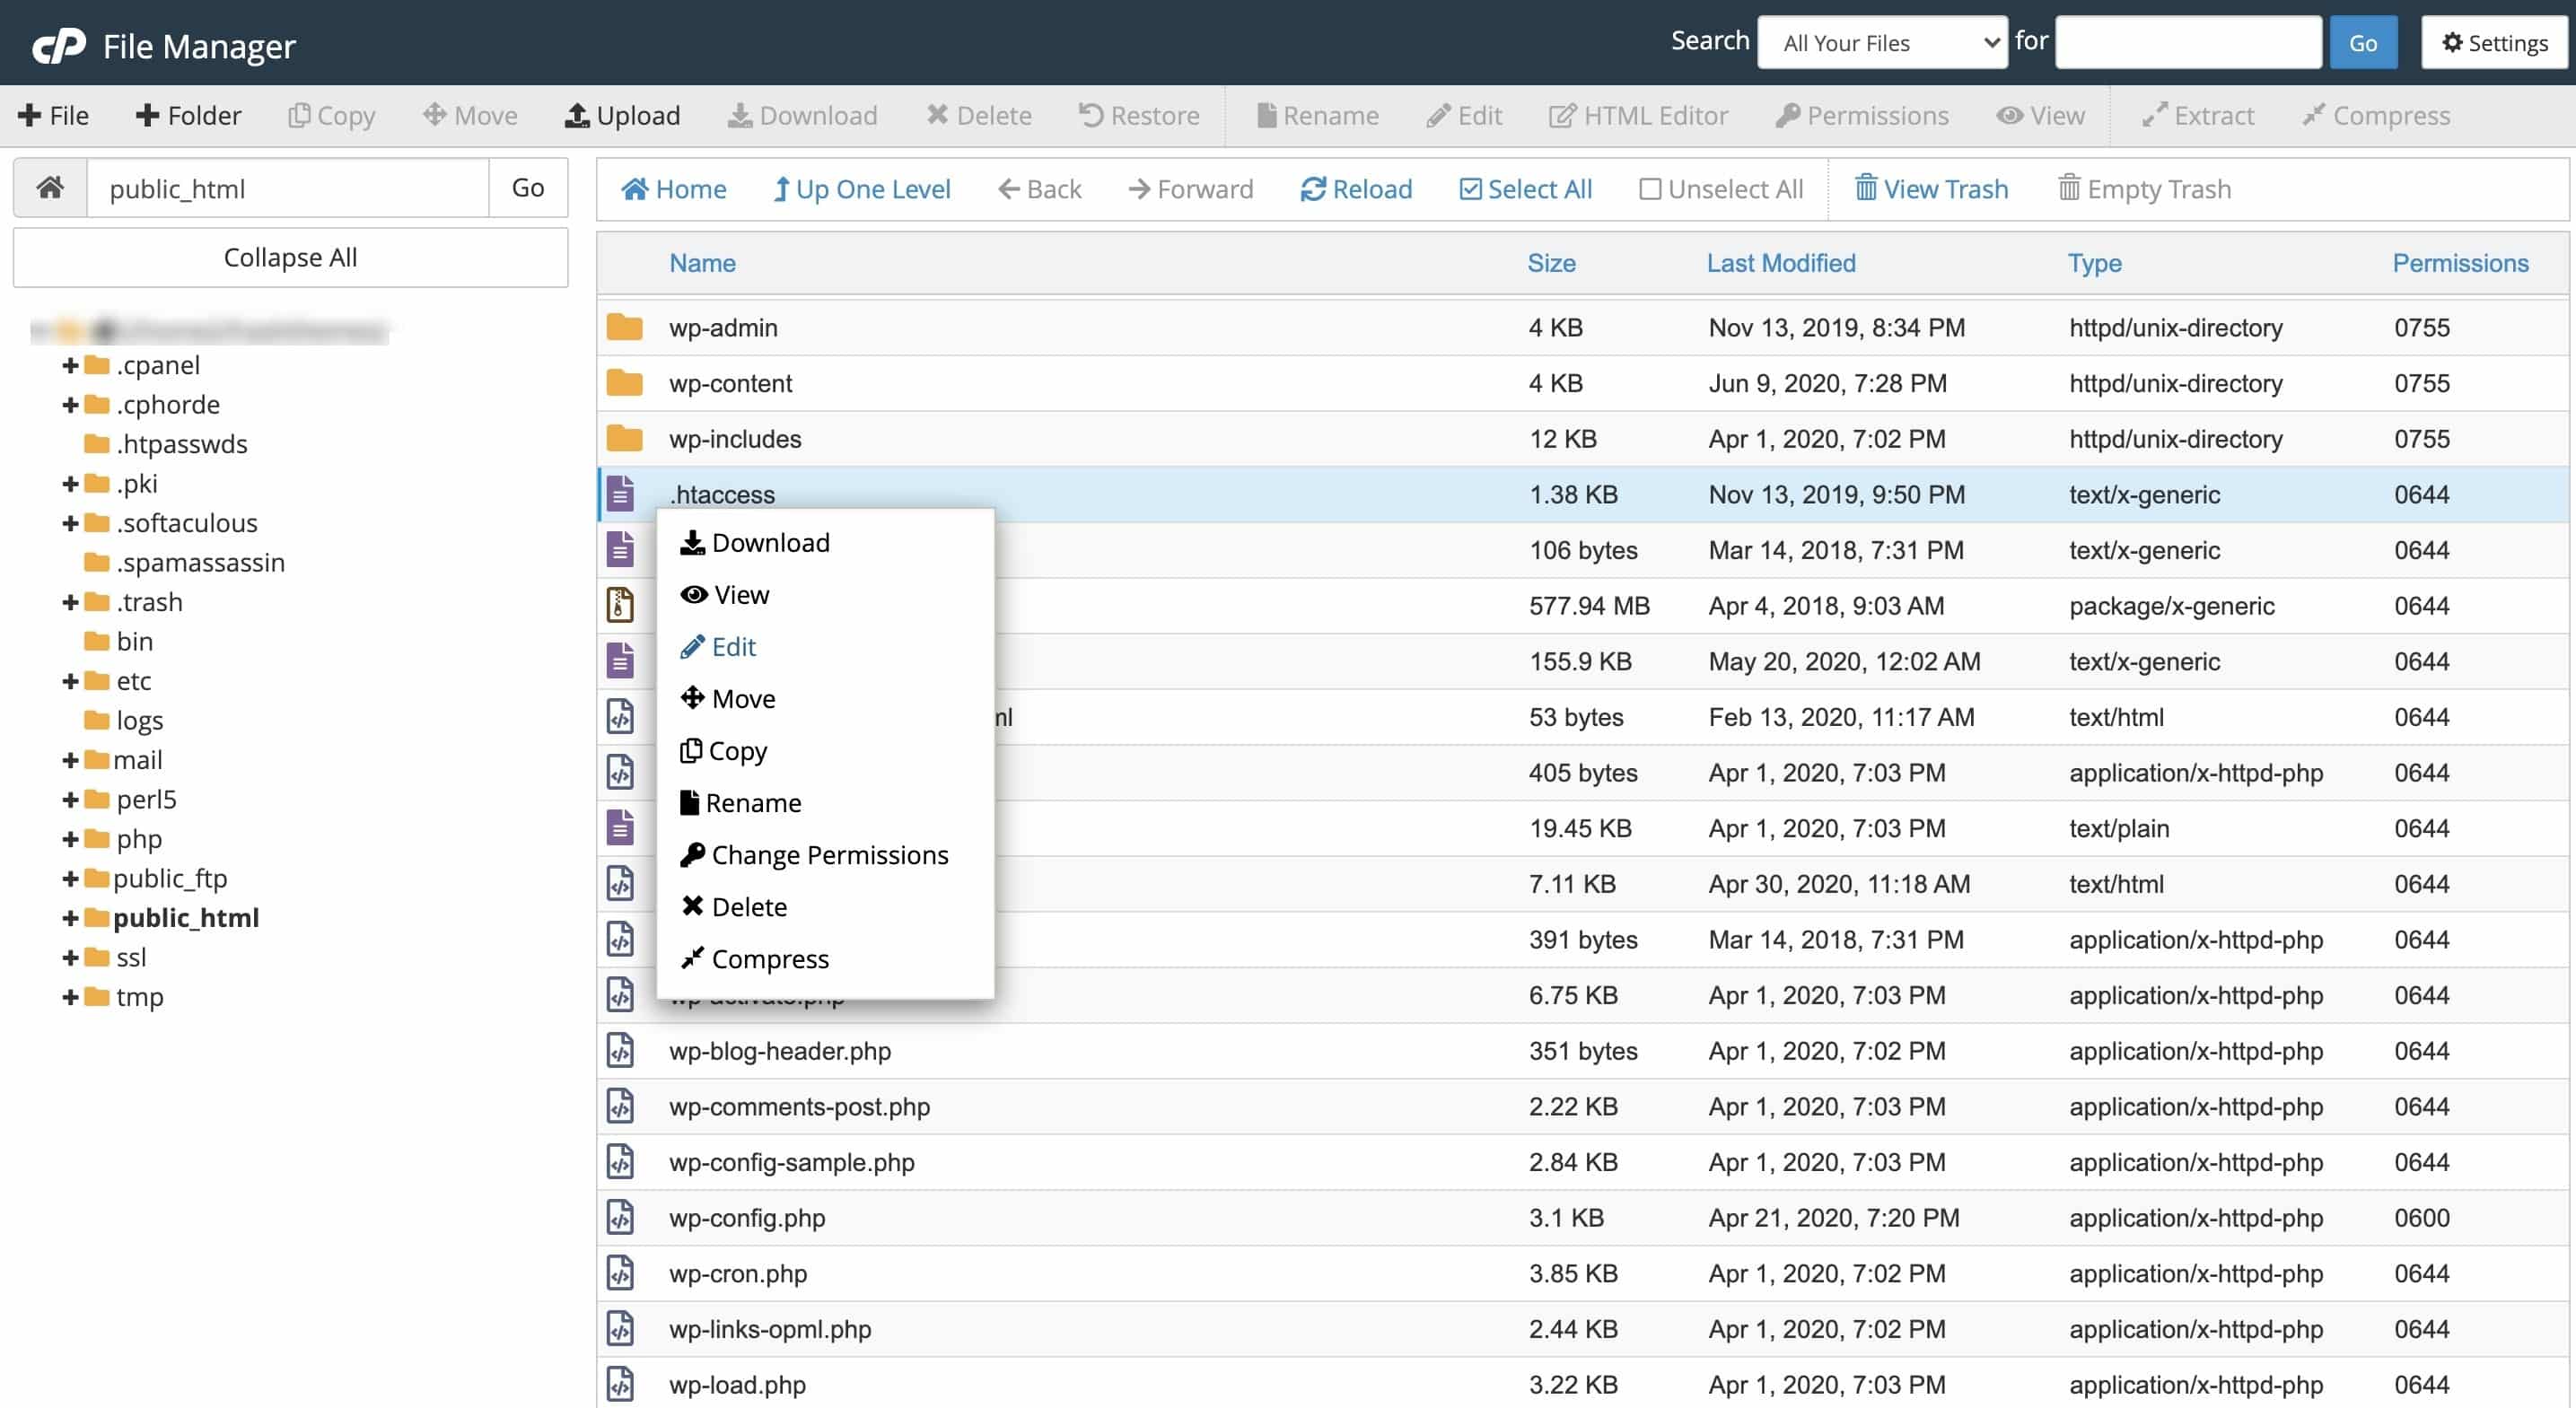
For this method, you will need to edit the .htaccess file by using the FTP client app or the file manager app in cPanel.
To connect to the CPanel via your hosting account, simply type “cpanel” at the end of your website domain name. (eg: xyzwebsite.com/cpanel)
Now enter the CPanel username and password. These details are usually provided in welcome email sent by your hosting provider.
Then, locate the .htaccess file and edit it.

Now, copy the code given below and paste it onto the .htaccess file.
php_value upload_max_filesize 256M
php_value post_max_size 256M
php_value max_execution_time 300
php_value max_input_time 300
Once done, click on save changes to save your edits.
Note: This method usually fixes the error. If not, try the next method.
By Increasing the File Upload Limit Size in php.ini file
If editing the .htaccess file does not fix your error, you can edit the php.ini file in the root folder of your site.
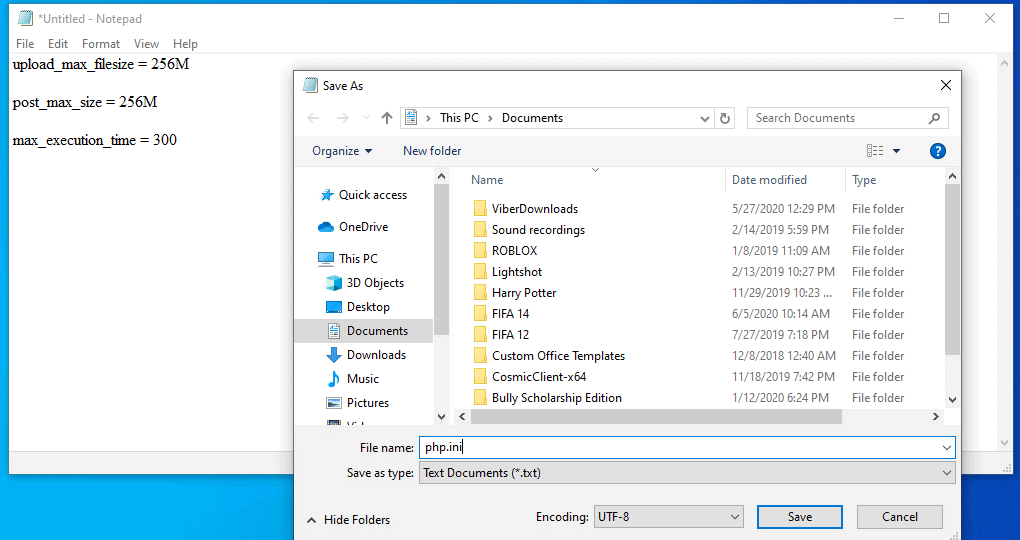
If you are using a shared hosting account, you may not be able to find the php.ini file on your site’s root folder. In that case, you will need to create a blank php.ini file using a plain text editor like notepad and upload it to your website.

Now, edit the php.ini file and add the following code inside it:
upload_max_filesize = 256M
post_max_size = 256M
max_execution_time = 300
Then, save it.
Still, if the error is not resolved, contact your hosting service provider and discuss the issue.


