When migrating a website from HTTP to HTTPS, web owners may encounter several issues. One of them is “Insecure Content (Mixed Content)” Error. This error is normally caused by the HTTPS/SSL settings. In most of the situation it won’t harm your website and your blog posts and web pages will continue to load as normal. However, keeping your website in such condition may break your website down.
In this article, we will discuss what insecure content (Mixed Content) error actually is and how to fix it on your WordPress website.
Adding SSL Certificate on your WordPress Website
In past, adding SSL certificate was optional for WordPress websites. But nowadays it is highly recommended and necessary.
SSL certificate adds an additional layer of security to your website by encrypting the data transferred to your users’ browsers when browsing your website. This makes the website secure by protecting the website data from being stolen or forged between the server and browsers.
Besides, SSL certificate also provides different SEO benefits and Google has highly recommended websites to use SSL certificates.
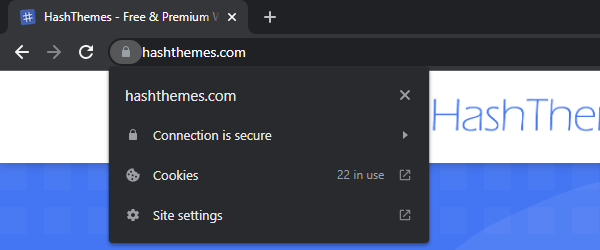
A padlock like the one in the screenshot below will appear next to the address bar of your browser if you have added SSL certificate to your website.
However, if you have not added SSL certificate to your website, something like the screenshot below will be displayed next to the address bar.
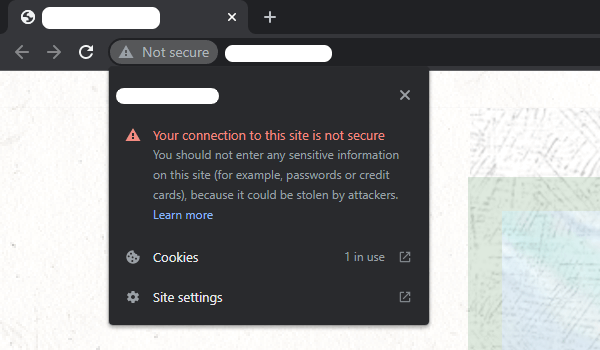
SSL certificate is very essential for the security and SEO of your website. So, if you have not added the SSL certificate yet we recommend you to add it right away.
What is an Insecure Content (Mixed Content) Error?
When you recently add an SSL certificate to your website, you will be expected to see a secured padlock symbol in the URL bar when visiting your site. However, in some cases, your site may be requested over secured URL and some individual assets present on the page may not load securely over the SSL. In that time, you will face Insecure Content (Mixed Content) Error.
To check if your website has mixed content errors, you need to go to Inspect Element.
If you are using Chrome browser, right-click your mouse button while it is on the browser and click on inspect. Alternatively, you can also press the “CTRL + Shift + I” or “F12” hotkey of your keyboard. Now, click on the Console tab.
If your website has Mixed Content error, you can see the error like the one in the screenshot below.
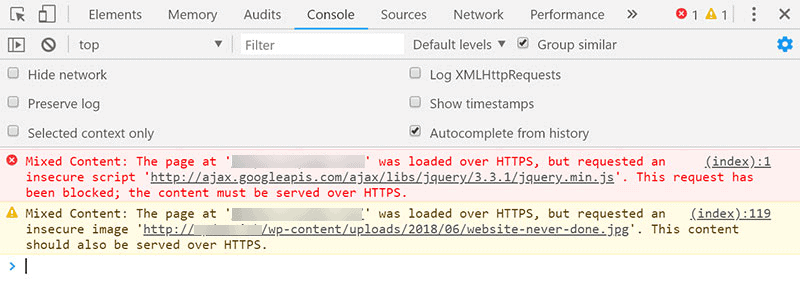
Although this error might not affect your website’s functionality but can adversely impact the SEO and user experience of your site. That’s why it’s good to fix this error as soon as you find it out.
Fixing Insecured Content (Mixed Content) Error in WordPress
There are several ways to fix Insecure Content (Mixed Content) Error in your WordPress website. Here is we discuss 3 of the easiest ones. They are:
Manual Method:
This is the manual method to fix the mixed content error on your WordPress website. Here you need to find which media or code that is causing the error and replace it with the new HTTPS URL.
This method is suitable if only one or two links are causing the error. Otherwise, manually finding and replacing all the error links one by one may be time-consuming for you.
Using SSL Insecure Content Plugin
In this method, you need to install and activate SSL Insecure Content Plugin on your WordPress website.
Once you have activated the plugin, go to Settings >> SSL Insecure Content page to configure the settings available.
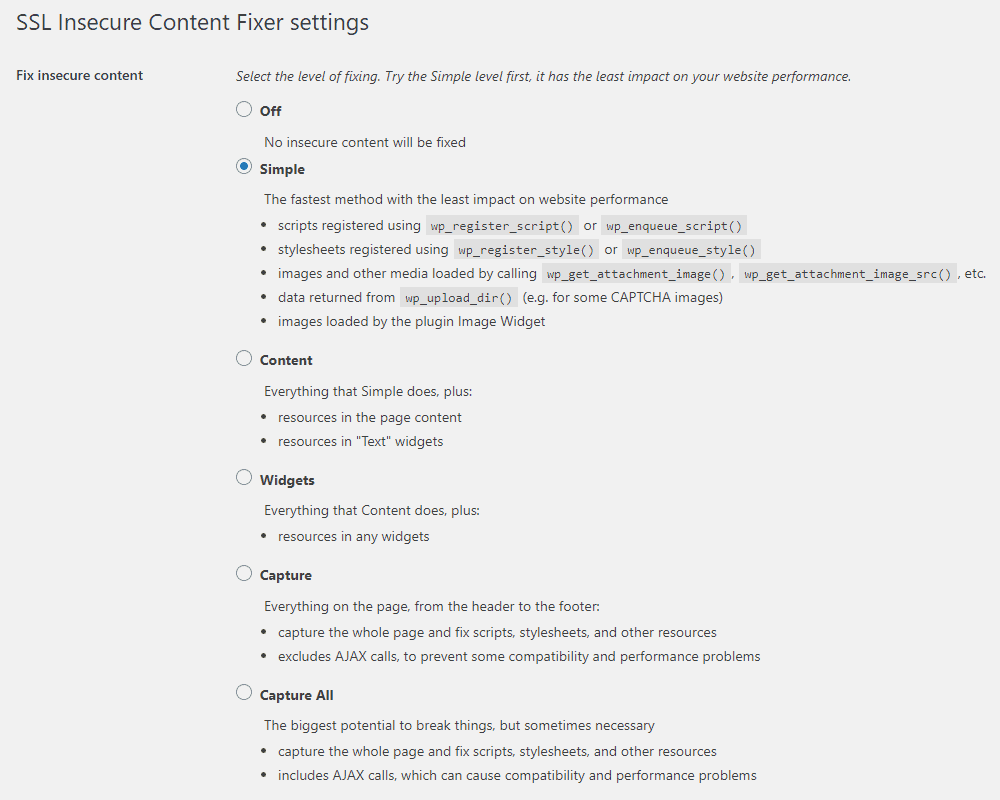
The plugin provides different fixes to the mixed content error. We will explain each one of them to help you find the best solution to resolve your issue.
Simple
It is the fastest and most recommended method for newbies. It automatically fixes the mixed content error in WordPress for scripts, stylesheets, and media libraries.
Content
If the simple fix method does not resolve the mixed content error of your website, you should try this method. It will use all the features of the simple method in addition to checking the fixes inside your contents and text widgets.
Widgets
This method includes all fixes applied in the content level as well as to all resources loaded in all WordPress widgets available on your website.
Capture
The capture method captures everything on every page of your website from header to footers, as well as replaces all URLs to HTTPs. It can slow down your website and also affect performance.
Capture All
If all the above methods fail to resolve the mixed content error, you can try this method. It attempts to fix everything that may lead to unexpected behavior of the website. However, this method will also have the most negative impact on the performance of your website.
After you have selected the content level fix for your error, scroll down to the HTTP detection section. This is where you can choose how to detect the HTTPs of the content of your site.
The default option is to use a WordPress function, which works for most of the website.

Once done, click on “Save Changes”.
Using Better Search Replace Plugin
In this method, the first thing you need to do is install and activate Better Search Replace plugin on your WordPress website.
Once, the plugin is activated, go to Tools >> Better Search Replace from your WordPress backend.
Now, insert the URL in which the mixed content error has occurred and replace it with the new HTTPS URL of your website.
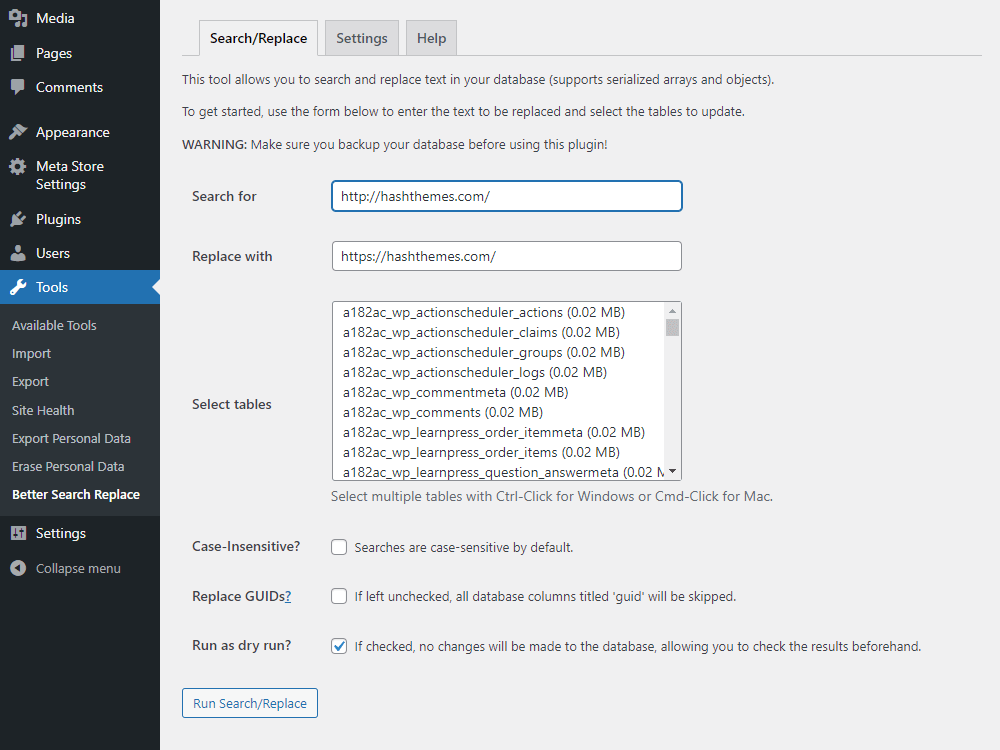
Then, click on Run Search/Replace button, and the plugin will automatically find and replace the error link with the new URL. You can check the case sensitive box to disable the case sensitivity as the searches are set to be case sensitive by default.

