Placing advertisements (ads or banners) in WordPress themes to monetize a website is quite a popular trend these days. The process of incorporating the ad in the WordPress themes is just a simple process. With this article, we will explain how to put ads on your website using the Viral Pro WordPress Theme.
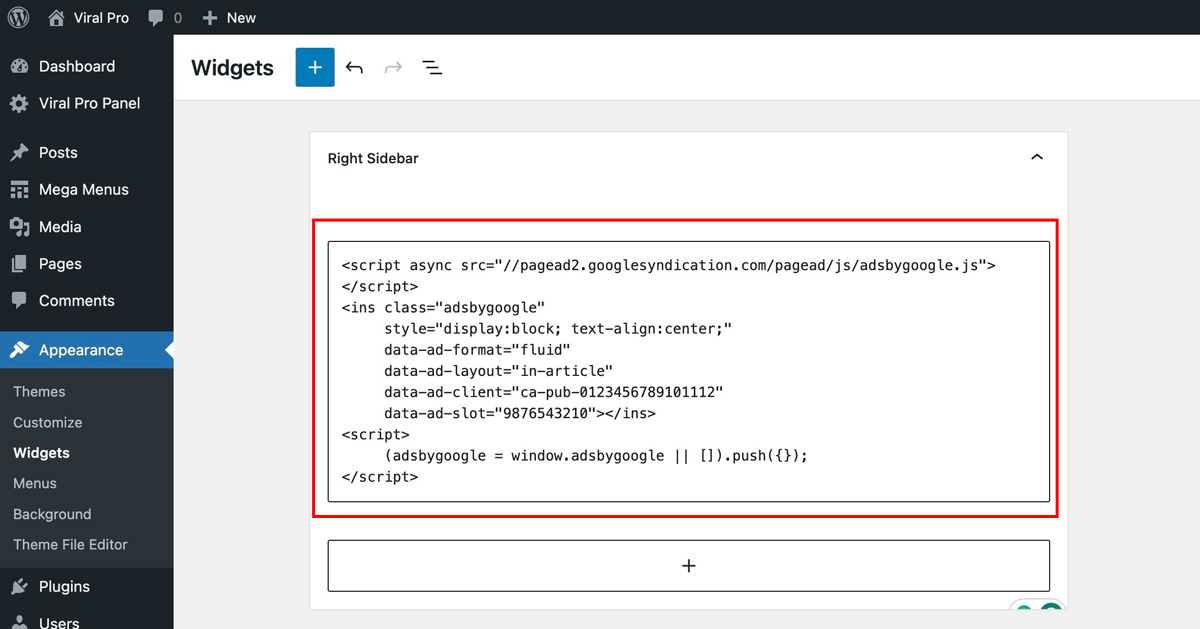
For those looking to display ads on their WordPress site through Google AdSense, start by obtaining the specific ad code provided by Google. This unique code is a crucial component for the effective integration of ads into your website.
Once you have the Google AdSense ad code, you can insert it into your website.
Placing Google Adsense Ads on Viral Pro
An ad code serves as a snippet of HTML or JavaScript that you need to incorporate into your website for the proper display of ads. These codes can be obtained from various ad providers based on your preference. For ease, you can use Google AdSense to create a code.
To use such ad codes, insert them into a text widget, and then place the widget in any widget area on your website.
- Go to Dashboard > Appearance > Widgets.
- Choose a Widget Area where you want to display the advertisement (e.g. SideBar, Offcanvas Sidebar, etc.)
- Click on the Add Block and search for Custom HTML as shown in the below screenshot.
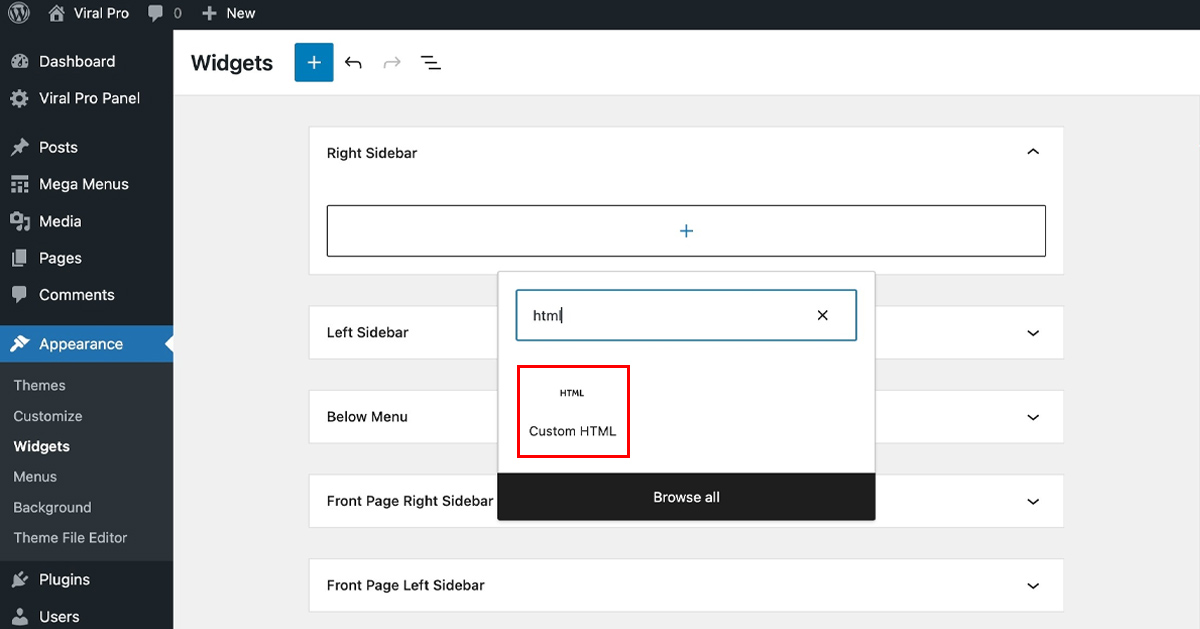
- Paste the Google Adsense Code
Placing Image Banner Ads on Viral Pro
If you want a hassle-free way to add ads to your website, you can take advantage of the banner ads feature. Here’s the guide on placing a banner advertisement.
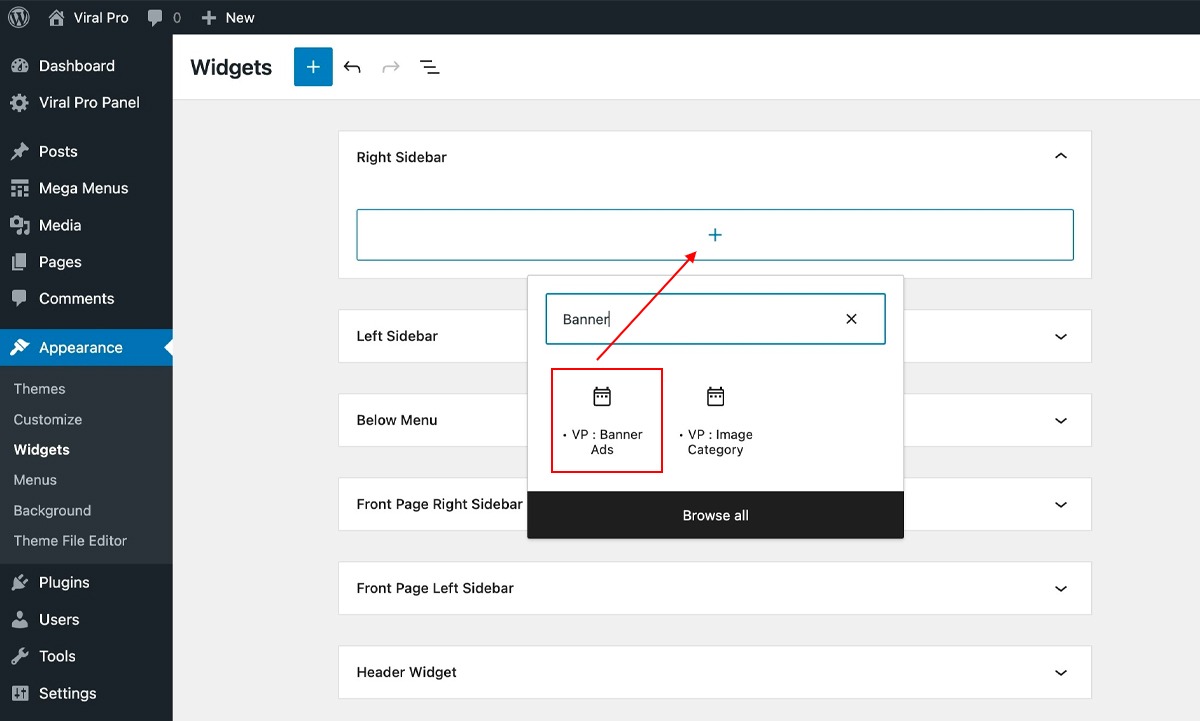
- Go to Dashboard > Appearance > Widgets.
- Choose a Widget Area where you want to display the advertisement (e.g. SideBar, Offcanvas Sidebar, etc.)
- Click on the Add Block and search for Banner Ads as shown in the below screenshot.
- Add the Title which can be a short description of the advertisement.
- Upload the Image you want to use for your ad.
- Enter the URL to which you want users to be directed when they click on your ad. Consider checking the Open in New Tab option to ensure that users stay engaged with your website while the ad opens in a separate tab.
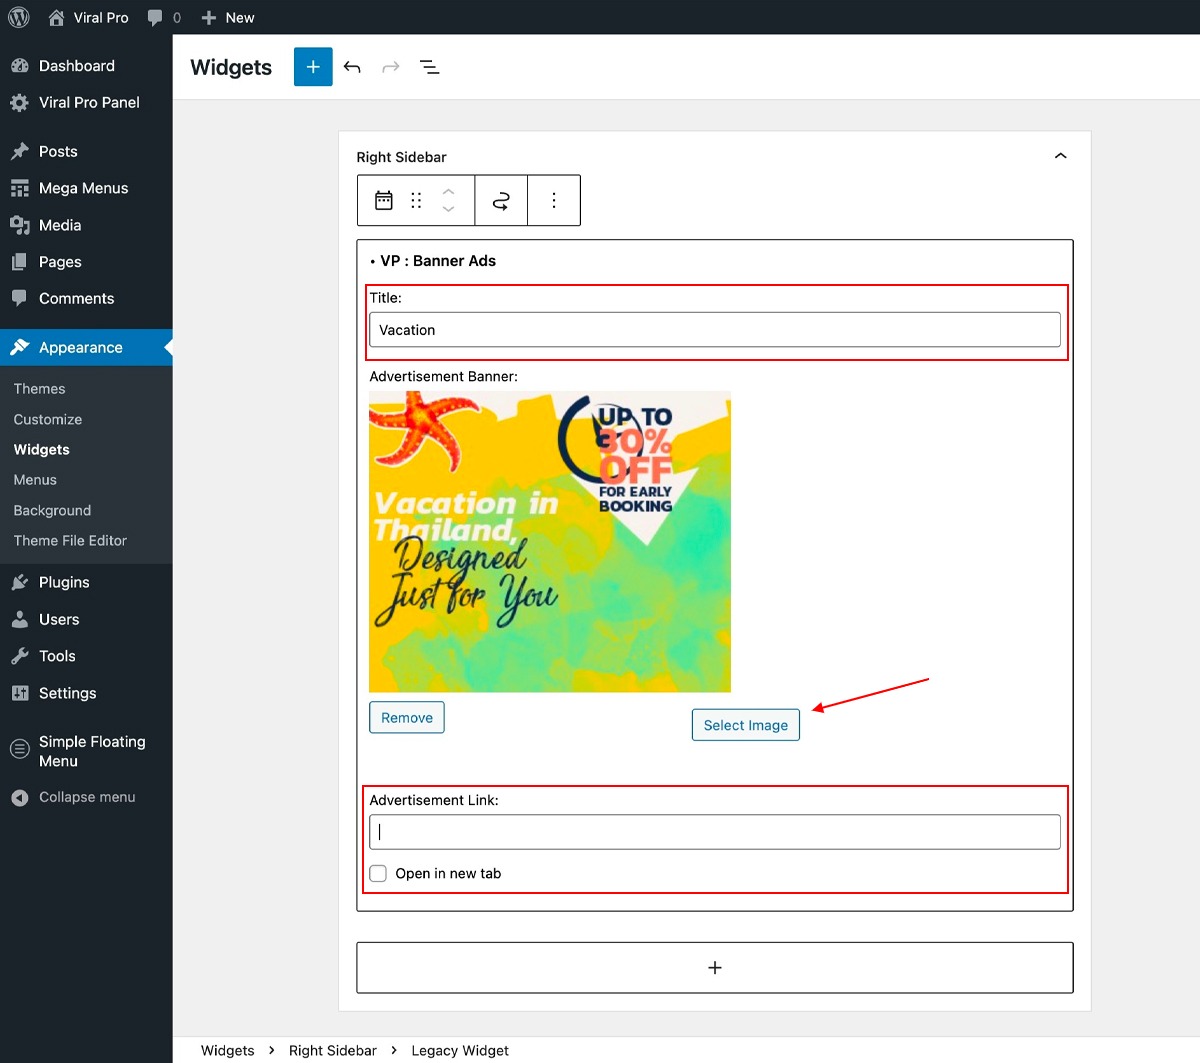
- You have the flexibility to add additional blocks and utilize the drag and drop feature to position your advertisements wherever you desire on your website precisely.
- Click the Save or Publish button to apply the changes.
Adding advertisements between the home page section
If you are using Customizer to create your home page section using the customizer section then you can place advertisements in between each front page section. To learn how to add ads between the home page sections, refer to the following guide:
- Go to Dashboard > Appearance > Customize.
- Click Front Page Sections.
- You can add ads above or below each section. Open the section where you want to add ads and then on the Content tab, scroll to the bottom.
- You will find two option
- Display Widget Above the Section
- Display Widget Below the section
- If you want to place the advertisement above the section then choose the widget in the Display Widget Above the Section and if you want to place the advertisement below the section then choose the widget in the Display Widget Below the Section.
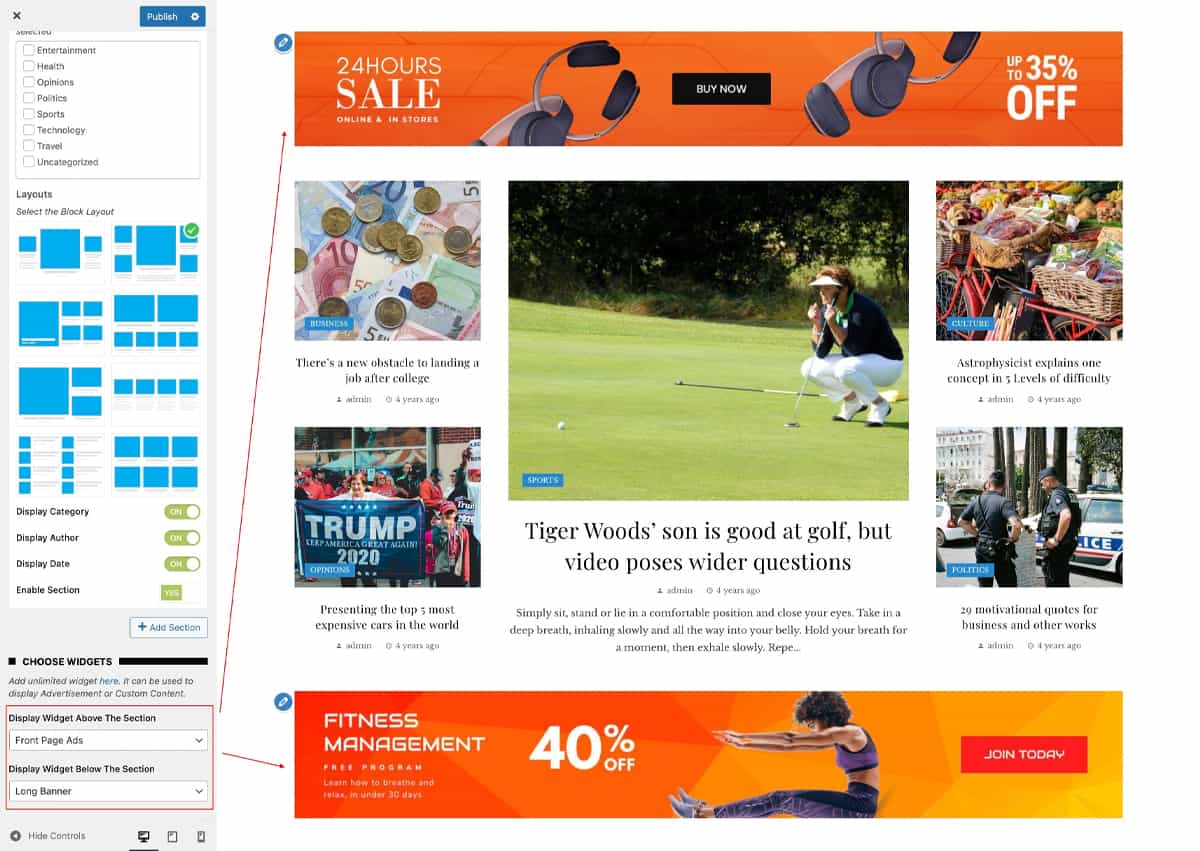
- Click on the Publish button to save the changes.
As we have already discussed on how to put Google Adsense ads or Banner ads on the widget, you can simply follow the process and add the advertisement to the selected widgets.
There are limited widgets on the Appearance > Widgets page which might have been used on other locations as well. But not to worry, you can create any number of Widgets on the Viral Pro Website. To learn more click on this article: Add New Widget Area
Let’s see the available position for advertisement on Viral Pro Theme
When you decide to incorporate ads on your website, you have the flexibility to choose from various positions where they will appear. By adding ad blocks to your selected positions, you can precisely designate where on the webpage the ads will be displayed. It’s essential to strategically choose a location that captures people’s attention to maximize the effectiveness of your advertising efforts.
- Go to Dashboard > Appearance > Widgets
- You will see a list of Widget Areas where you can add Widgets to place your ads
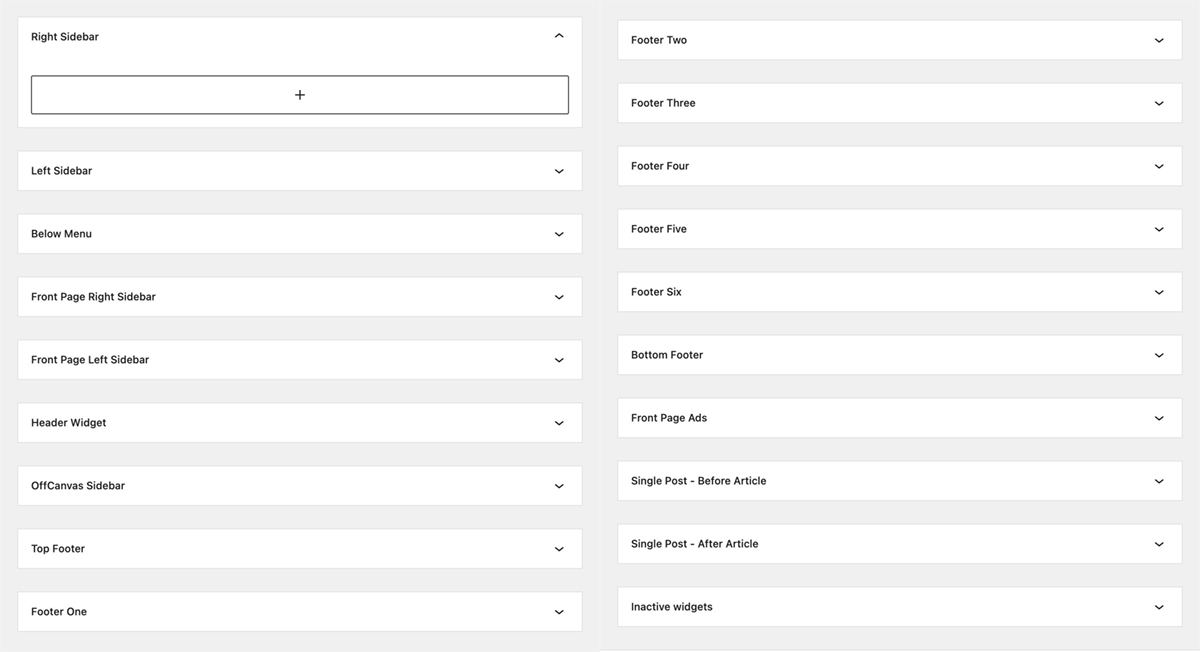
Right Sidebar
You can conveniently add ads on the right sidebar in the Single Post section or Blog section. Ads positioned in this section will be prominently visible to visitors as they navigate through your site, enhancing the visibility and reach of your advertising content.

Left Sidebar
You can conveniently add ads on the left sidebar in the Single Post section or Blog section. Ads positioned in this section will be prominently visible to visitors as they navigate through your site, enhancing the visibility and reach of your advertising content.
To make sure you want to place your ads in the left sidebar you will need to select the layout for the placement of ads in the left sidebar. To change the position of the sidebar:
- Go to Dashboard > Posts.
- Click on the specific blog post where you’d like to place the ad within the left sidebar.
- In the Layout Settings section, select Sidebar Position: Left.
- Click on the Update button once you have made the changes.

Below Menu
Positioning ads below the menu is an effective strategy to enhance visibility as visitors navigate your website. By placing ads immediately after the navigation menu, they become prominent at the outset of the user’s journey.

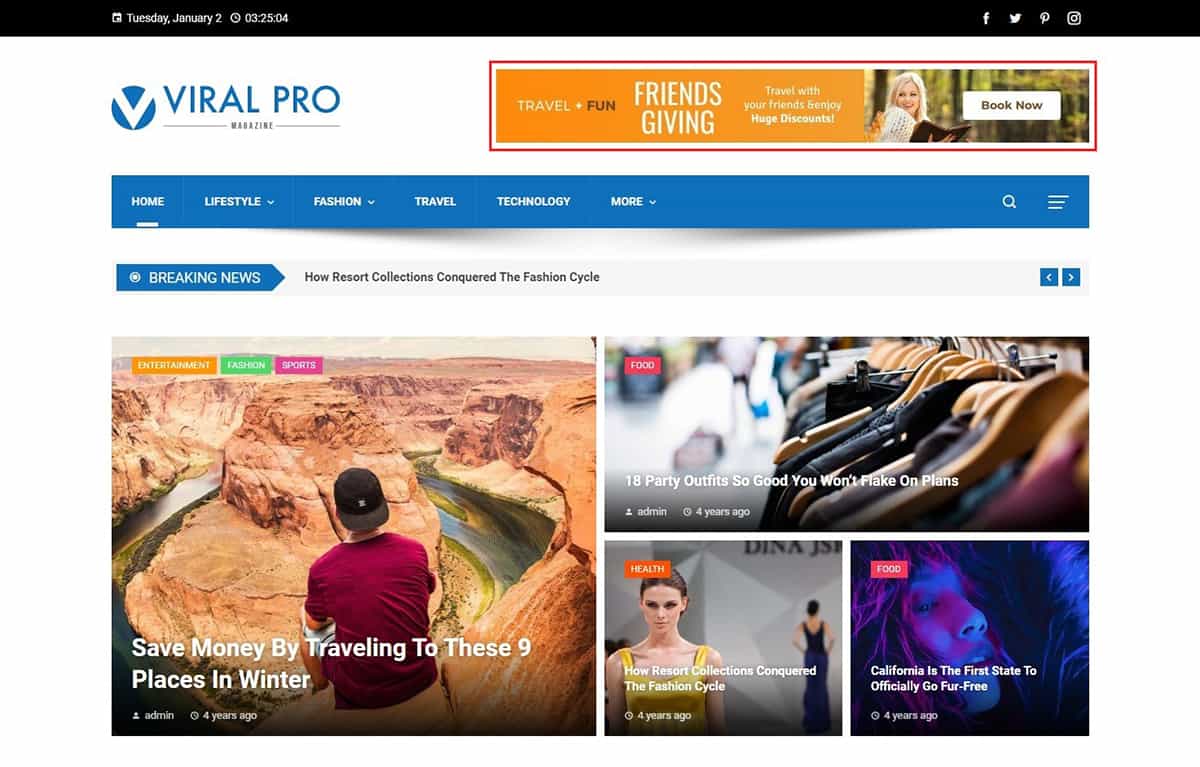
Header Widget
Ads in the header widget appear prominently at the top of the webpage, catching the user’s attention immediately upon landing on the site.
The Header widget will only show for Header Layout 4 and Header Layout 5 If you’d like to include the advertisement section in the header widget, please follow these instructions:
- Go to Dashboard > Appearance > Customize
- Click on Header Settings > Main Header
- Choose the header layout 4 or header layout 5
Front Page Ads
Front page ads are strategically positioned on the main landing page, ensuring that they are among the first elements visitors see when arriving at your website.

Front Page Right Sidebar
Ads in the front page right sidebar specifically target the right-hand section of the main page, providing a focused location for content visibility.

Front Page Left Sidebar
Similar to the right sidebar, front page left sidebar ads concentrate on the left-hand section of the main page, offering an alternative placement option.
To add the advertisements on the front page left sidebar, you will need to enable the News Module Left Sidebar. To enable:
- Go to Dashboard > Appearance > Customize.
- Click on the Front Page Sections > News Module- Left Sidebar.
- Ensure you activate this module to display the ads you’ve added in this section.

Off Canvas Sidebar
The off canvas sidebar is the section where users have to manually click to get some quick or extra information. You can strategically place the advertisements here as well. To enable the off canvas sidebar follow these steps:
- Go to Dashboard > Appearance > Customize.
- Click on the Header Settings > Main Header.
- In the Content tab, you will be able to locate the off canvas sidebar. Simply enable this section and it will appear on your main header with the hamburger icon which you will have to simply click to open the off canvas sidebar.

Top Footer
You can position advertisements in the top footer section, just before the footer content.

Bottom Footer
You can place advertisements in the opposite, at the bottom footer section.

Footer
In this segment, you can add advertisements into the footer spaces or the footer itself. The theme provides six separate footer sections, enabling you to select which ones to show or hide.
Let’s see how the advertisement looks in the Footer Two section.

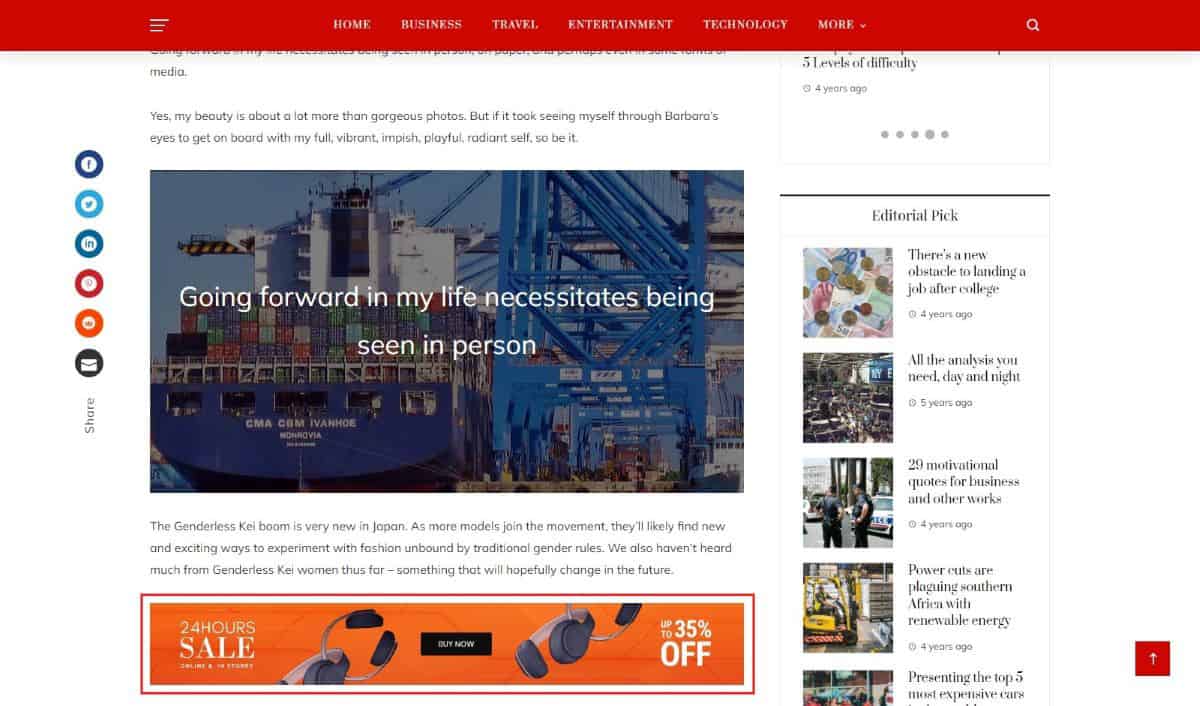
Single Post- Before Article
As users navigate through the individual post, you have the opportunity to display ads right before they start reading the article.

Single Post- After Article
Once users finish reading the article, you can showcase ads immediately after the article concludes.
In summary, you can strategically place advertisements on your website, ensuring they enhance content visibility when appropriate.