In a super floating menu, a navigation indicator typically refers to a visual cue or marker that highlights the current or active navigation item. This indicator helps users identify which section or page they are currently viewing within the menu structure. It can be in the form of an underline, bold text, different color, or an icon next to the active menu item.
The navigation indicator enhances navigation usability, especially in long menus or one-page websites, by providing clear visual feedback to users about their current location within the menu hierarchy.
How to Configure Navigation Indicator Settings
To start configuring the navigation indicator settings follow these steps:
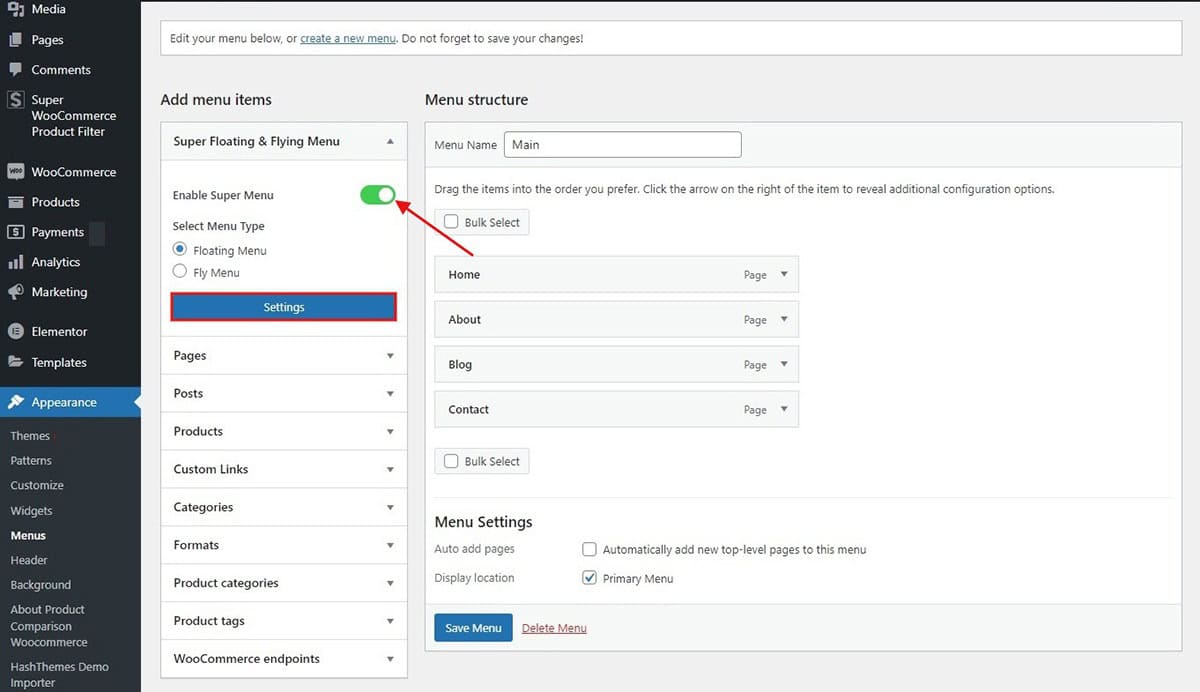
- Go to Dashboard > Appearance > Menu.
- Enable the Super Menu and click on settings to configure more features.
- In the Layout tab, choose the navigation indicator template.
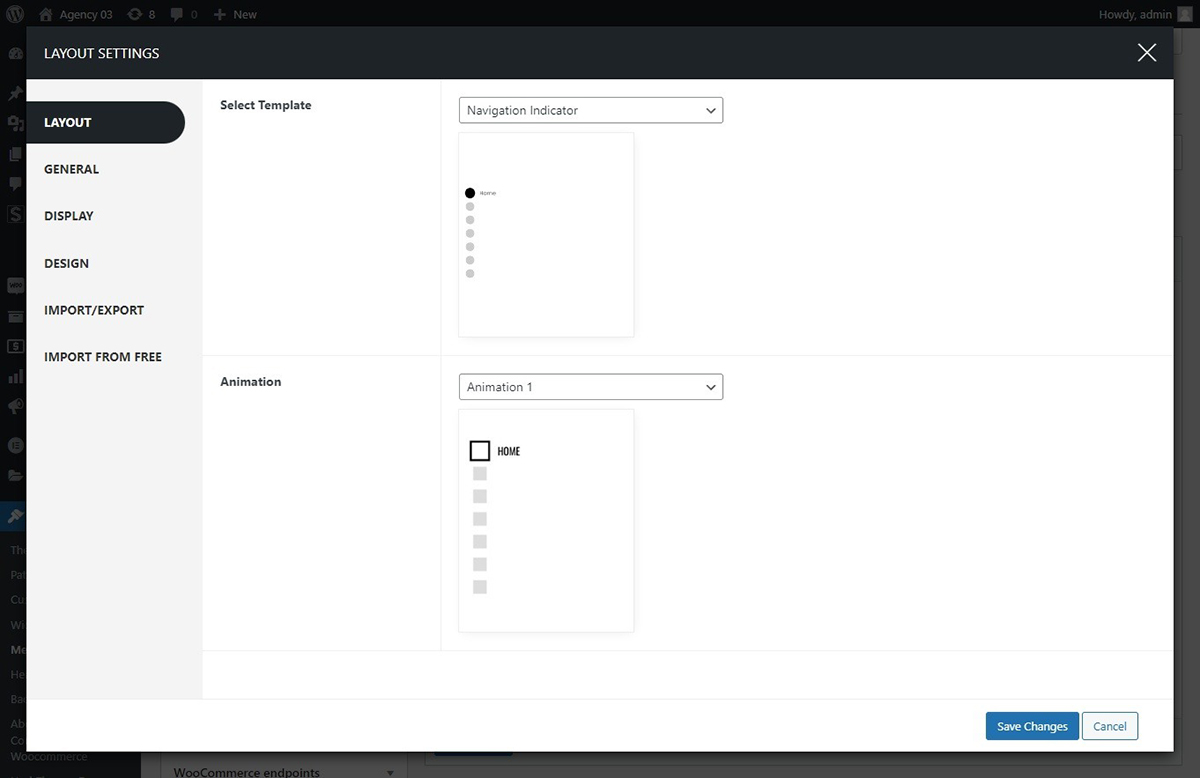
There are 13 different animations that users can choose from to match their preferences. These animations add a touch of elegance to your website.
If you want to view the demos of the navigation indicator please click on this link.
Configure Navigation Indicator Settings
To enable users to navigate directly to specific sections of your menu, you can set the navigation indicator by adding the unique ID of the desired section. This allows users to effortlessly scroll to their intended destination with ease.
To add the Section ID follow these simple steps:
- Go to Dashboard > Appearance > Menu.
- Hover to the menu for which you want to set the navigation indicator ID. As you proceed to click or hover over the desired menu section, you will notice an option labeled Super Menu Settings on the right side of the menu box. Click on this option to access and configure the settings accordingly.
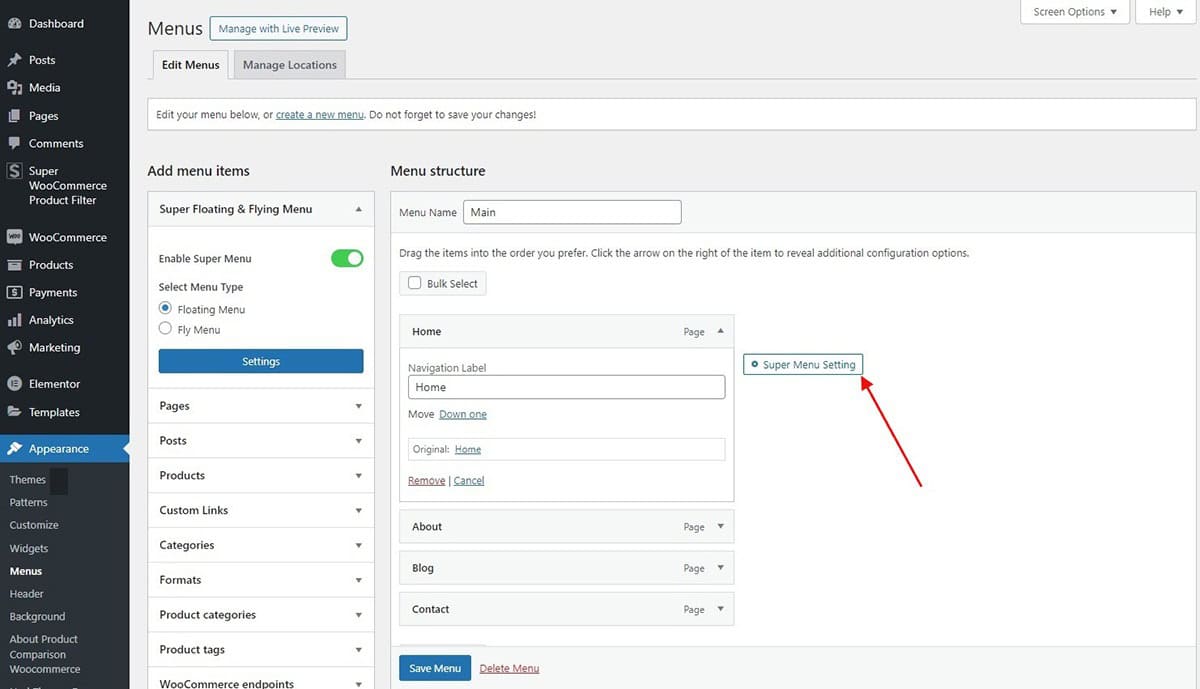
- A customizable pop-up box will appear, enabling you to input your designated section ID for the related menu section.
- To include the section ID, just copy it from the source by inspecting it. Let’s guide you on how to copy the unique section ID.
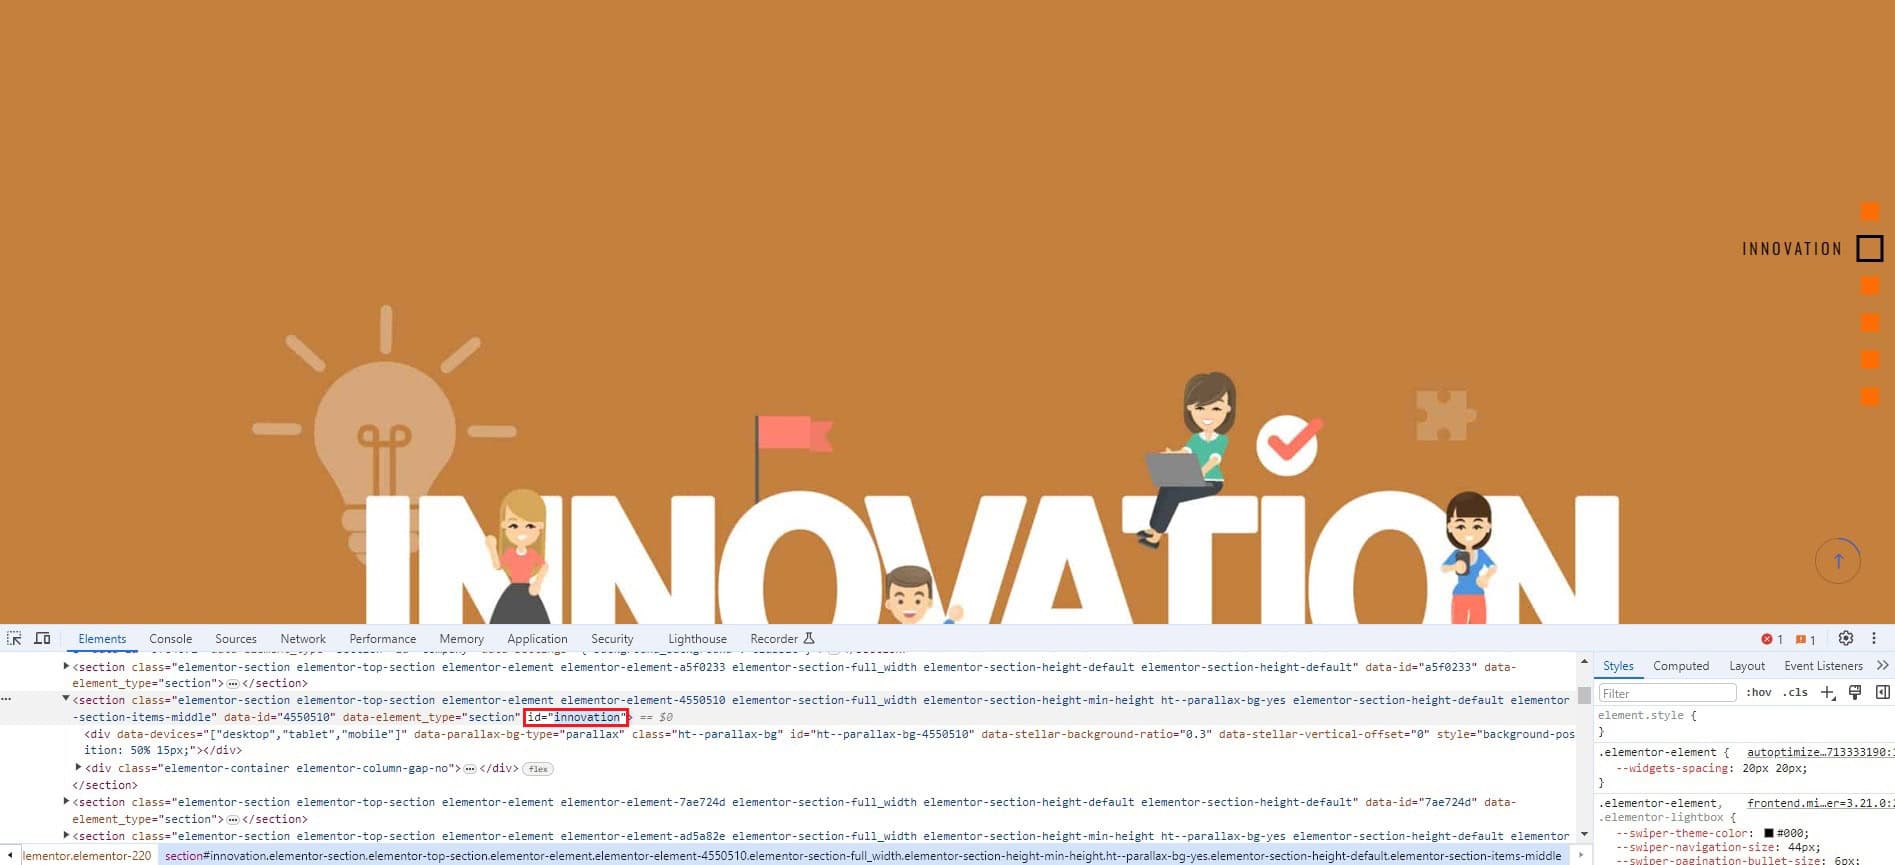
- For this article, we’ll add the section ID innovation. To do this, go to the page you want your menu to redirect to. Then, inspect the page and find the unique section ID. Copy it.
- Next, paste the copied unique ID into the section ID.
If you are confused, how to configure the section ID click on this article to know more: How to Find Element Id From Inspect on Different Browsers?
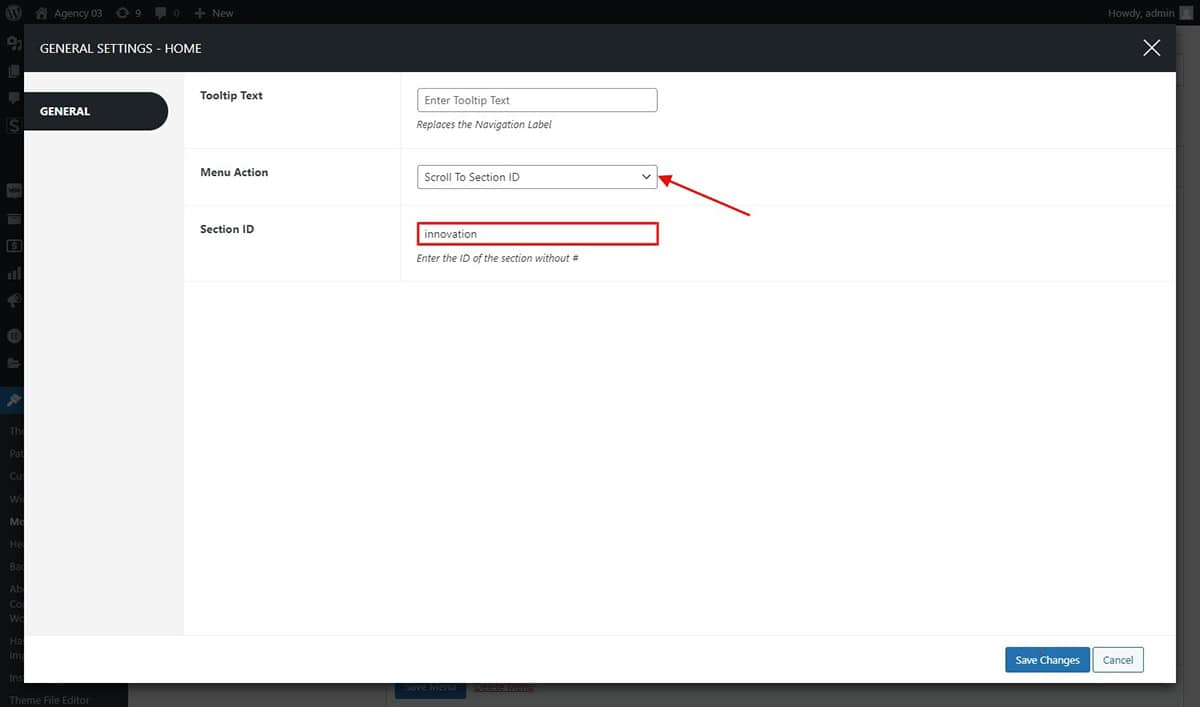
- In the Menu Action section, begin by choosing Scroll to Section ID. Next, simply add the Section ID in the following step.
Let’s see what happens when you add the designated section ID to the menu. When you click on the menu item you’ve added, it will take you directly to the specific section ID you assigned.


