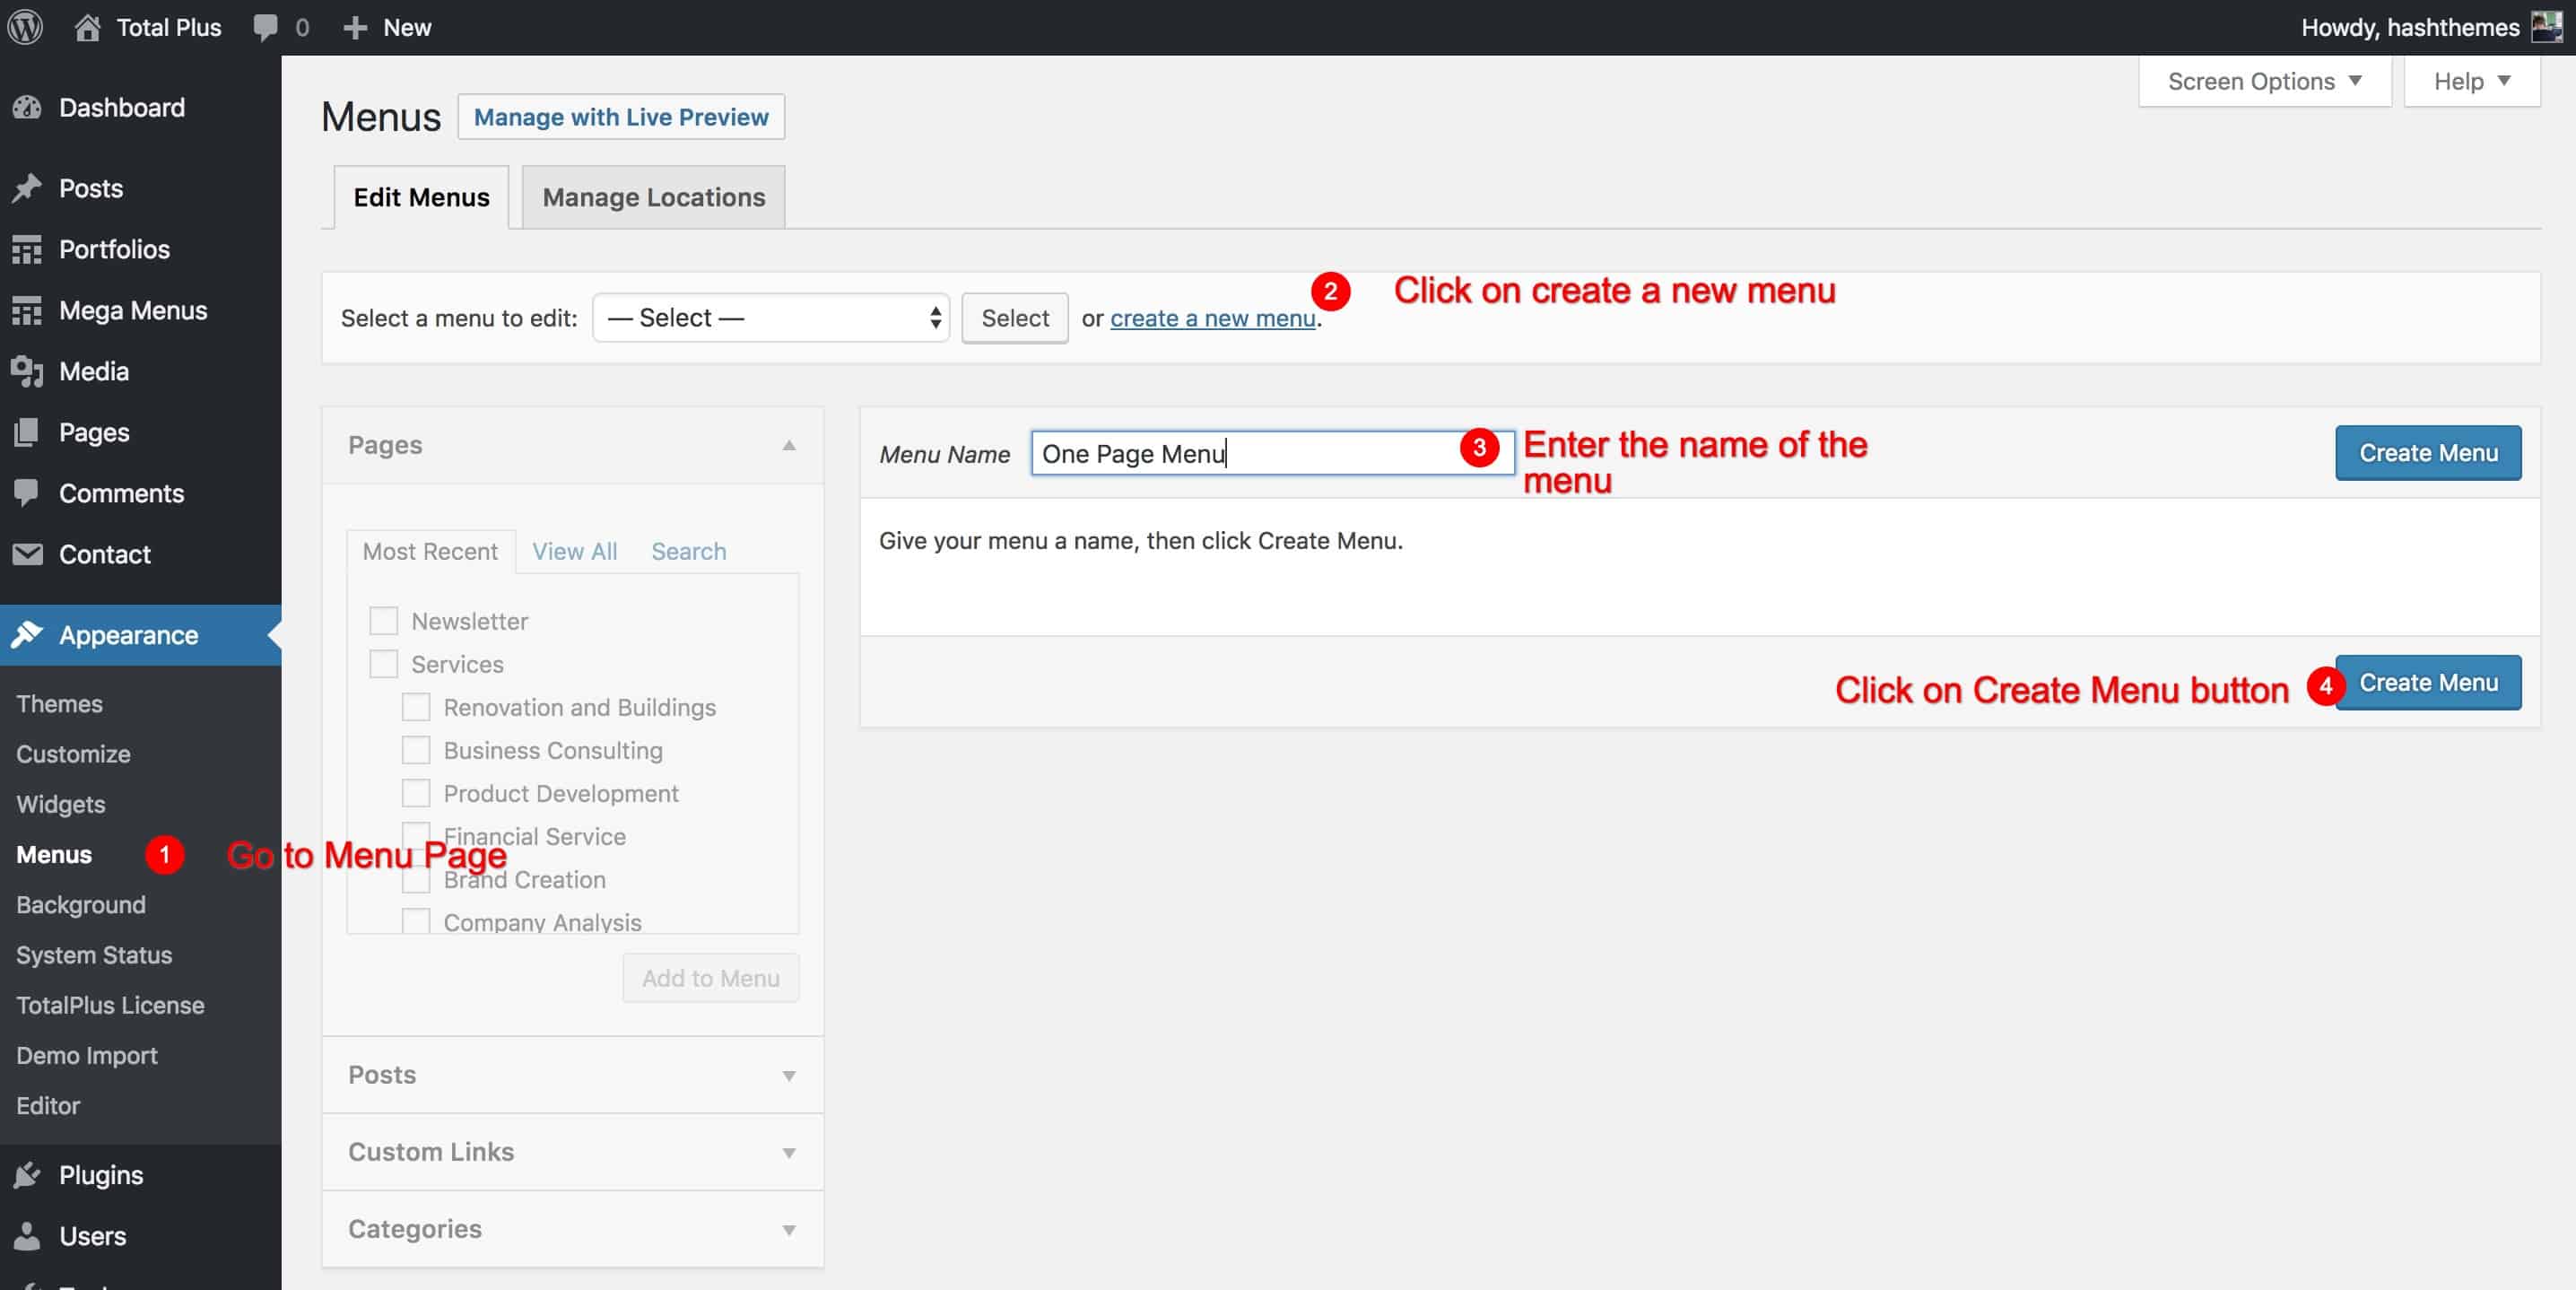
Let’s get started by creating a new menu.
- Log in to the WordPress Dashboard
- Go to Appearance > Menu Page
- Click on Create a new menu link at the top of the page
- Enter a name for your new menu in the Menu Name field
- Click the Create Menu button

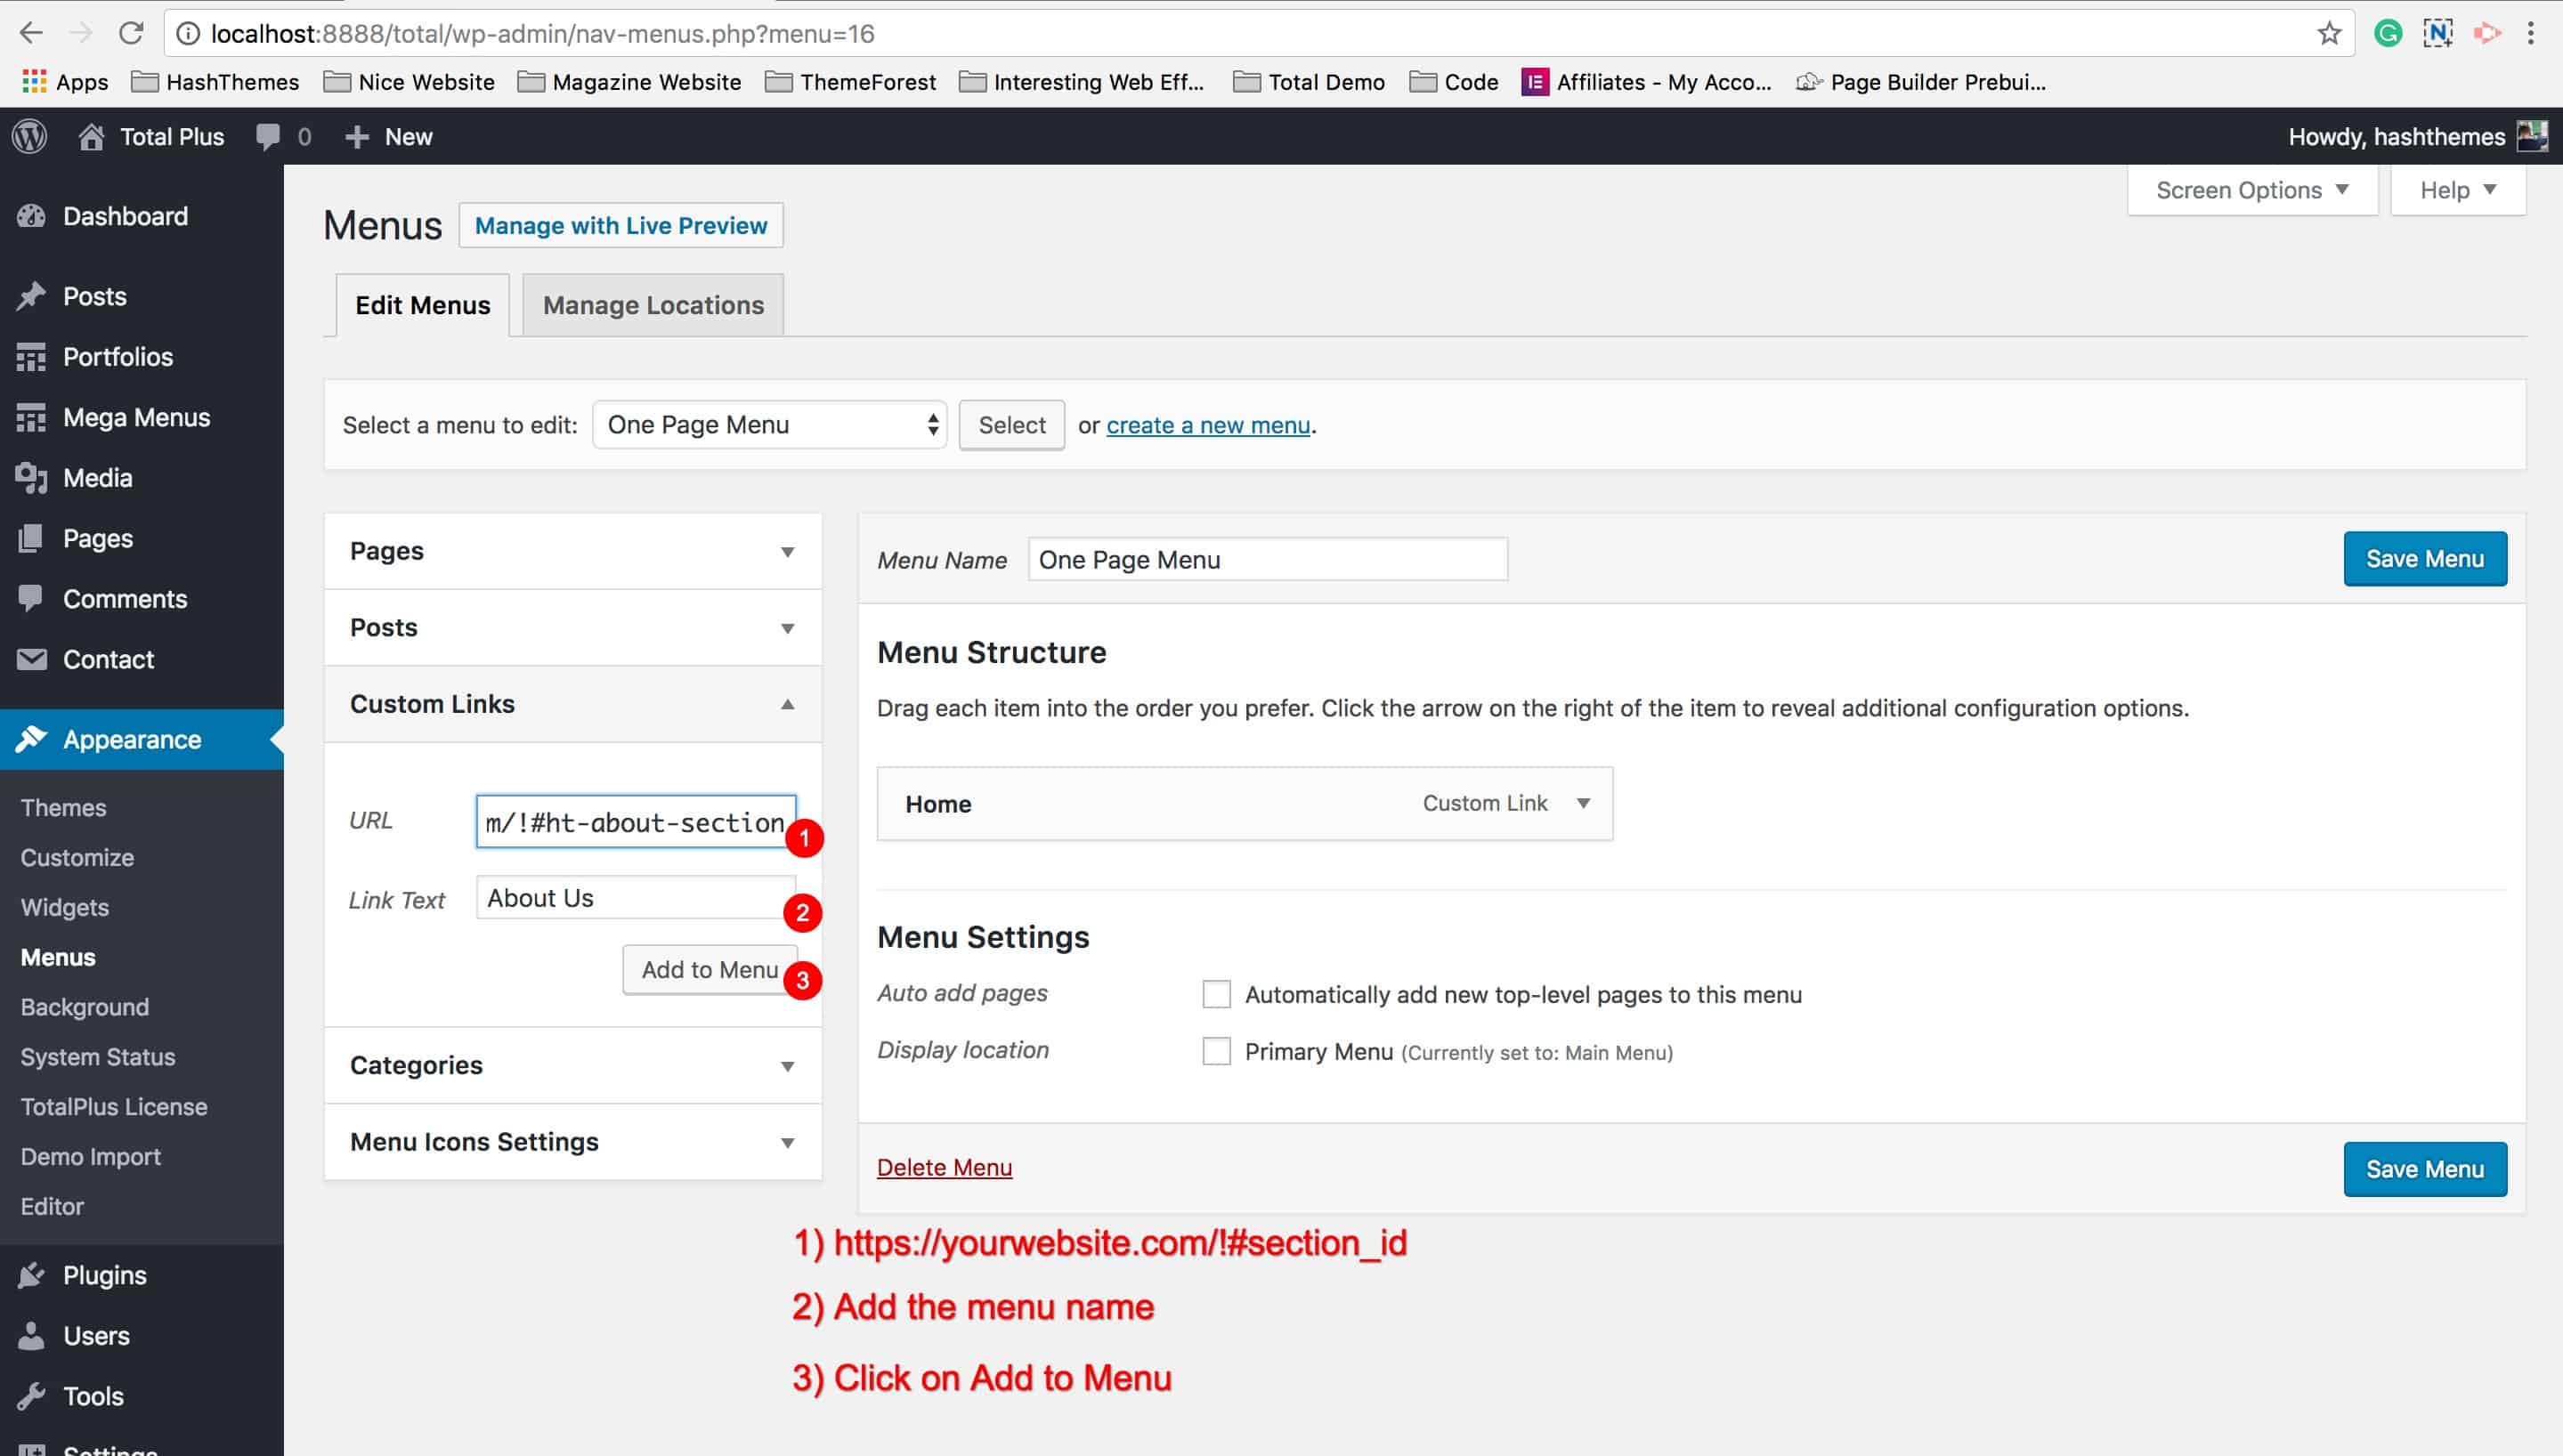
Once you create the menu,s add the menu items. To add the one-page menu, you will need to add the Custom Links in the left block.
- From the left list of menu items, click on the Custom Links bar. It has an option to add URLs and Link text.
- Add the link of your website followed by the section ID in the form of !#section_id
- The list of section names along with its IDs is given below.
- Add the Link Text. It is the text that shows on the menu.
- Click on the Add to Menu button.
| S.No. | Section | Section ID |
|---|---|---|
| 1 | Slider Section | #ht-home-slider-section |
| 2 | About Us Section | #ht-about-section |
| 3 | Featured Section | #ht-featured-section |
| 4 | Highlight Section | #ht-highlight-section |
| 5 | Portfolio Masonary Section | #ht-portfolio-section |
| 6 | Portfolio Slider Section | #ht-portfolioslider-section |
| 7 | Service Section | #ht-service-section |
| 8 | Team Section | #ht-team-section |
| 9 | Pricing Section | #ht-pricing-section |
| 10 | Tab Section | #ht-tab-section |
| 11 | Testimonial Section | #ht-testimonial-section |
| 12 | Counter Section | #ht-counter-section |
| 13 | Content Slider Section | #ht-news-section |
| 14 | Blog Section | #ht-blog-section |
| 15 | Client Logo Section | #ht-logo-section |
| 16 | Call To Action Section | #ht-cta-section |
| 17 | Contact Section | #ht-contact-section |
| 18 | Custom A | #ht-customa-section |
| 19 | Custom B | #ht-customb-section |

It’s all you need to do. And you create a one page navigation.


