
Adding a scroll back to top button in WordPress can be a great way to improve the user experience of your website especially when you have lengthy blogs. This will provide an easy way for your users to scroll back to the top of your site and quickly navigate other web content as well.
In this article, we will show how you can add the scroll back to the top button by using a WordPress plugin. The plugin that we will use is Simple Floating Menu. It is a free WordPress plugin that allows you to place different floating contents on your WordPress website. The contents can be anything including the menu, scroll to top button, and many more.
Main Features of Simple Floating Menu:
- 5 Icon Pack with 5000+ Icons to Choose
- Add Unlimited Menu Items
- 8 Different Position to Display Menu
- 9 Different Button Shapes to Choose from
- Customizable Height/Width, Icon Size, Color, Tooltip of Button
- 600+ Google Fonts to Choose From for Tooltips Text
- Add Internal, External or One Page Scrolling Link
Table of Contents
How to Create Scroll Back to Top Button in WordPress Website using Simple Floating Menu?
Now let’s talk about a step by step guide to creating a scroll back to top button on your WordPress website using the Simple Floating Menu plugin.
The first thing you need to do is download and install the Simple Floating Menu plugin from WordPress.org. Then, activate it on your website.
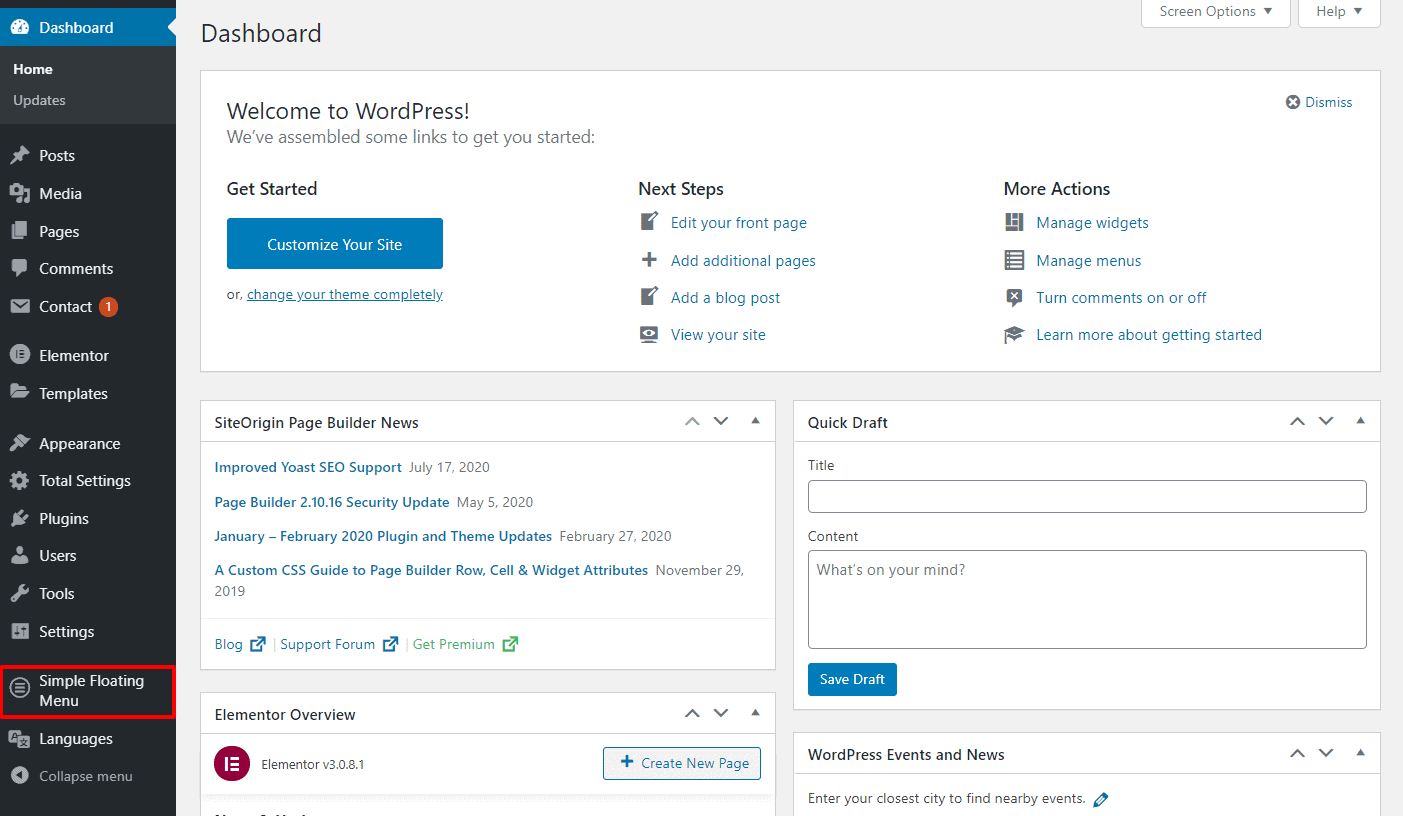
Upon activation, you can see Simple Floating Menu on the left menu of your WordPress dashboard. Click on it to continue.
You will land to the buttons page from where you can add buttons. Click on the “Add New” button to add a new button.
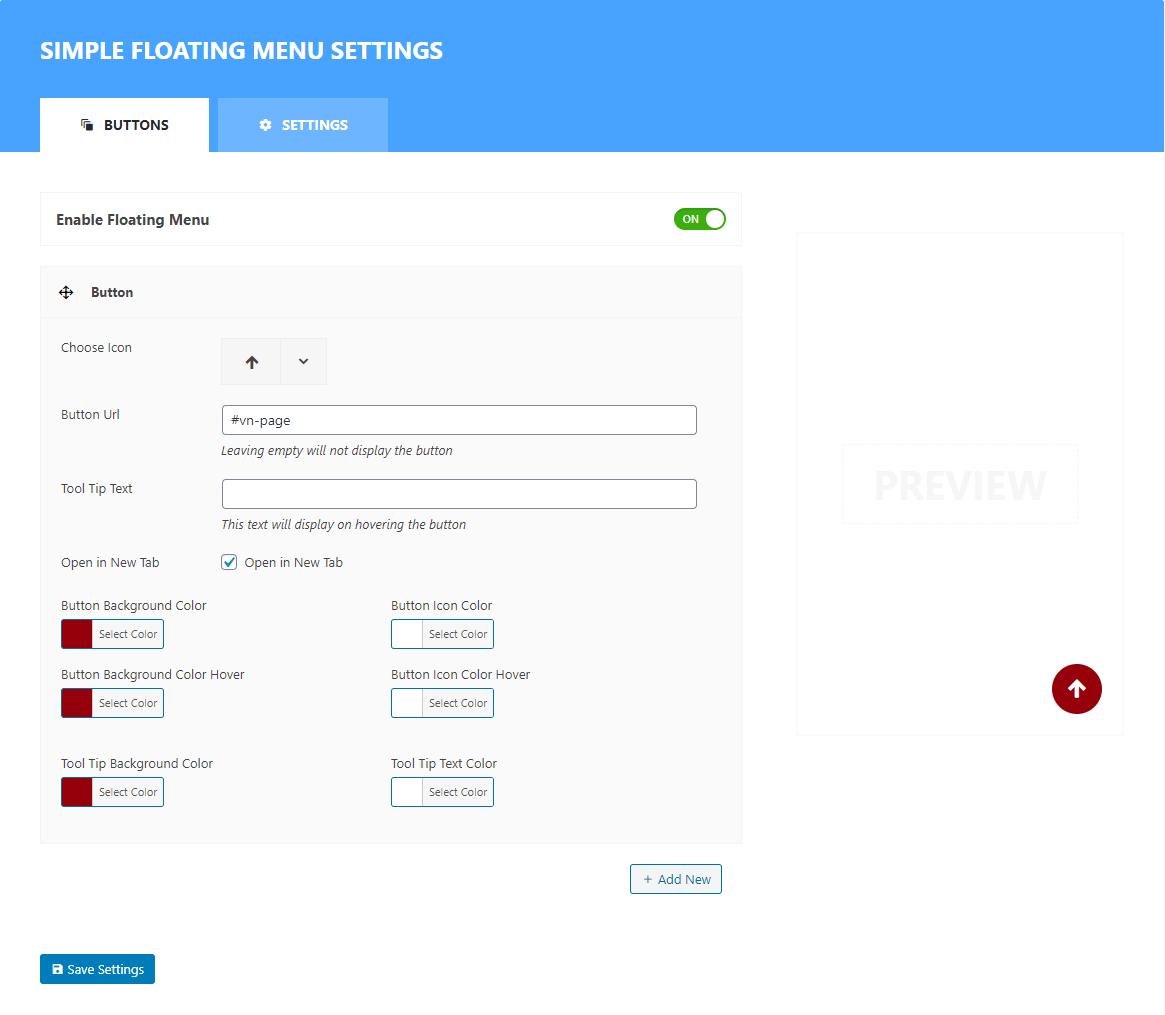
Now choose the favorable icon for the button, enter the URL and add tool tip text.
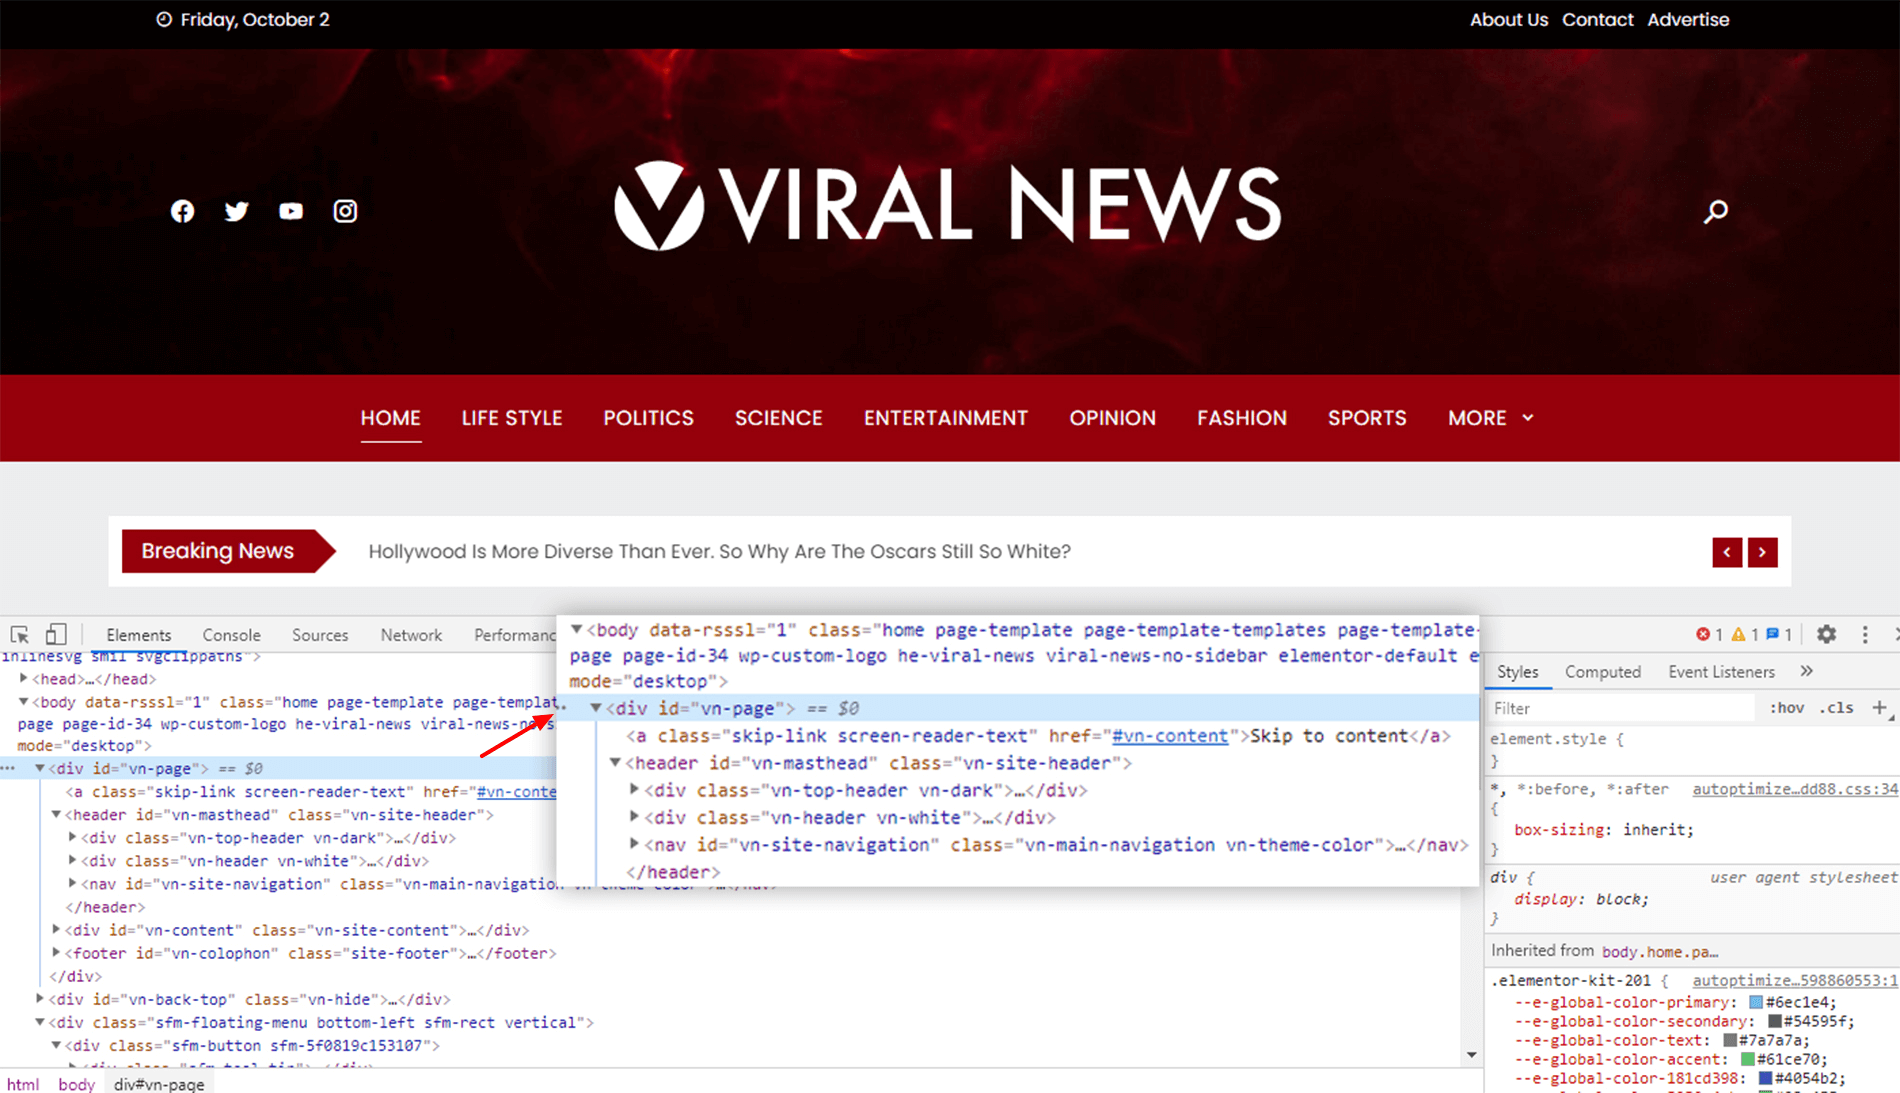
On the URL button add the section if of the top most elements of your website.
To inspect the element of your website, right mouse click the button and click on Inspect button. Alternatively, you can press CTRL + SHIFT + I or f12 from your keyboard. This method is used to Inspect the element from Google Chrome browser. If you are using other browsers or want to know in detail to view the inspection element of the Chrome browser, you can refer to the article: How to Find the Element Id From Inspect on Different Browsers?

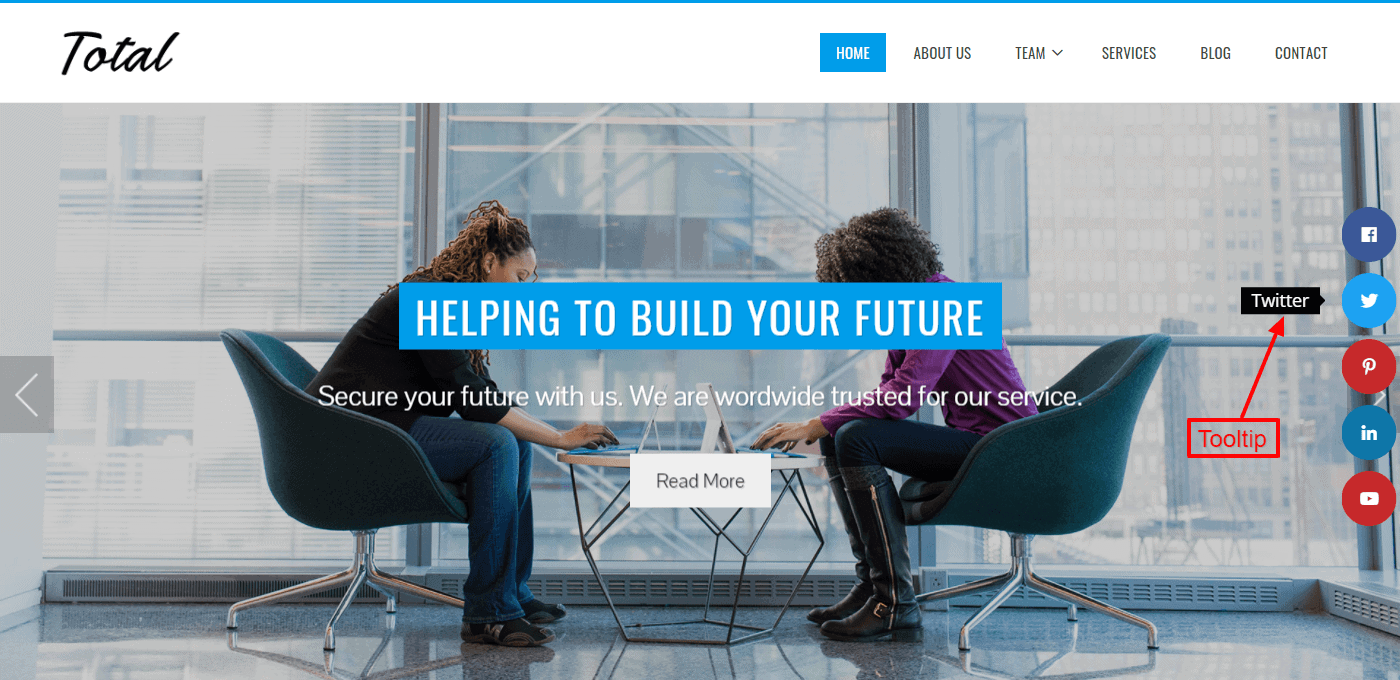
Once you have got the section id, paste it on the button URL. Also, add the tool tip text, and pick the suitable color for the button background, tool tip background, button icon, tool tip text, etc.
Simple Floating Menu Settings
After you have added the scroll back to top button on your WordPress, go to the settings tab to configure it. It contains different options to configure and customize the buttons. Here are some of them below:
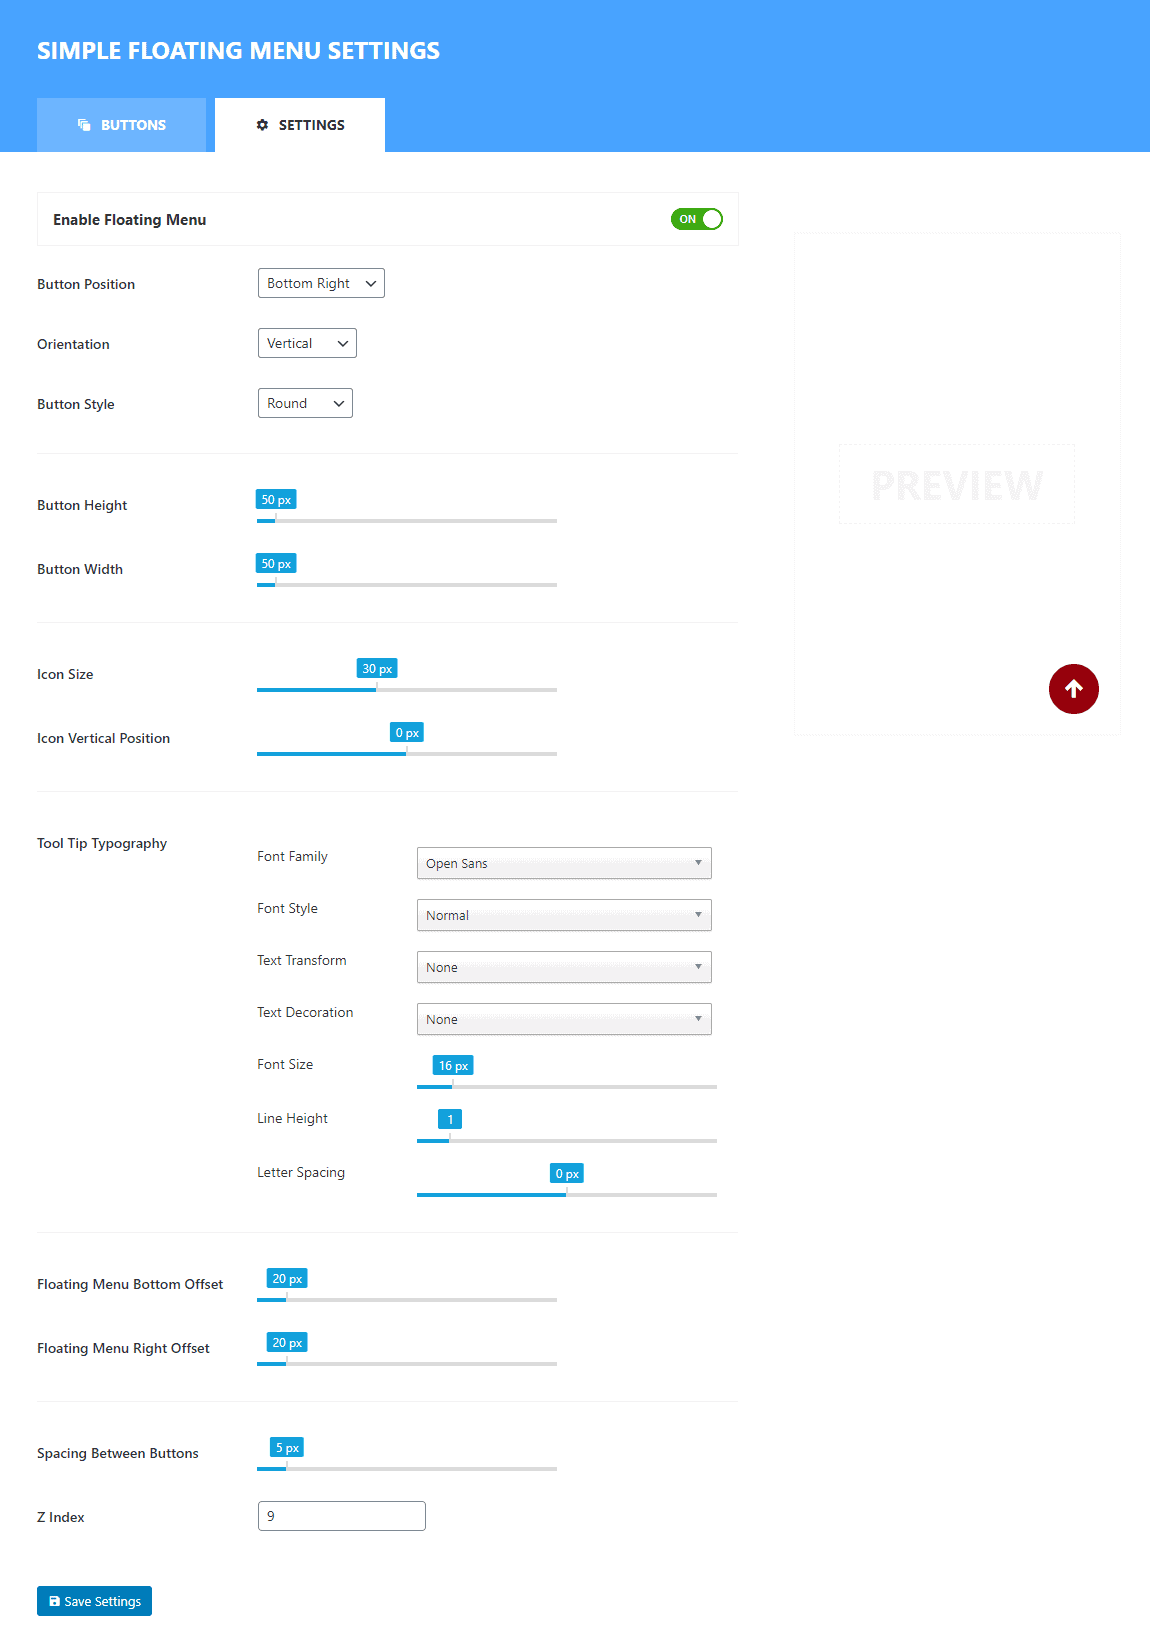
Button Position:
From the button position option, you can choose the placement of your button. The plugin will allow you to choose 8 different position to showcase the navigation button on your WordPress website i.e. Top Left, Top Middle, Top Right, Bottom Left, Bottom Middle, Bottom Right, Middle Left and Middle Right. Test all the position and choose the most suitable.
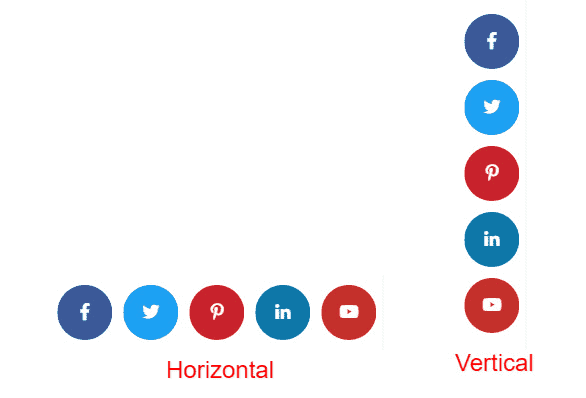
Orientation:
The orientation option will allow you either place your button horizontally or vertically on your website.
Button Style:
The button style option will allow you to style up your scroll back to the top. The plugin contains 9 different button styles i.e. Rectangle, Round, Triangle, Rhombus, Pentagon, Hexagon, Star, Rabbet, and Oval. You can choose any button type of your choice to make it suitable for your WordPress website.
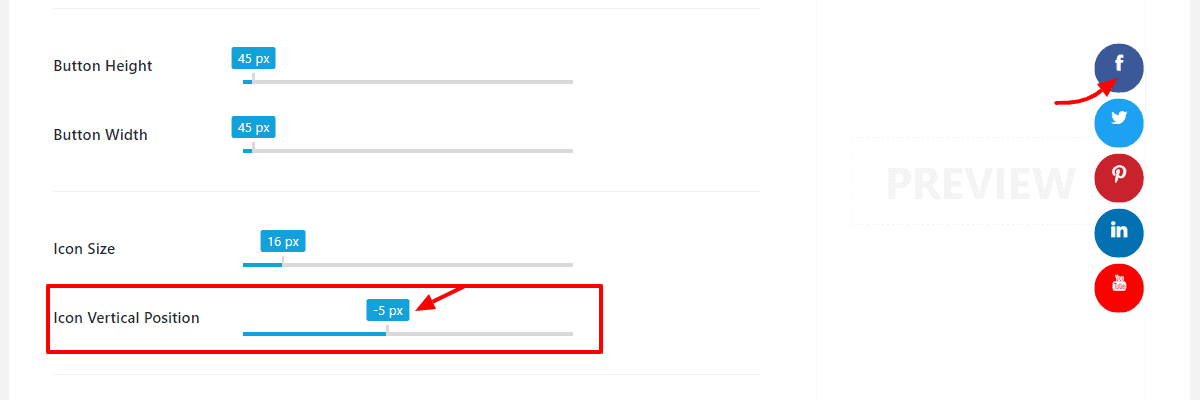
Button Height and Width:
From here, you can set the height and width of your scroll. It will provide you an option to set the height and width of your button as per your need.
Icon Size:
When you configure the height and width of your scroll to top button, its icon size might be smaller or bigger. So, to make your button perfectly fitting on your website, you can configure the icon size.
Icon Vertical Position:
The icon vertical position will allow you to move the position of the icon vertically on the button. It will help you to position the icon on the top or bottom of the button.

Tool Tip Typography:
From here you can personalize the font of the tooltip. You can select the favorable font family and style it up from font style, text-transform, and text-decoration. Besides, you can set the font size, line height, and line spacing.
Floating Menu Offset:
Floating Menu Offset option will allow you to configure the offset spacing of your button. It will allow you to move the scroll to top button on the top, bottom, left, or right side of your screen depending upon the button position you have chosen.
There are mainly 4 different floating menu offset:
- Left Offset
- Right Offset
- Top Offset
- Bottom Offset
Space Between the Buttons:
If you are looking to add multiple buttons, you can configure this option to add the space between the buttons.

Z Index:
In some of the WordPress theme, the menu will override your floating section. If you have installed such type of theme on your website, you can use this setting to bypass the menu.
Once done, click on Save settings and view the scroll to the top button on the frontend of your website.
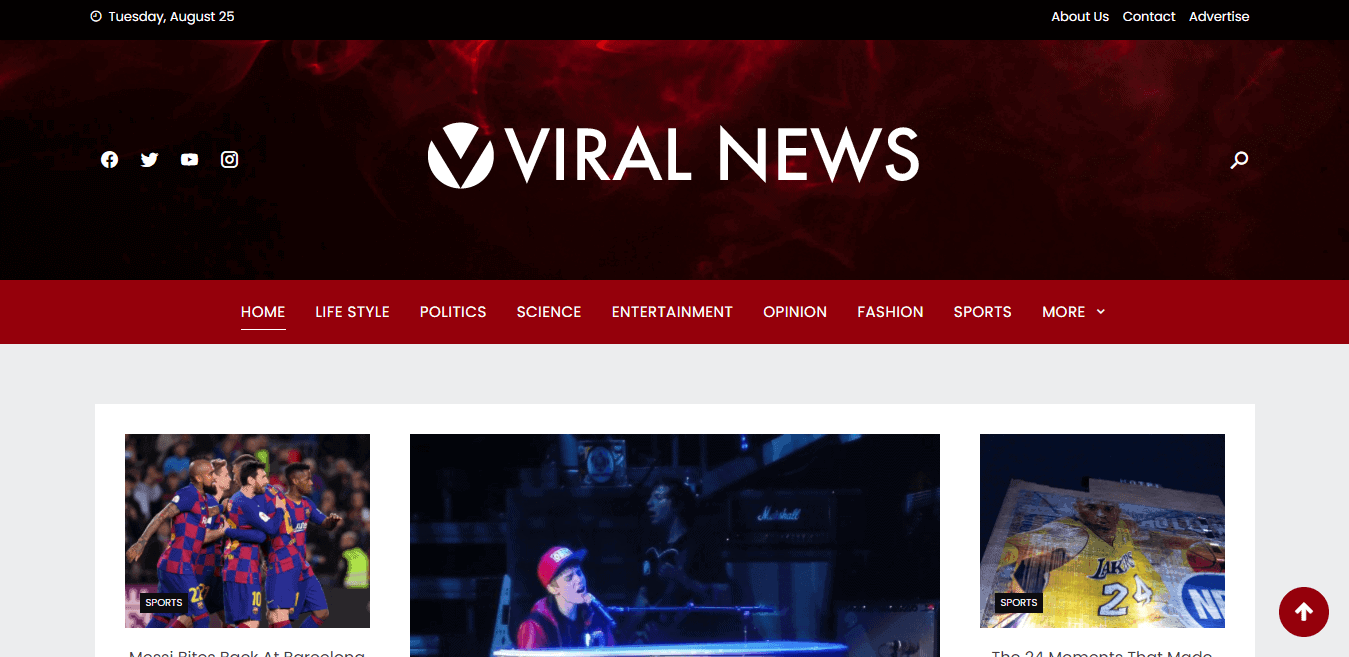
You can see a scroll back to the top button like the one in the screenshot below.
Conclusion:
In this way, you can create a scroll back to the top button on your WordPress website. It will help your audience to easily reach the top of your web page and improve user engagement. You can also the similar tutorial of How to Create Sticky Floating Social Media Button in WordPress?